Whimsy Scribble

The Art of Practical Jokes

LifestyleMichela Mastellone-Schottman1 Comment

I have never considered myself a “jokester” or a particularly comedic person. I do however have a good sense of humor and like to have some creative fun. I’ve always enjoyed the trend of flash mobs and admire the work of groups like Improv Everywhere. I recently watched an episode of This American Life, a TV series based off the radio program, narrated by Ira Glass, that examines the recipients view of an Improv Everywhere “mission”. The Ghosts of Pasha, a little known band that got surprised by an unexpected rock band experience on their first tour, had much more negative feelings than the good-meaning “pranksters” intended.

I have created and participated in numerous scavenger hunts with various groups of friends and readily take the opportunity to participate in absurd endeavors (like the time my friend and I made a documentary while we stayed awake for 72 hours to see if we would go crazy). I’ve also at times set up what some people would consider a “practical joke”. Whether it’s spurred by my intense awkwardness at meeting new people or simply because I’m bored and need a creative outlet, I’m not sure. For years my best friend and I would bring up the fun fact that our friendship really started when I mysteriously left her a picture of my nipple (disguised as a gift from a secret admirer obviously).

Looking back, it’s clear that there is a very VERY fine line between a fun practical joke and a very creepy move. So I thought I’d take a quick look back at some of my best (?) pranks. You can decide for yourself if I’m super creepy or super hilarious, and either way, you may want to use some of these ideas for your own pranks!

  1. Past scavenger hunt items: braid a stranger's hair, use a makeshift bathroom, get the entire team in a strangers car.

  2. While living in the middle of the South African bush, my friend and I hid all of the silverware and made an elaborate treasure hunt necessary to retrieve it.

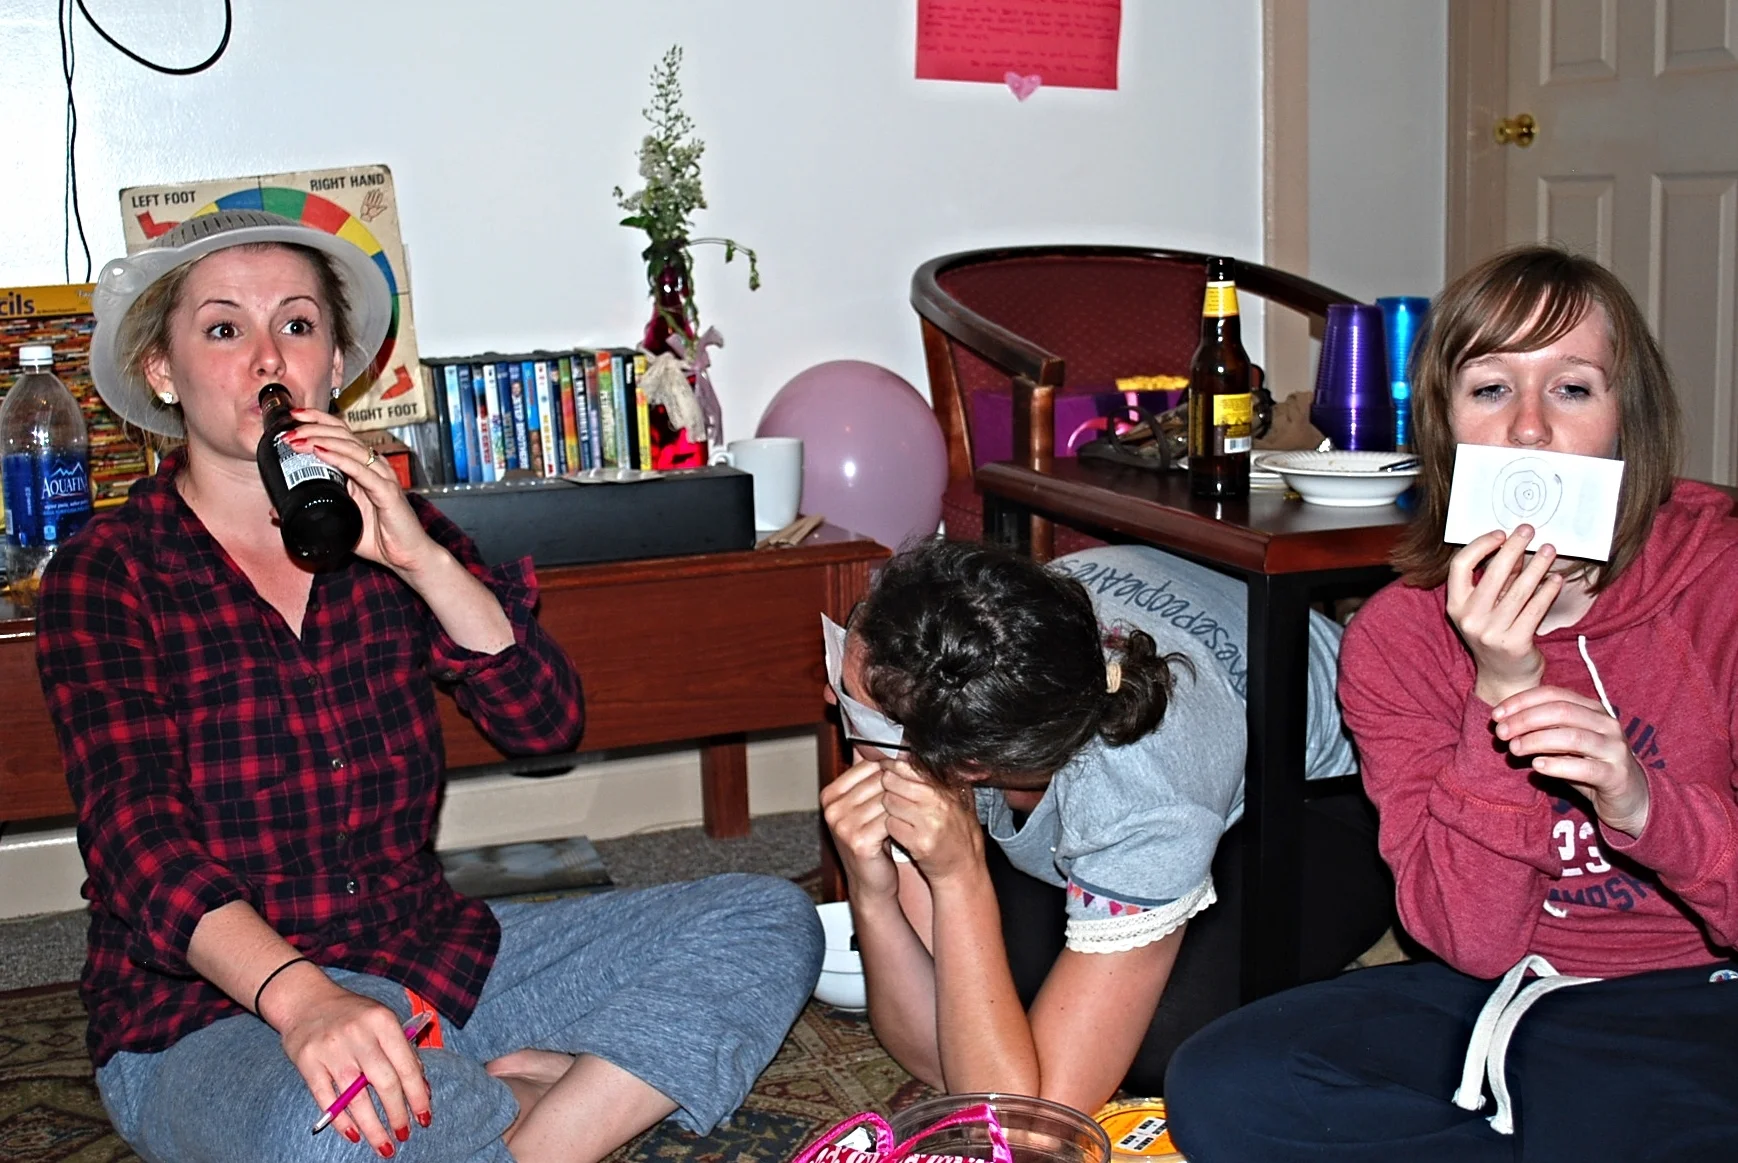
  3. As a new college freshman, I befriended another freshman living down the hall through a series of acts performed by a secret admirer. This included: breaking in to clean her half of the room, leaving a suggestive mix tape, and several overly blatant and often sexual secret admirer notes and pictures. Having gone back to read some of those old notes saved on my computer, I admit that it could have been extremely creepy if I had not taken care to chose a very good natured, equally fun spirited recipient.

  4. Mannequins - full ones are ideal, but miscellaneous body parts work too. I've also made occasional scarecrow style mannequins, but realism is key. These are then ideal for leaving around places in various positions for people to find. Some of my favorite spots are showers and behind doors. 

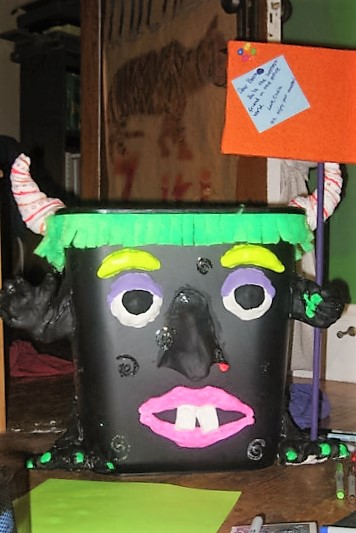
  5. I went through a long phase of turning unattended items into monsters....


I thought that perhaps looking back I’d realize that I had taken it too far, but in fact, this really has just sparked my mischievousness again. I think that as long as no one is physically or emotionally hurt from a prank, it’s all in good fun. While I am always very conscious of what the effects of my tricks may be on people, it’s certainly important to remember people may not react in the way that you expect or intend. Leave some comments, let me know if you’ve participated in either side of a practical joke, and if it was hilarious or maybe crossed the line over to a little bit creepy or even damaging.


DIY Camera Strap

DIY & ProjectsMichela Mastellone-SchottmanComment

 I have a Nikon D60 that I LOVE. I have a generic Nikon camera strap that I do not love. I've found dozens of adorable strap options for sale, and they are common on etsy and craft venues, but I decided I'd rather save the money and have a little fun customizing one for myself! 


I decided that I would put cameras on my camera strap....that seems appropriate, right? If you prefer, at this step you can use any fabric that you wish for your strap, I just didn't have any that I liked, so I made my own! I spent some time sketching basic camera outlines. I then scanned the drawings in order to resize and format them on my computer (I do this for most of my projects - I prefer drawing by hand, but love having the ability to manipulate designs to fit for different uses). I decided how long to make the fabric portion of the strap and formatted a pattern of cameras to be printed on a chartreuse cotton fabric I had leftover from past projects. I used my favorite technique of backing fabric with freezer paper in order to run it carefully through my inkjet printer. In retrospect, this would have been a good project to do some sort of pre-treating of my fabric in order to waterproof somewhat, or to have used a different fabric printing technique. Over time, some of my cameras have become a little smudged due to my tendency to take pictures in the rain or while forging through a river.


Once printed, I set aside that piece of fabric to concentrate on creating the structural part of the strap. In order to attach the fabric portion of the strap to the body of the camera, I decided to mimic the design of my old nikon strap which uses 1/2" webbing, which is then locked with a plastic piece (which I recycled from that old strap). Unfortuantely, in all my mountains of craft supplies, I didn't have any 1/2" webbing. So I divided a piece of 1" nylon webbing and melted the raw edge with a lighter to prevent fraying.

I wanted the fabric portion of the strap to have some bulk to it to provide a nice grip and some security to my camera. For this I used a piece of a canvas dropcloth cut wide enough to fold over twice (remember to fold the raw edges in!) I then carefully positioned the webbing into the ends of the cloth strap and ran two rows of stitching through the center of the four layers of canvas and firmly attaching the webbing to the fabric portion of the strap - an important step in securing the safety of my camera. I ran an additional 2 rows of stitching parralell to the center ones in order to stiffen the canvas, and I liked the look visually on the cavas of the additional seams. 

In the final steps, I attached the printed camera fabric to the canvas strap by turning the raw edges under and doing a simple top stitch along the edge of the printed fabric. I added some dark gray fabric to finish off the fabric strap. I copied the shape and stitching pattern of my original Nikon strap. This step is unnecessary to the structure of the strap, although it does make me feel better to have the additional stitching attaching the webbing to the strap. These end pieces could be made out of a variety of different materials - or you could think of a different way entirely to attach your camera/webbing to your strap, but I know I feel confident letting my camera dangle from my arm on this!

My Documentary Addiction

LifestyleMichela Mastellone-SchottmanComment

Winter has finally decided to make an appearance in Maine. I spent one very snowy day tucked in under the covers with my cat watching documentary after documentary. Very frequently in conversations I find myself suppressing the source of my information, otherwise I'm constantly saying “I saw in a documentary….”. It’s not that I don’t also watch sitcoms and dramas and fictional movies etc. But I realize that I have a similar trend in the way I consume a lot of media - I read non-fiction much more than fiction, and listen to science and news based podcasts far more often than pop culture discussion or comedy. My go-to favorite past time though has to be watching documentaries.

My media preferences clearly show that I like when something is able to be summed up with one object statement and then is backed up with lots of supportive evidence. Obviously in any collection of information there will be a bias and certain information will be purposefully omitted. What I like about documentaries is that it adds one more dimension than just text - when you get to watch an interview and be given information through the primary source (obviously taking into account it being a planned interview for a documentary with a camera crew) it allows you to make some further conclusions yourself based on the air of confidence and mannerisms etc.

I have always loved documentaries. I used to do a fair amount of video editing for fun. I remember documenting my high school jazz band’s competition trip to the Bahamas and doing reaction interviews with people attending my grandfather’s sculpture show. I definitely played a bit with it early in college, filming my friends and occasionally putting together finished video projects. The filming aspect was never my real interest, and I gravitated towards primary research in the biological and social sciences. Luckily, I went to a school heavy in the visual and performing arts so got to benefit from talented people around me creating things that I get to enjoy!

photo by Amanda Plunkett

One of my closest friends is very talented behind a video camera and has done a variety of mini-documentaries. She used to make great compilations of our friends and our antics and great school video projects, but now I get to enjoy watching the much more informative, interesting stuff she has been producing more recently. If you’re like me and can’t get enough of documentaries, check out some of Amanda's videos


The Brightside of Unemployment

LifestyleMichela Mastellone-Schottman1 Comment

I recently heard from a good friend of mine, a previous coworker, that she had been fired from my past workplace. Even thinking about this, a situation I was 100% removed from, makes me so angry. This particular workplace represents everything I dislike about our society. People were inconsiderate, disrespectful, arrogant, power hungry; basically everything that is distasteful in someone's personality was part of almost every employee’s personality and behavior. It was a lot like being back in middle school, but the “mean girls” had grown up, become economically powerful, and learned how to be even more manipulative and hurtful. I kept a smile on my face the whole time I worked there, keeping my mouth shut with a polite smile and nod as I watched a business fall apart with immature gossip and poor business practices. It was awful to say the least.

I’m am so grateful to be able to have the skills and experience and support to risk trying something different from the same old underpaid, under-appreciated, emotionally tolling workplace. Hearing about my friend going through this change and needing to find a next step I so hope she can find something that she’s happy at and helps her figure out what she wants to be doing long-term. Unfortunately I think sometimes it takes a horrible experience to be the push that forces you to either rethink what you want to be doing or discover something that you are happy to get out of bed in the morning to do. I think the real challenge sometimes is not only finding a JOB you want to be doing, but a staff of people that you want to be doing that job with. Therein lies the challenge, but luckily for my friend I can’t imagine any worse workplace environment, so she really has nowhere to go but up!


Pigeon PDA

LifestyleMichela Mastellone-SchottmanComment

As eerie as I find the constant evidence of global climate change, I have to admit that I’ve really been enjoying Maine in December frequently having temperatures in the 50s. I’ve been so appreciative of this mild start to winter as a gentle “welcome back” to New England. I’ve been taking advantage of the unseasonable balminess and taking lots of beautiful walks over the bridge into Portsmouth, NH and along the waterfront.

On one such day I wandered into the park for some contemplative sitting and water gazing and had to smile as I watched these two pigeon friends enjoying the day. I snapped a quick picture and texted it to my friend, personifying our relationship through the pigeons. Soon after, I started laughing hysterically by myself on a dock as I watched the pigeons kiss!! And yes, I know that this “kiss” is in fact a weird pidgeon mutual feeding pre-mating ritual, but after a while of gazing at the pair adoringly, I couldn’t help but think they were putting on a show for me.

20151215_140625.jpg

I'm sure this incredible weather won't continue for much longer, but I'm glad I've been able to get in as many walks as I have, and hopefully there are still some more warm days left for pigeon kissing in the park!

First Craft Show: Mission Accomplished

LifestyleMichela Mastellone-SchottmanComment

Alright folks, let's see if I can get this blog on a roll. I have MOSTLY completely moved into the new place (minus a few household projects that will someday get done). These last few weeks have been full of multi-tasking projects, having lots of nice gatherings between celebrating my birthday and Thanksgiving, and I just successfully participated in my first craft show!


I’ve been steadily in the process of trying to start a pet sitting and dog walking business in hopes of once again having something that resembles an income, and have had to put much of my crafting on the back burner during my move and trying get my business going. Luckily for me, I recently moved back into the area where a former roommate reached out to me about a small craft bizarre going on at the local theater. This was such a fun opportunity for my first craft fair - very small with not a ton of foot traffic, but I received a lot of positive feedback and got some business cards out there (even made a handful of sales!).

It also gave me an excuse to take a break from other things and get my crafting fix in. I made a giant new batch of journals with my original designs printed on both fabric and paper covers. For this most recent batch of fabric covered journals I tried something new - hand dyed muslin. There is definitely a learning curve to it, learning how much dye to use and how long to soak it, and judging how much the color fades in the rinsing process. Because of this, many of the colors I made are quite similar, but all usable and I think I know how to improve on it for next time. There is another craft show on Sunday, but I will post all of the remaining items over in my shop as soon as it is over!


20151129_123254.jpg

I also had a fun time coming up with a display table. I did not have time (or resources) to get or make anything specific for a display, so I multipurposed a lot of things from around the house. I pulled together a cute sign which I mounted using painted bottles I once built a bookshelf with. Our house has an abundance of crates used to store most things and even make a lot of my furniture, so I dismantled the kitchen cat feeding station to make use of those crates. Then I haphazardly dumped small containers of my clothes into a pile on my bed and grabbed my desk organizer to finish up the table display. If I end up doing craft fairs more regularly in the future, perhaps I’ll take the time to create containers better suited to display my items, but I think this worked out just fine for now.


Overall, it was a great first craft fair experience - low pressure and relaxed. I also really enjoyed seeing the handful of other craft vendors there. There were lots of great products ranging from knit and sewn pieces to jewelry and art pieces. It was nice to be back amongst such a small community packed full of creative people and those who appreciate the arts. What a nice reinforcement that moving back was a good choice.


DIY Bachelorette Party Game

DIY & ProjectsMichela Mastellone-Schottman2 Comments

If you’ve read previous blog posts of mine, you’ve probably noticed that much of it has been dominated with topics surrounding my friend’s recent wedding. That’s because many of the projects I've recently worked on have been motivated by it. Now that the main event is over, I can take a breather and start writing about some of the cool things that I made!

DIY bachelorette party game


As soon as I started thinking about my friend getting married, I knew I needed to make her something INCREDIBLE. This is a friend of mine who has been the recipient of some of my most elaborate and outrageous gifts for many years and who I began my friendship with over a practical joke. So when I learned that the bridesmaids were planning a weekend pre-wedding celebration, this seemed like the perfect excuse to gift my friend a completely custom hand-made EPIC BOARD GAME. The best way I can describe this game is a combination of would you rather, truth or dare, minute to win it, and lots of ridiculousness. This is a game that must be played with fun spirited people who won’t hesitate to make fools of themselves. If you've ever played "Quelf" it's like that, but better.

I am thinking about creating pdf downloads of all the cards and the game pieces so that they can be purchased, but for now I will simply give a brief description and you can use your imagination to create your own version! (Or email me for some of my ideas!)


The game is essentially a card game with a scoreboard….and a penalty wheel. There is also a separate penalty deck. To make the cards, I drew unique borders and designs for the front and backs of each category. I drew them in pen on paper and then scanned them into my computer to resize and format for the cards. I printed the front and backs in coordinating cardstock and then glued them together before cutting the cards out and rounding the edges for a more finished look. Two layers of cardstock resulted in a nice card thickness, but you could easily make the cards a single double sided piece of cardstock to cut down on bulk and work.

There are 5 categories in a mixed main deck: Would you rather, Head-to-Head, Challenge, Guess Who, and G-Spot. G-Spot is a category specific to my friend, Grady. These questions can be used for any person who is having a special day, but you might want to come up with another clever title if their name doesn’t begin with G.


The Would You Rather category is just that - hilarious would you rather questions that players have to guess what each other would rather. Healthy debate is encouraged.

In the Head-to-Head Category, there are several adapted Minute To Win It style competitions. Each card specifies how to choose your opponent for the activity based on an arbitrary fact (such as the player who you have known the longest).

In the Challenge category there are different challenges that must be completed either by you or by the group.

The Guess Who category has questions to which all players have to write down their answer and then the cardholder has to assign the answers to players.

G-Spot requires everyone to try and guess Grady’s answer (the way I decided to do the scorekeeping, the bride definitely benefits….but I figured that was okay).


Everyone had an adorable game piece. I doodled some characters, scanned them into my computer, printed on cardstock, colored with colored pencils, adhered cork to the back and then made a chipboard stand!


As players received and lost points, they moved their pieces around the game board. The game board has a total of 30 points (completely arbitrary). Each score has a rule associated with it that must be followed for the entire time the player remains on that space. This often makes game play pretty difficult, depending on the cooperativeness of the group playing. I made the board itself out of 4 pieces of chipboard duct taped together and covered with a single piece of butcher paper. The rules themselves were printed on cardstock and cut with rounded corners. I stacked the rules on coordinating patterned and solid cardstock and cut out cork numbers for the scores.

If at any time a player notices someone not following their rule, they may call them on a penalty. The offending player must then spin the penalty wheel and either lose points or perform a penalty card.


This game was SO MUCH FUN! We only ended up getting through about ⅓ of the cards and we had to adjust our scoring system half way through to speed up the game, because we played it all night!! I was careful to make sure that any inappropriate content was only printed on cards, so this is a game that can very easily be sorted through and made completely awesome for playing with all ages. I can’t wait to play this again!


I came up with a rule sheet complete with game supply list, so if you would like specifics about how I determined scoring, or you want help brainstorming your own game, just let me know!

Whirlwind of Life

LifestyleMichela Mastellone-SchottmanComment

For the few who may have begun reading here...sorry for the break in posts! Life has been a little bit hectic. I just accomplished the move from North Carolina to Maine. I hate moving so much. I’ve done it countless times and I’ve parred down my belongings time and time again. I’ve very happily lived out of nothing but a backpack for an extended period of time, so I get so frustrated with myself and society and everything by having all of these THINGS. It’s a hard balance to find in being comfortable in a home and surrounded by things that are important to you and meaningful to you but not becoming overwhelmed with stuff. Moving always floods me with all of that which inevitably makes me wish that I were simply able to live with nothing but a tent and a back pack again.

But instead, I spent a sweltering hot day moving furniture up and down stairs and packing a sizable truck full of way too much stuff. I packed up the animals and all of their things (of which there is also a lot of) and took off on the 13+ hour drive to Boston to stop for the night and leave the pets in the care of my mom for a few days while I settled in and ferret-proofed the Maine home, which is only slightly over an hour north of Boston.

My cat Sausage and ferret Xylophone have now joined me and are both getting along great with my roommate's small dog. I've been spending the last week or so frantically assembling furniture, building shelves, and sewing curtains in hopes to settle in quickly and finally for the first time in AGES settle in to some sort of routine and get down to some business endeavors.

20151027_123117.jpg

My computer has recently decided that it can no longer handle all that I ask it to do which at least has conveniently happened around my birthday and I was lucky enough to get help in purchasing a new computer. In theory, among other things, this will allow me to start getting into the swing of regular posting here. I have a growing list of great DIY projects to share and even some ideas of new products to sell!


DIY bridesmaids t-shirts

DIY & ProjectsMichela Mastellone-Schottman1 Comment

My best friend just recently got married, which of course just meant LOTS of fun crafting projects for me! One thing I knew I really wanted to make for this event were matching bridesmaids t-shirts! I’ve made tons of different shirts over the years for myself and my friends, but this was the first time I took on the challenge of making multiple matching shirts. I also wanted to make sure they had added special elements that would tie them into the rest of the wedding, so this was certainly a big undertaking, but I think the results were worth it! Everyone in the bridal party seemed very happy with them, and I even had one groomsman upset that he did not get one as well.

DIY Bridesmaid T-Shirts

I decided to use very basic light gray t-shirts for the base, primarily because they were cheap but also because I needed something good for both painting and sewing. I did opt for a “girl” cut though. I first needed to add the text to the back. My friend snapped a picture for me of the cute initial and date stamp they were using for some DIY wedding projects, so I re-sized the picture in order to create a stencil. I also picked a coordinating font to add in their wedding hashtag.


Ideally, screen printing is the way to accomplish the stenciling I did on these shirts. However, I needed a lot of supplies to make that happen, and I’m on a budget. So I decided to instead use freezer paper stenciling, a technique I’ve had a lot of success with in the past. Simply draw or print directly onto the paper side of the freezer paper and then carefully cut your stencil out with an exacto knife. You can then iron the stencil wax side down directly to your fabric. In theory, these stencils could be used multiple times if you were very careful to not overheat while ironing the stencil on and then careful when removing the stencil. I wanted to ensure that each t-shirt would have equally precise lettering and I had plenty of time, so I just made a separate stencil for each shirt.

Once I had adhered the stencils to the shirts, I mixed up the fabric paint colors I wanted and applied with a foam brush. Then I got creative and awkwardly hanged t-shirts all over my loft while they dried. As I sat in my makeshift sweatshop, I sewed small chest pockets for the shirts. To match my friends farm wedding I wanted to make the pockets out of burlap, but I also wanted to avoid the burlap fraying and wanted the pockets to be strong enough to be functional. I decided to line the burlap pocket with two layers of cotton muslin folded over at the top. This allowed for the muslin to form the structure of the pocket, with the burlap seam completely hidden. I sewed all the pockets on after removing the stencils from the shirts once completely dry.

With the pockets all sewn on, I repeated the same freezer paper stenciling technique with a simple bird design I drew. I added strips of freezer paper to stencil a line around the sleeve (I later added painted flags to the line). In retrospect, I would have designed the front slightly differently as stenciling on the burlap resulted in less precise results than I would have liked. I would recommend either stenciling a simpler design on the burlap pocket, or making the pocket out of a different material.

Once the fronts were dry enough to remove the stencil, I added flags on to the painted string around the sleeve (my friend tells me this is called “bunting”). I decided to sacrifice a few foam paint brushes to turn them into triangle stamps for the flags. These ultimately worked, but the foam only stayed glued to the posts for the first half of the shirts, then I simply had to carefully stamp/finger paint the rest. If you have more than a few shirts to make, I would recommend constructing better stamps. In order to complete stamping on both the front and the back of the sleeve at the same time, I inserted a piece of curved cardboard for support. Be very careful when hanging the shirt to dry that the wet sleeve does not fall to touch the rest of the shirt.

Once all the paint was dry, I just had to add the last touch: lace hem! My friend had a very cute farm wedding in a barn with lots of lace accents, so I wanted to bring some of that to the shirts. I had never worked with lace before, so I found a cotton lace that I figured would be easy to sew and not be an issue with washing along with the t-shirt. Adding the lace was super easy, I simply folded under some of the shirt sleeve hem and then added the lace and hemmed the sleeve with a single top stitch!


I’m super happy how these turned out and everyone looked great in their shirts!

BOOK REVIEW: One Perfect Day – The Selling of The American Wedding

Scribbler's SuggestionsMichela Mastellone-SchottmanComment

I have recently had a very pleasant resurgence of my avid reading habit. In large part I have my discovery of a local used bookshop to thank for this. There is something so relaxing to me about being surrounded by somewhat haphazardly constructed bookcases forming as close to a maze of books as fire laws will allow. I'm realizing now that this is a little odd given my tendency to feel claustrophobic, but I guess that's the power of being distracted by a book at every step. The local bookshop here extends back twice as far as one would expect, plus – they have cats! The categories in which they organize the insane collection of used books are so well grouped that I find myself retreating to the back corner of the store and quickly have an enormous stack of books that I have to par down to a reasonable purchasing number.

one perfect day book

A while ago, my best friend was visiting me for the weekend. She just recently got married, and as earlier this year I moved more than 700 miles away, as a wedding gift I flew her out for a weekend visit (plus, I'm always a fan of gifts I benefit from as well). My friend perhaps reads more than I and I know shares my happiness in being surrounded by filled bookshelves. A walk to the bookstore was a necessity for this visit. It was here, joining my friend exploring categories I would NEVER ordinary glance at that I found Rebecca Mead's One Perfect Day. My friend quickly voiced that she had heard great things about it, and so for the first (and likely last) time, I bought a “wedding” book.

My interest in this book stems primarily by the fact that it is all about the wedding INDUSTRY and speaks very little to the emotional and cultural aspects of weddings, which I have very little interest in. I was really very pleasantly surprised by this book. I fully appreciate that it was written in a very gender neutral voice and at least from my perspective as someone who knows little to nothing wedding-related, did a fairly thorough job examining various aspects of the American wedding industry, from bridal gown manufacturers overseas to wedding planners and honeymoons. There was a great balance of history with anecdotes from various current wedding industry professionals.

My personal favorite topic discussed in the book was that of destination weddings, in which the book focused on Aruba. I've never been to Aruba, but I've traveled quite a bit and could very easily imagine the description given of the hotel area being in large part an artificial environment fed by a giant desalination plant providing beautifully groomed, often imported plant life. It gives the rest of the small island the feel of a desolate parking lot. I also couldn't help but smile at the mention of the obligatory wedding sunset on the beach photo giving an image of the couple in complete blissful isolation, but in reality just out of frame the beach feels much closer to that of “MTV Spring Break”.

Mead also focuses on the idea that these destination weddings are a construction of this new generation now beginning to marry. Not only do destination weddings avoid a lot of the hassle and stress that often comes along with the planning of a traditional wedding, but it is a peaceful solution for people who perhaps have less than ideal family dynamics (divorced parents who cannot stand to be in the same room), which I imagine has become an increasingly more common occurrence. Additionally, it's brought up that many of the individuals currently marrying (and this book is now 7-8 years old) are the offspring of often wealthy baby boomers. They have grown up with adventurous spirits and traveling a great deal, so it is only natural that they will want top their previous experiences for what is supposed to be the most amazing day of their lives. Mead does a great job filling out with several historical and cultural examples of how destination weddings can very aptly be seen as "the new elopement".

I will say that Mead also does an impressive job, even while frequently using the term “bridezilla”, not implicating that brides are brainlessly falling for all these manufactured wedding gimmicks. The epilogue in fact is very worth reading as it reveals that during the journey of writing the book, Mead herself met a partner and married. It also touches on brides' awareness for the industry and the role it plays in their wedding planning.

I surprised myself with how much I enjoyed this book. As I'm getting to the age where many of my friends are married or on their way to married, I’m glad I found a source that could give me the type of information about weddings that I was looking for, without the information coming at me from the industry itself. While I'm of course very happy for my friends getting married, there has always been a cultural aspect to marriage that really puzzles me, and this book touched on exactly my concerns and questions. In particular, the books discussion about gift giving (both for showers and weddings) made me feel more confident in my hopes that eventually it will be equally as socially acceptable for single people to chose to have wedding sized house warming parties complete with registries, or welcome a new family pet with a baby shower.

I will be packaging this book up this week and putting it in the mail to my friend!  

Entering The Blogosphere

LifestyleMichela Mastellone-SchottmanComment
madagascar hermit rock

It's quite common to casually ask children what they want to be when they grow up. I remember then, as I do now, thinking that was a very confusing question. The only answer I could ever come up with as a child was that I wanted to grow up to be a hermit. It was always laughed at, but I'm not sure I've ever felt more sure of anything.

I eventually learned that was no longer an appropriate answer, so I stopped telling anyone that all I wanted to do was live alone in the woods with a bunch of animals. I wrote stories about isolated, animal-filled utopias, and imagined fantasy worlds for myself.

Once out of high school, I got as close to being a hermit as I could at that point in my life. I lived in the middle of the South African bush in a dilapidated tent, rehabilitating baboons. I returned to the states eventually to attend Bennington college, an extremely small liberal arts school in the middle of the mountains of Vermont. Luckily during that time I was able to several times escape back to tents and non-human primates. Now in my late 20s, while a huge part of me wants to be back isolated in a tent with some monkeys, I'm trying really hard to find a balance of that lifestyle with the things that make me happy here (mostly my pets....).

Through my years in the mainstream workforce, I've found that the stress in a full time, emotionally exhausting job doesn't leave me with enough energy after staying sane and positive around people at work all day to then enjoy my time outside of work.

kitty pillow

So I'm trying to find a way to fall back on some of my other talents in an effort to find a way to support myself that is sustainable to my happiness. As a science and music student through college, and then working in the animal care field, people were frequently surprised to find out that my first job was as an art teacher at a children's theater camp. But in truth, art and creativity have been as big a part of my life as animal sciences.

In an attempt to find a way to support myself through alternate means and begin selling my crafts, I've been beginning to discover the enormous world of social media and blogging. I have never been a heavy user of these outlets for personal social use, so this has been an interesting journey, and I'm still trying to find the niche on the internet that I can relate to (and I welcome suggestions!).

My hope is to post a variety of content here (book and movie reviews, DIY projects, and whatever else I'm doing/working on). I love coming up with new ideas of crafts and designs, so make sure to check out my shop where you can purchase my work directly through me. I also love a challenge and new ideas to try out, so I would love comments or suggestions on anything you would like to see me create or write about!