Whimsy Scribble

DIY Mobile Grooming Van Conversion - Plumbing and Electrical

Grooming Van ConversionMichela Mastellone-SchottmanComment
20210122_095953.jpg

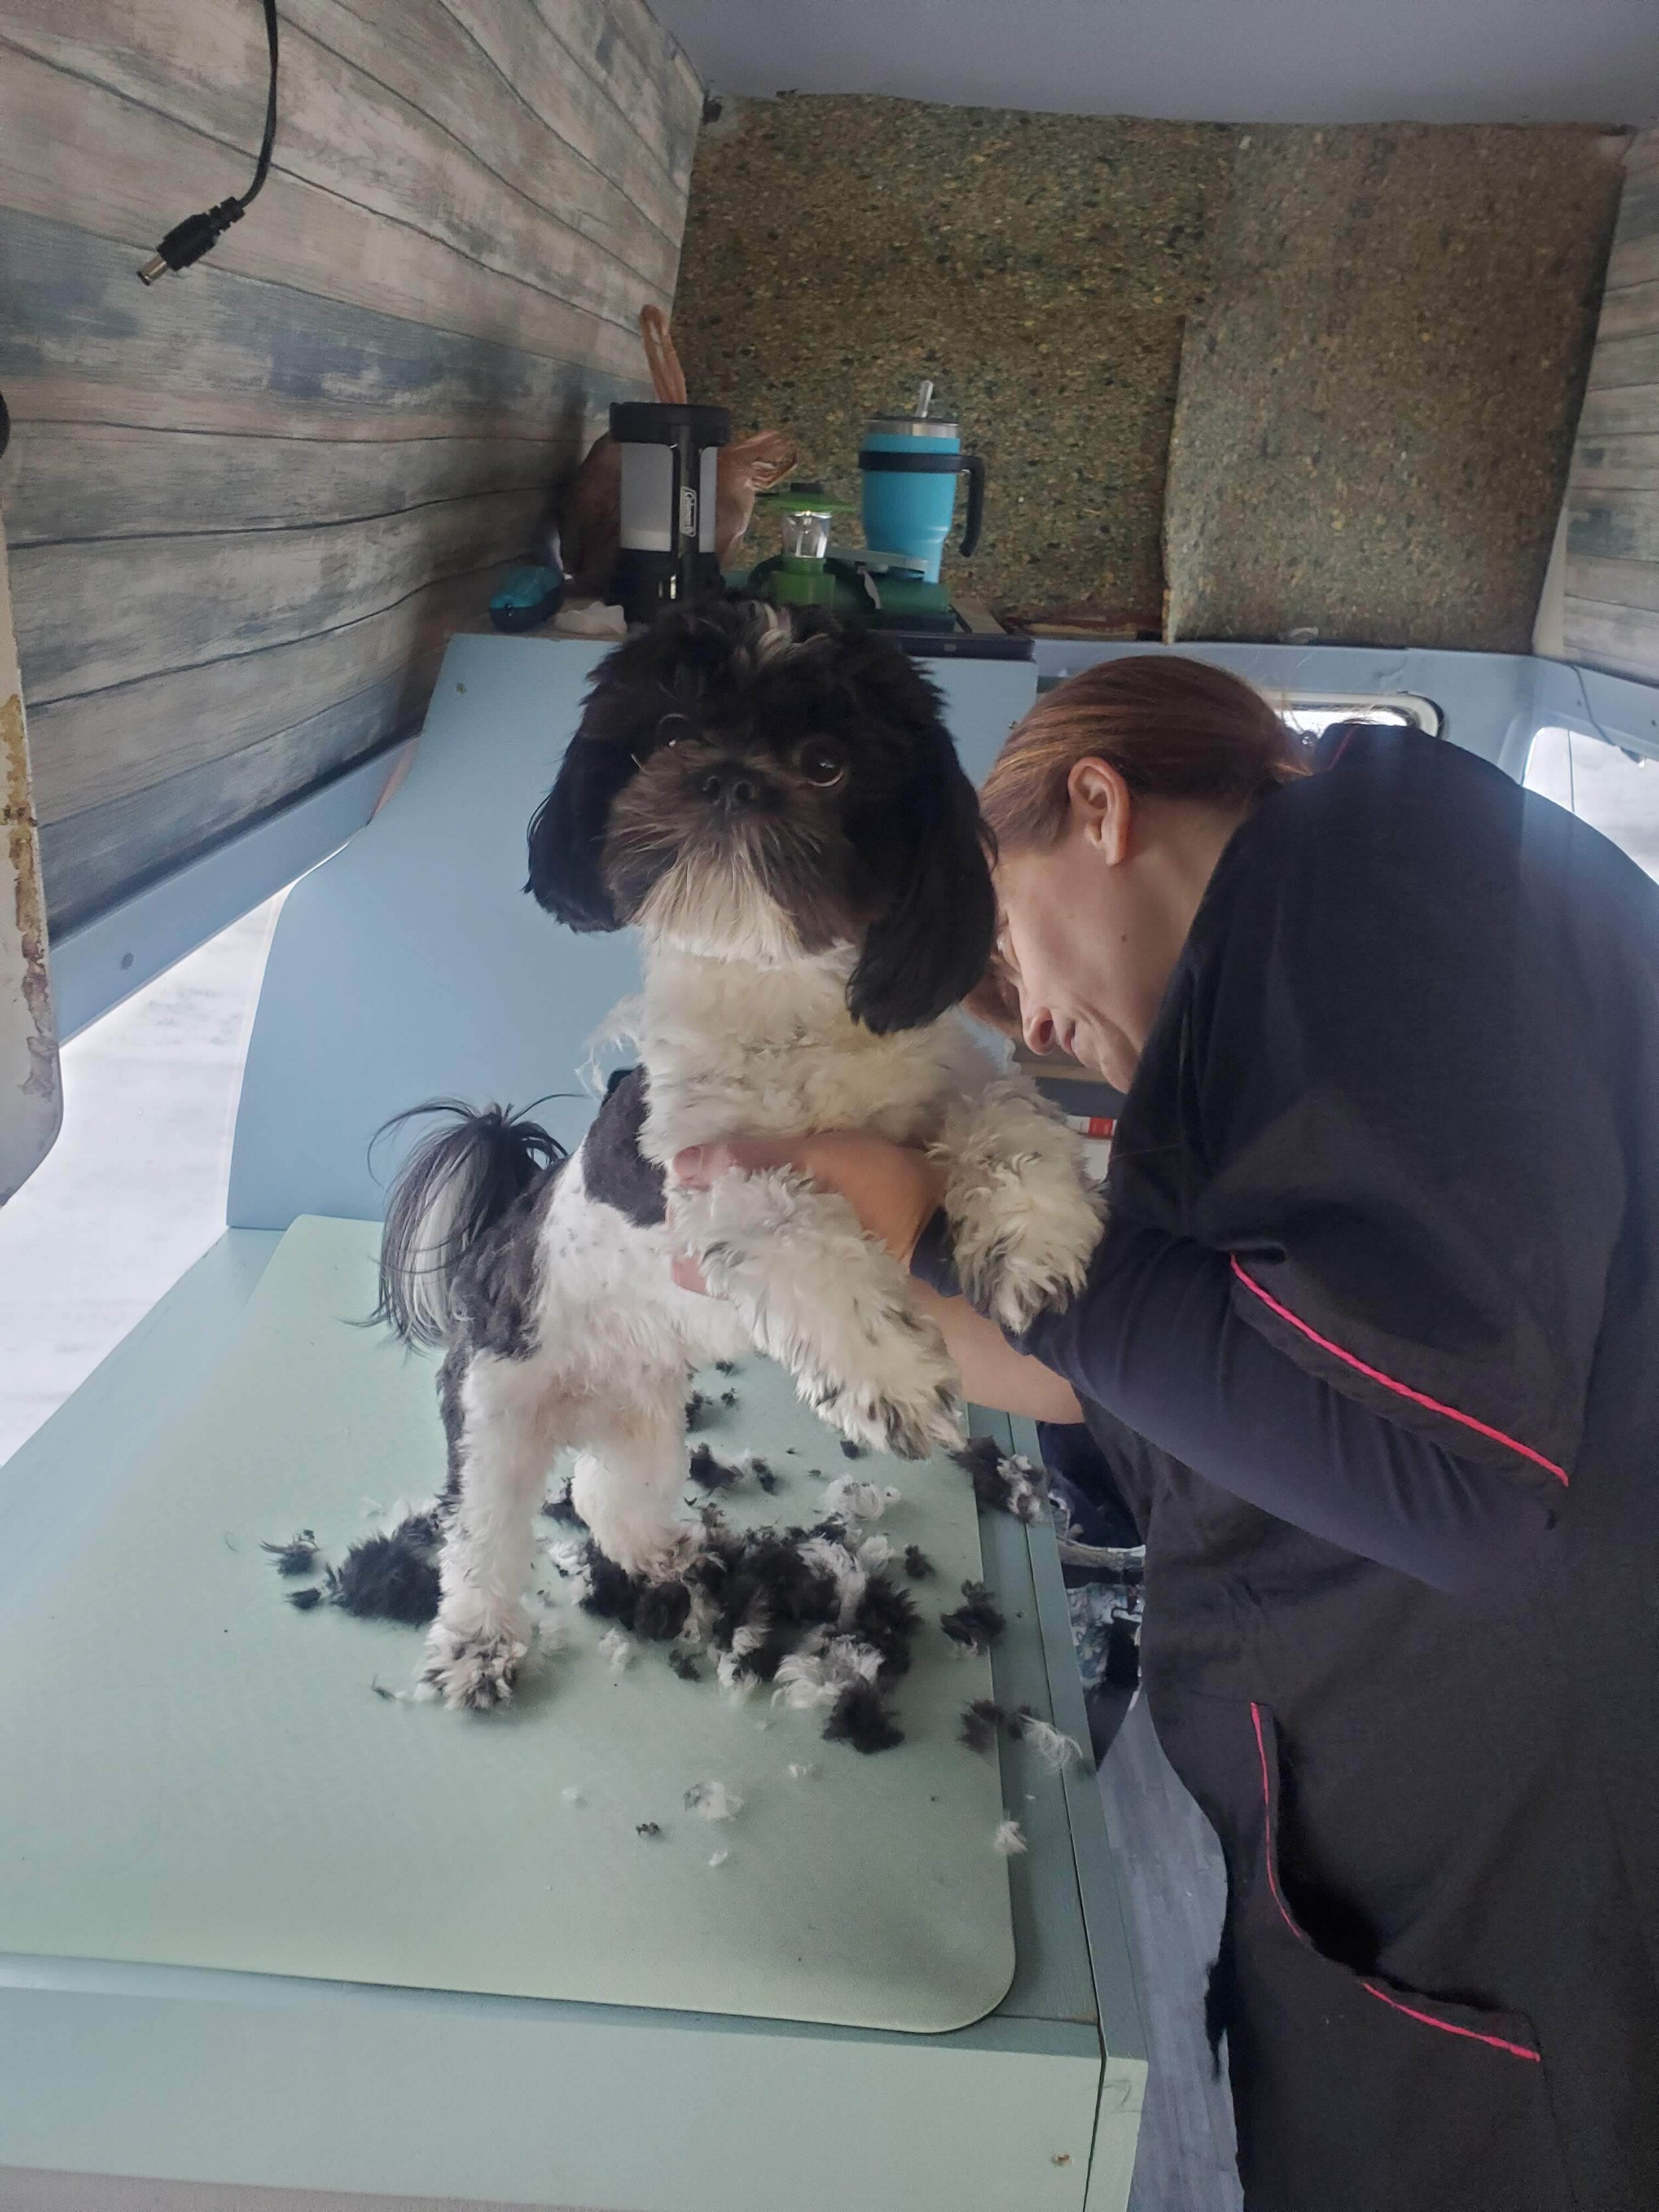
Finally this monstrous undertaking in my life is finally starting to take flight. The Wild Rover-Mobile is up and running and fully functioning complete with giving our clients full bathing services! This means that yes, I’ve finally mastered (haha - not even close) the plumbing and electrical systems on the van so we are able to run all of our equipment (like a dryer) and have heated water to give baths with a recirculating bathing system. Unfortunately among the many “bad timings” this van project has had, in our first weeks of operating we had extreme low temperatures causing freezing I didn’t account for and burst a few of my plumbing components (luckily nothing too challenging to replace). But that experience led me to realize I had not properly accounted for needing to be able to drain the system entirely during the winter, so I’ve now made some design adjustments to add in what drainage valves we will need to keep everything running smoothly all times of the year.

Along with extreme freezing temperatures, we’ve also been hit with several storms and a good amount of accumulated snow. And of course, just to keep us on our toes, the van has had a few mechanical hiccups in the first few weeks of being in service. An extraordinary noise announced the development of a giant hole in our muffler that we had to bring in to a mechanic to be fixed. Less than a week later, we found ourselves broken down on the side of the highway. Ultimately we were able to get ourselves going again - with lots of help from family from troubleshooting over the phone to help me identify the problem, to roadside deliveries of transmission fluid. Long story short: I now know how to fix transmission hoses. We have had a pump seize up on us and stop working and the water heating system is still not working to the efficiency I had hoped, but luckily all of the “plan B” options I’ve come up with on the fly have worked out alright for us and we’ve been able to continue working. So needless to say - I am not yet fully finished, but the end is in sight.

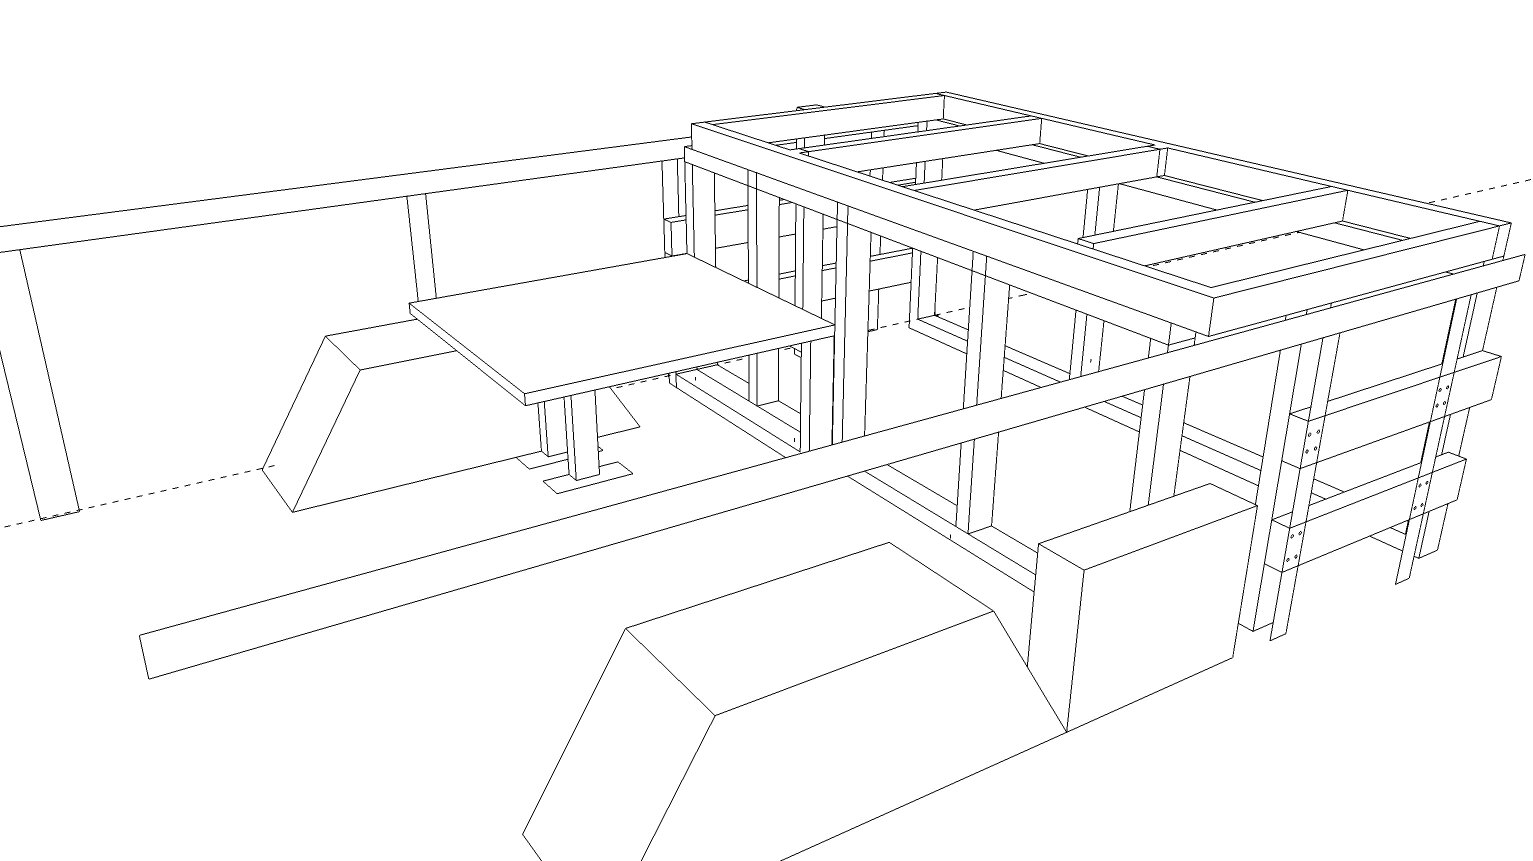
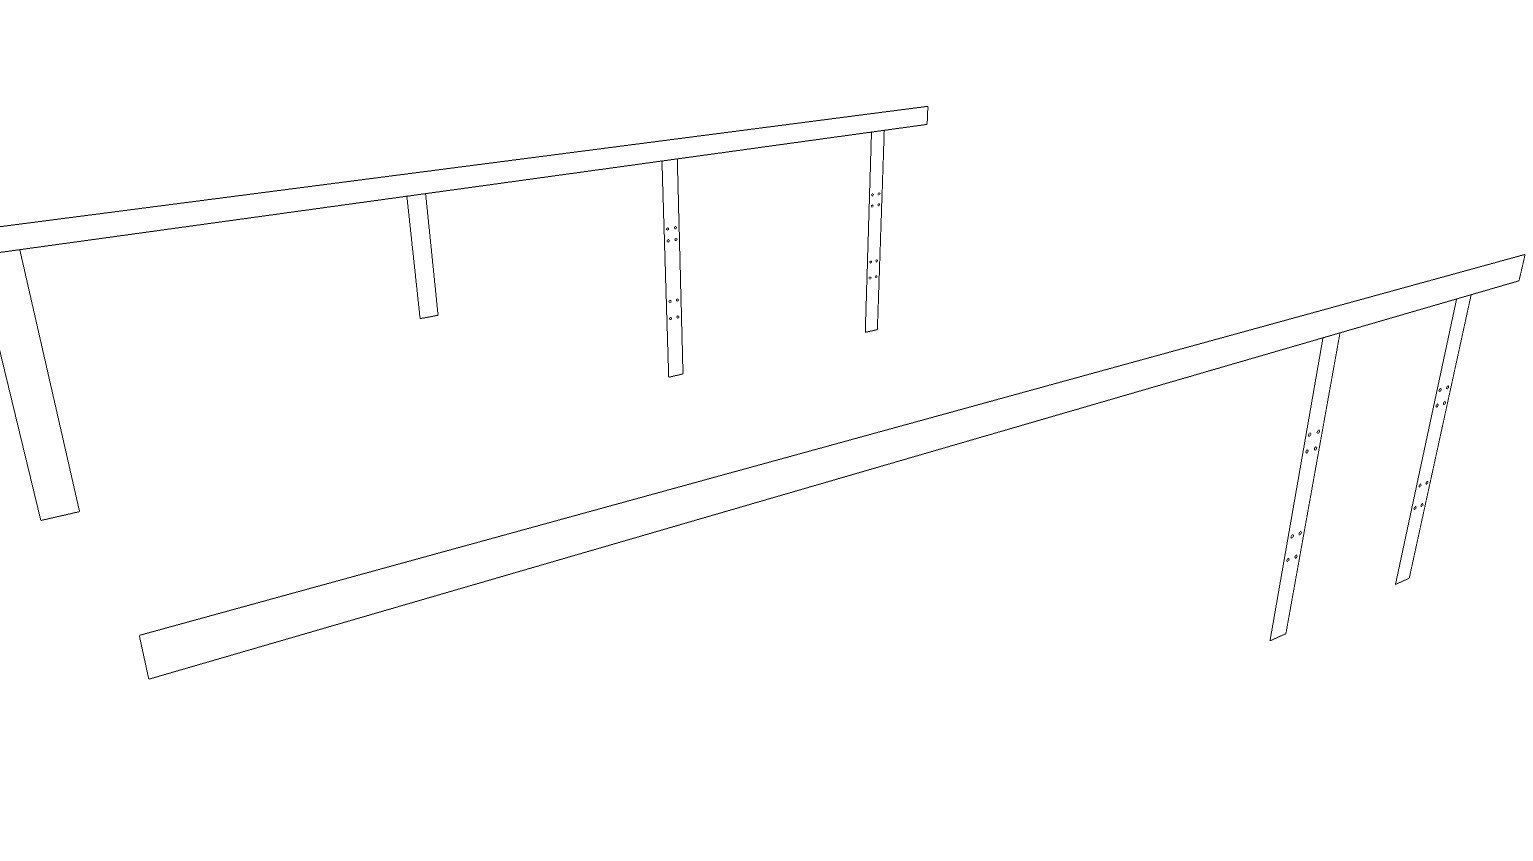
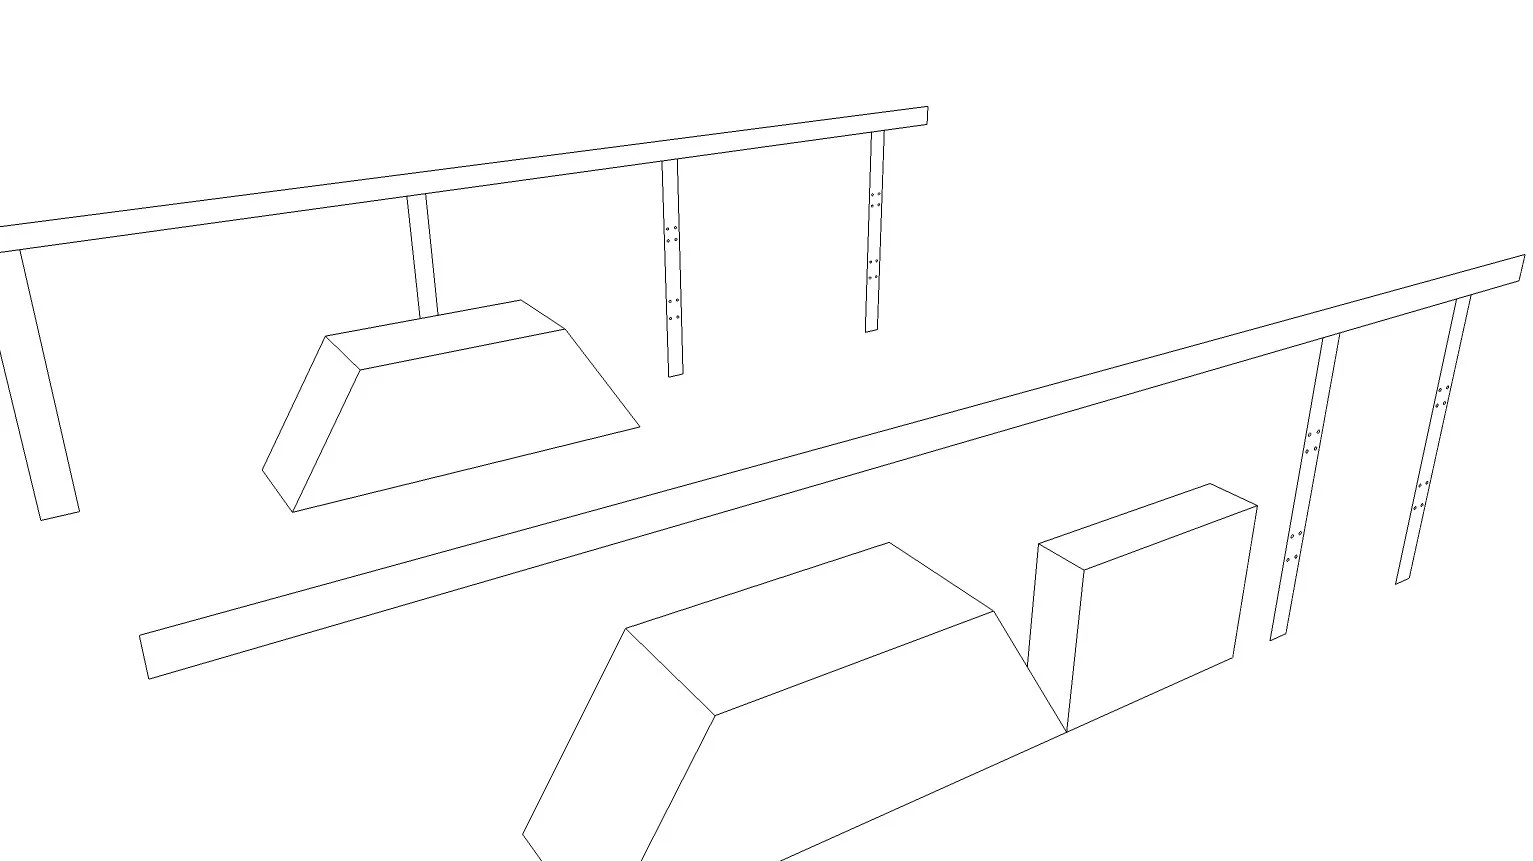
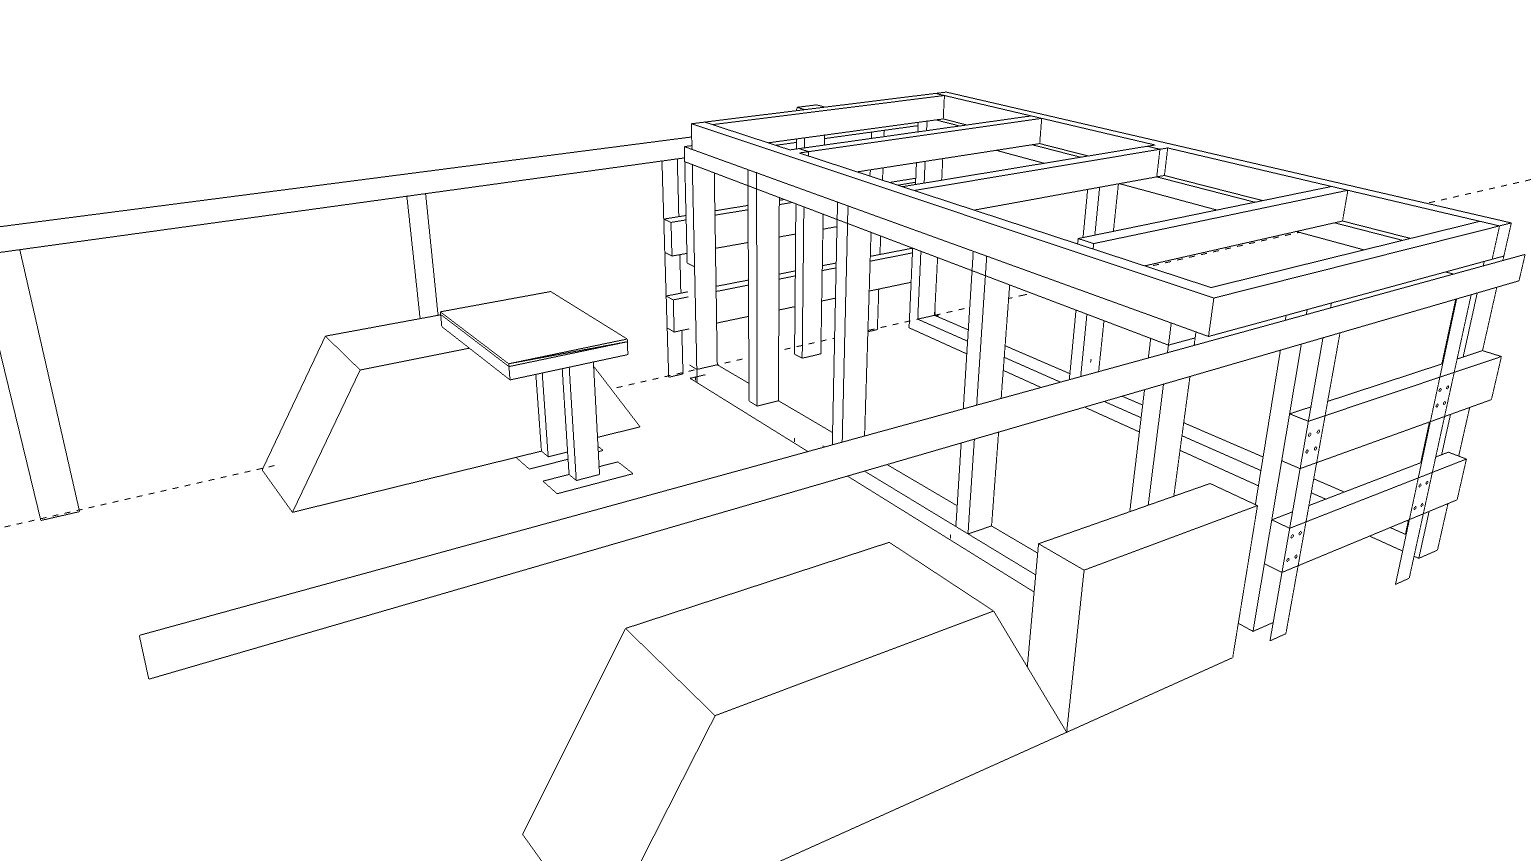
We had about a month in which we caught up on appointments in our van though were not yet able to offer baths. A short break thereafter allowed me to buckle down, practically live in the van, and get us all set up to operate fully. The first major step of this: the bath. A huge component of this van is that it can give us the capability to offer full bathing services, something we were previously unable to do. This of course requires a LOT to make happen in the back of a van. In a previous post, I made this basic diagram to figure out how our system would work.

van plumbing.jpg

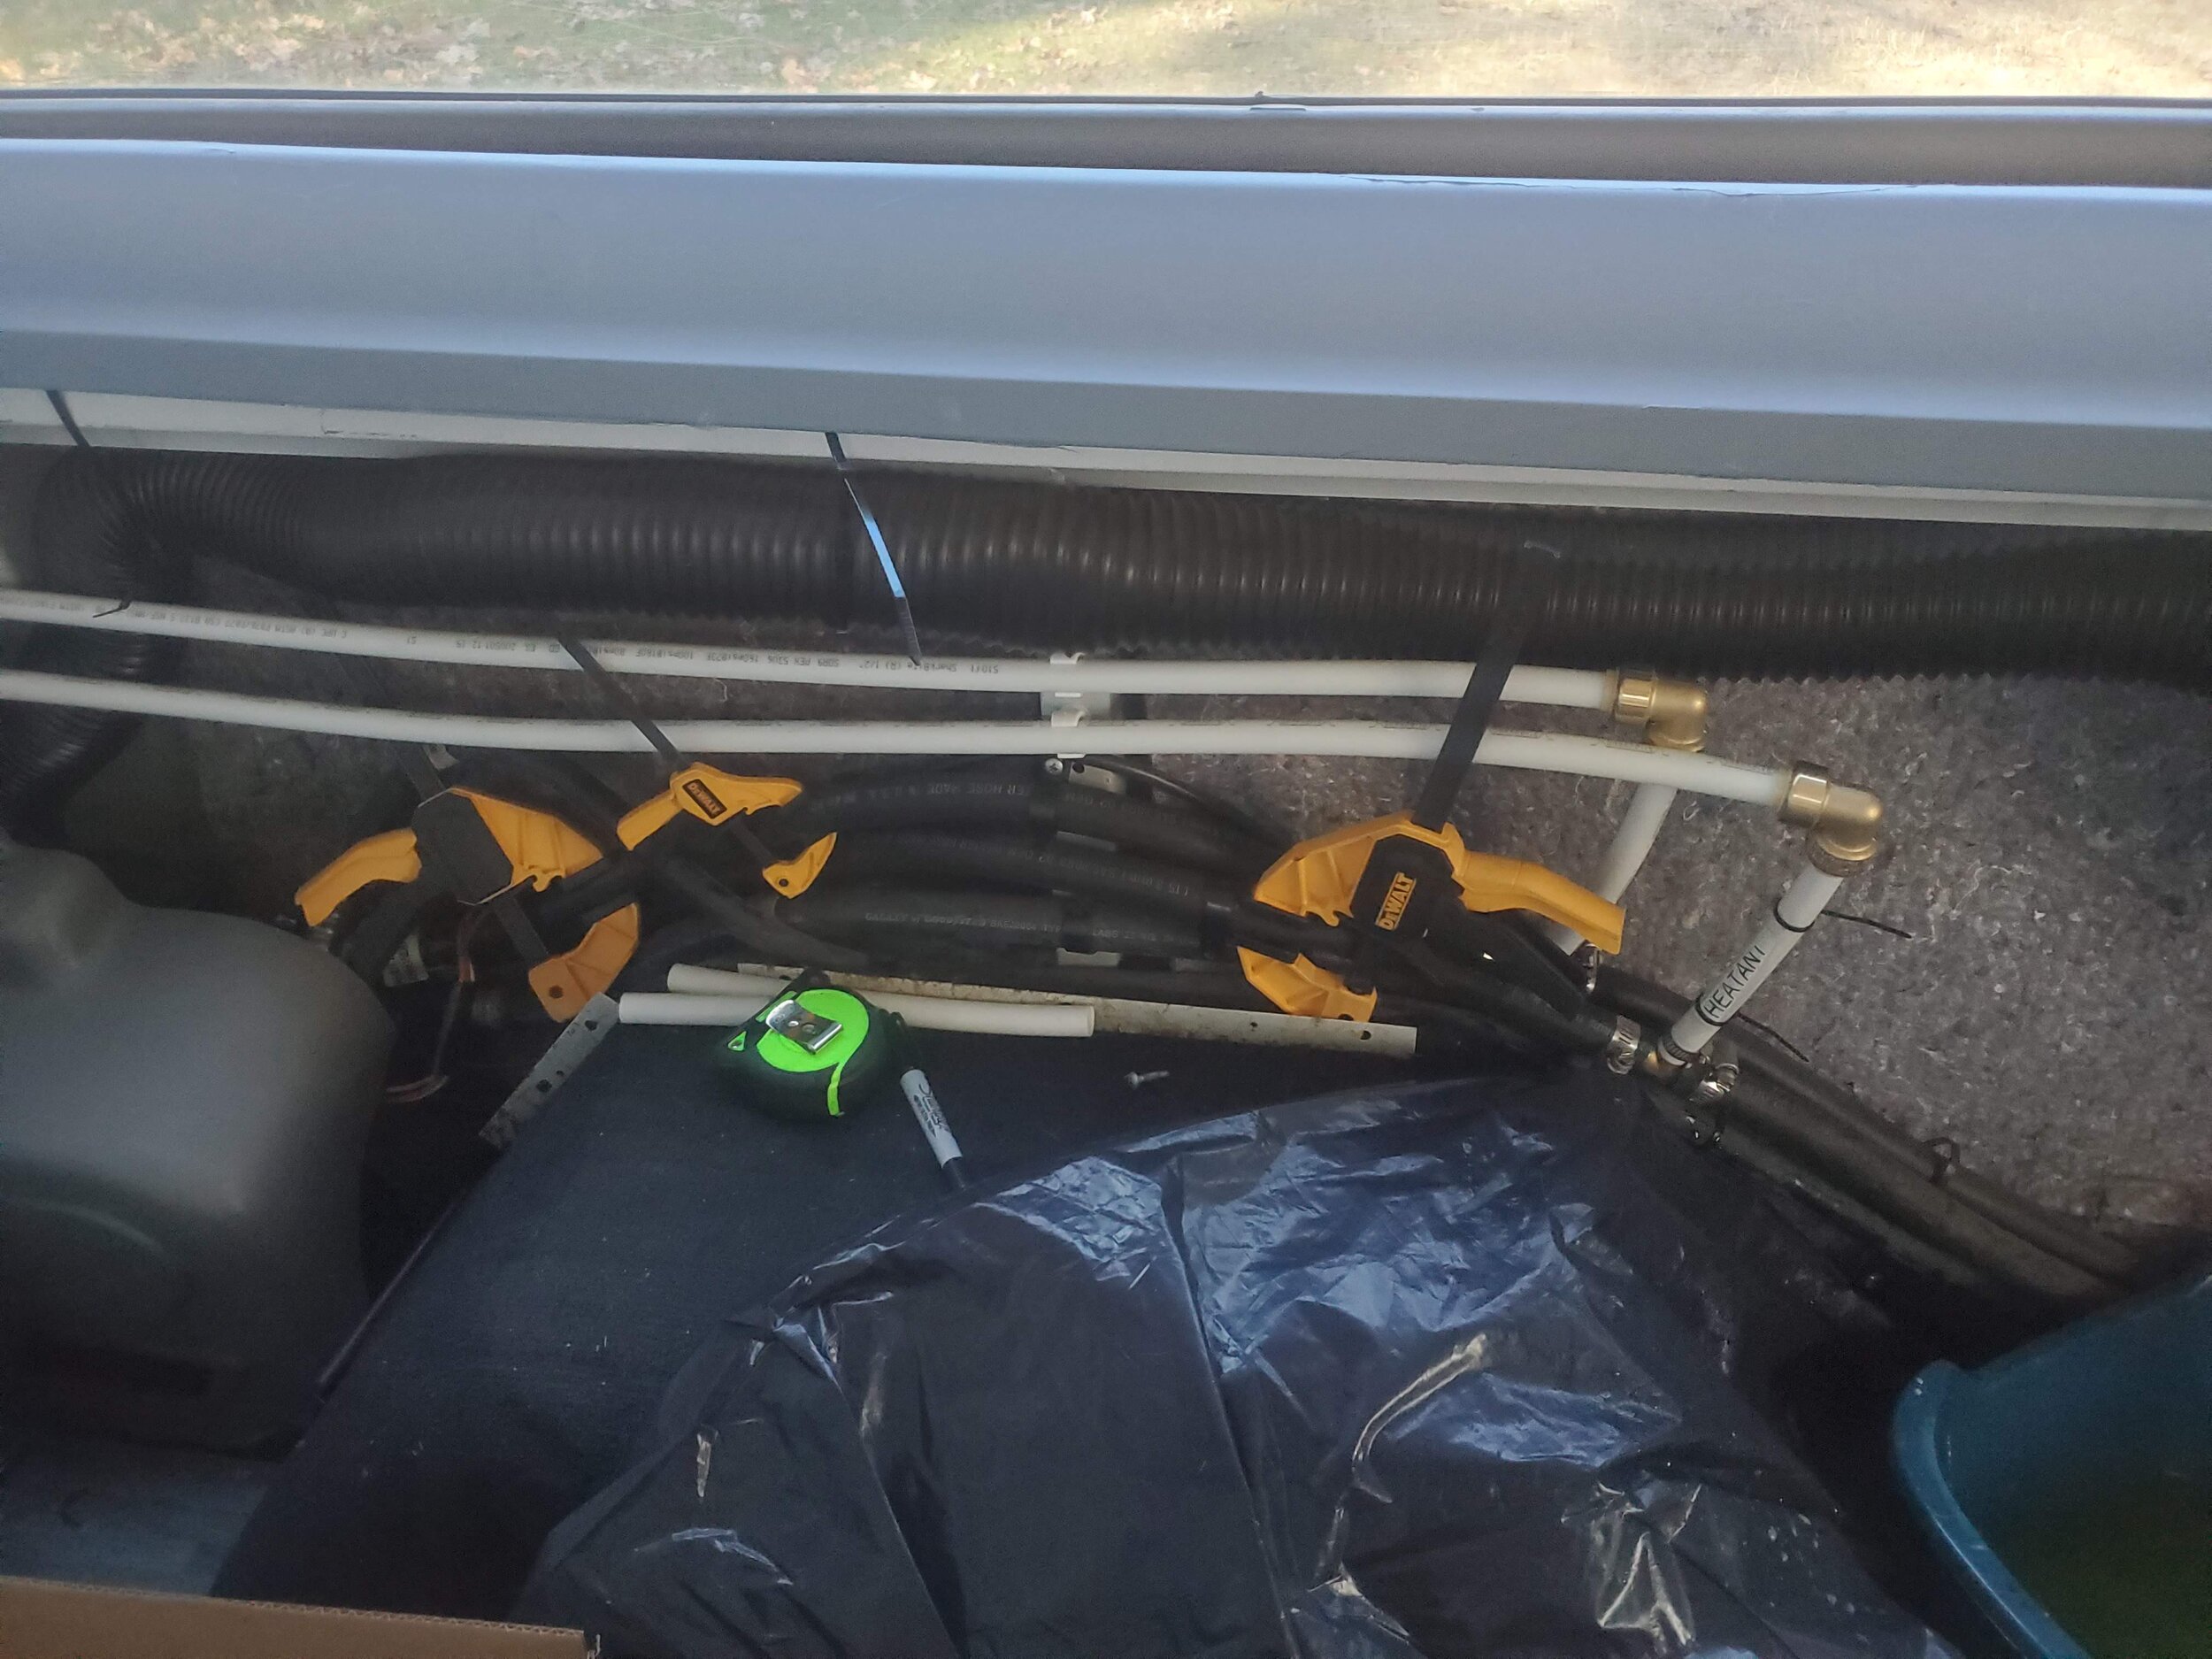
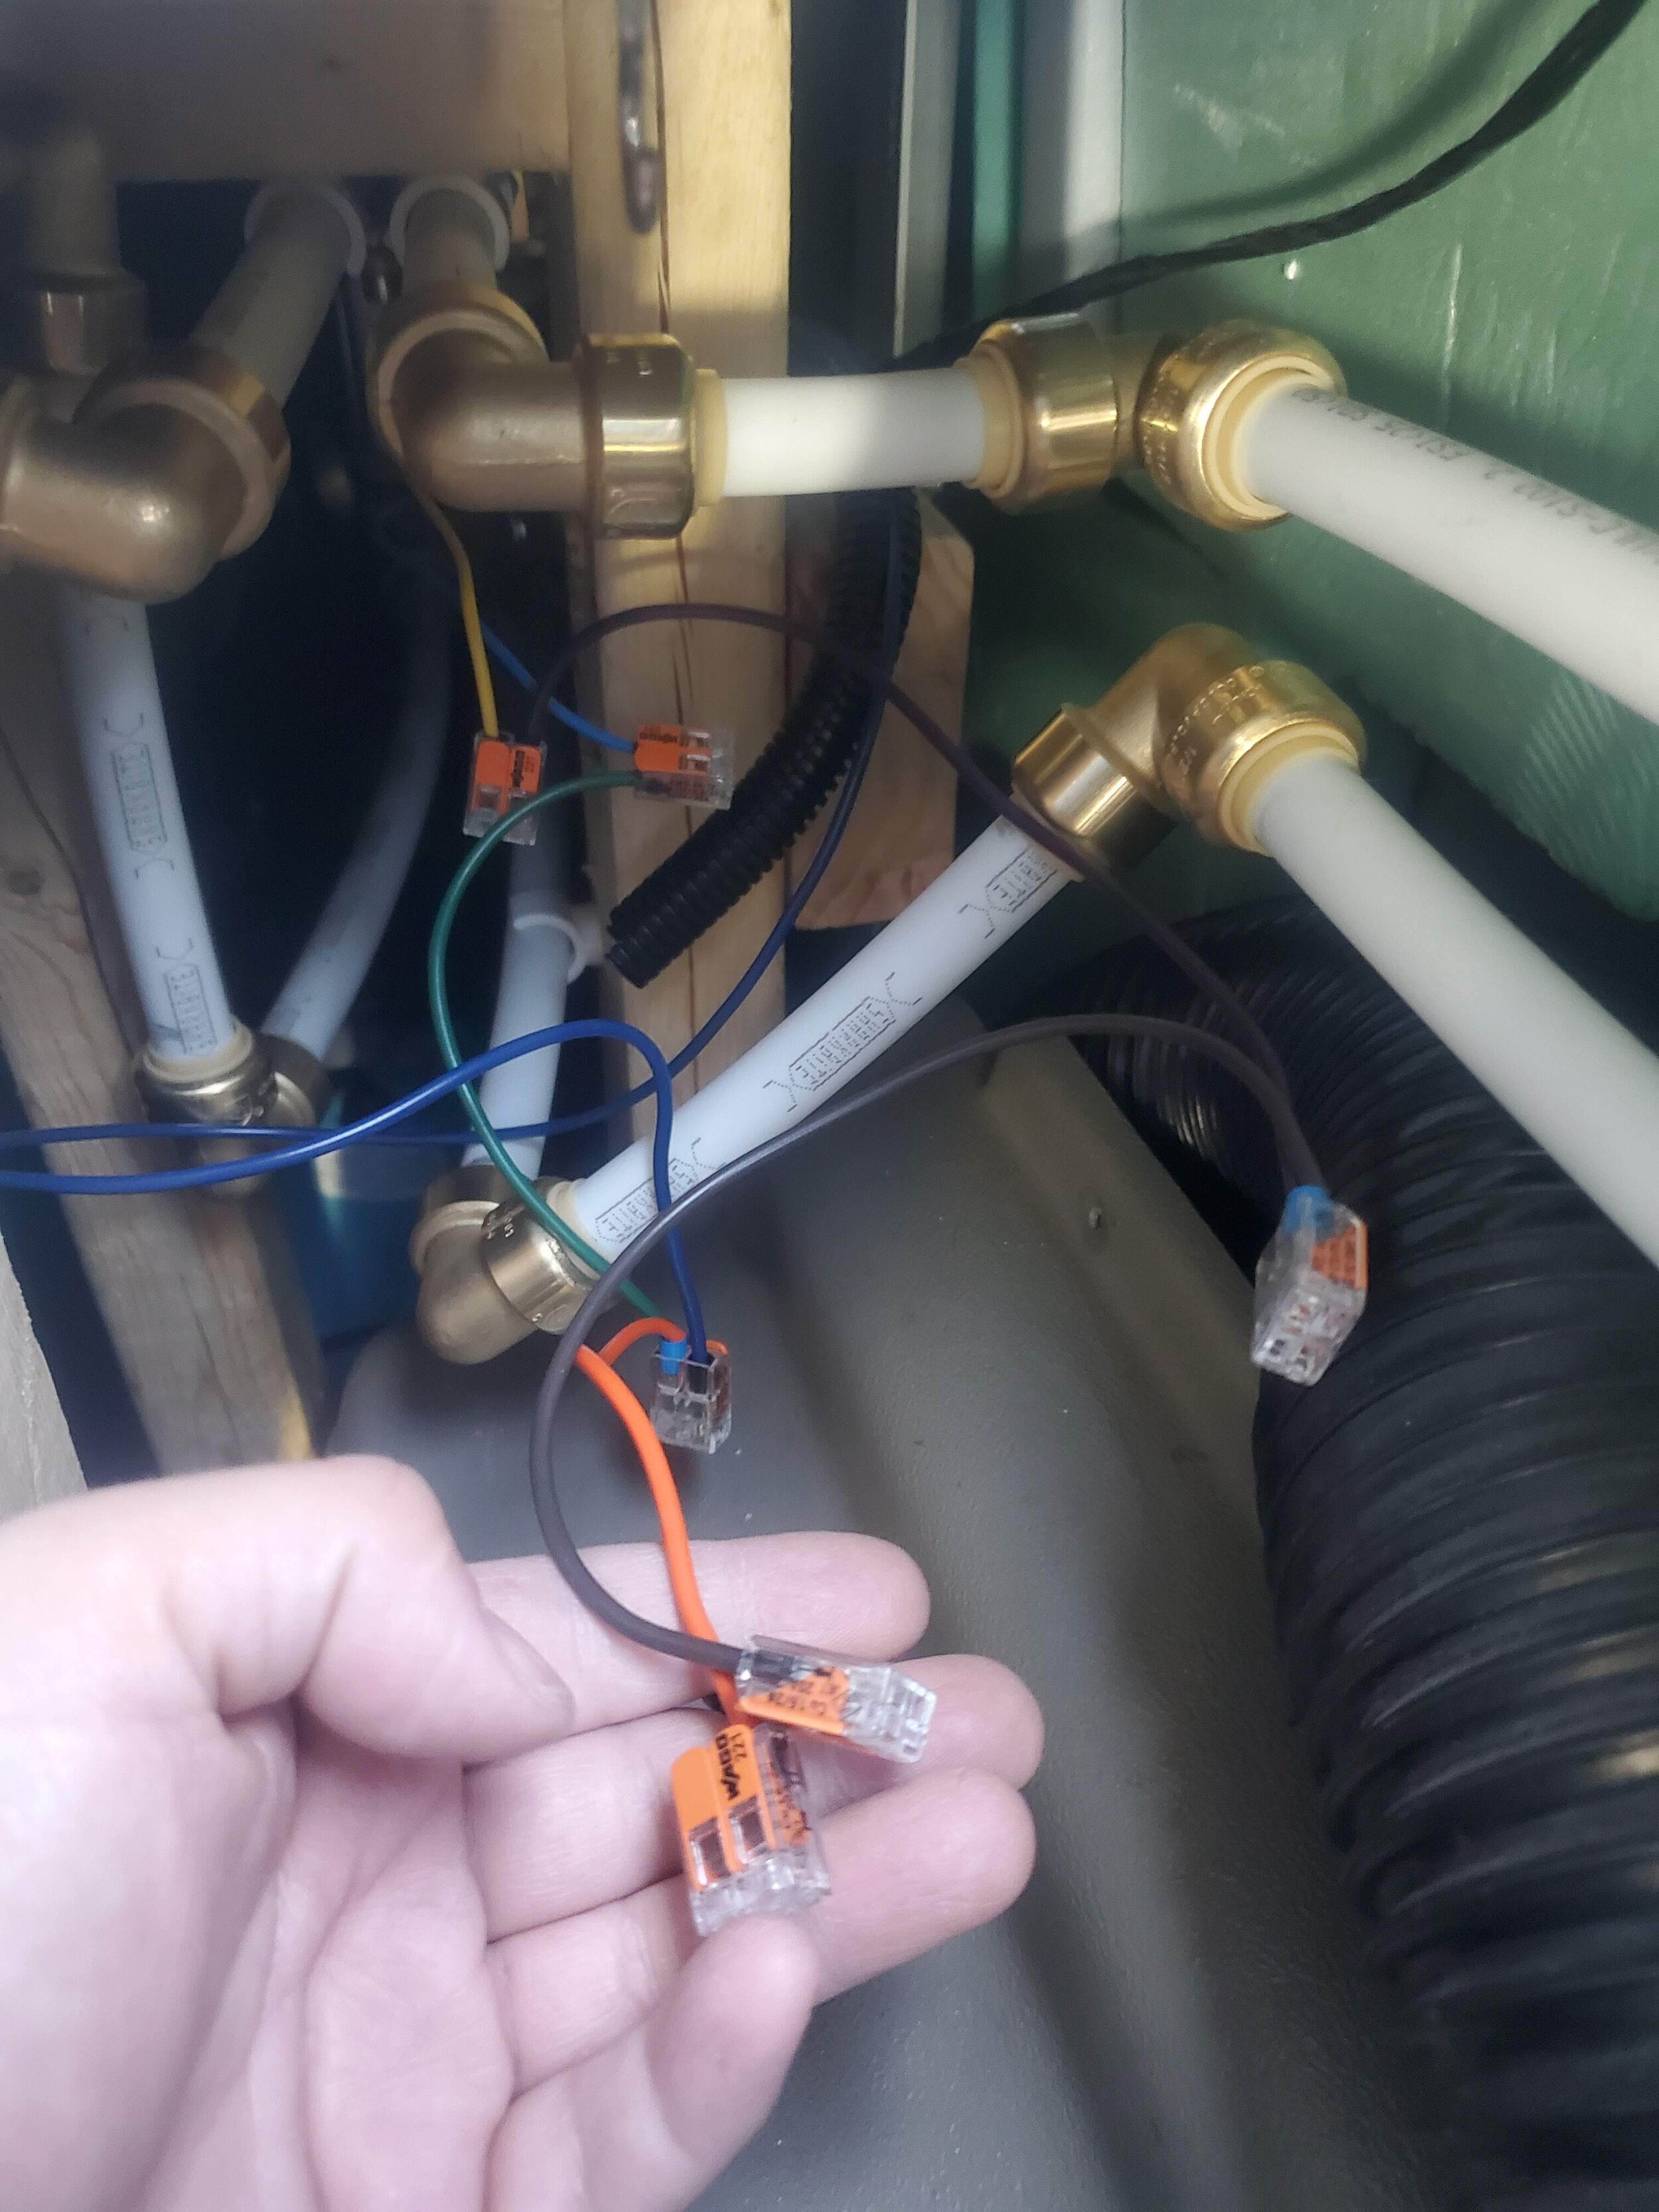
Now I just had to actually make it happen. First to tackle was the piping required for the water heating system. I chose to use PEX piping since sections of it would need to sustain high heat. It is also relatively easy to work with. I can’t even really explain how all of this came together. I spent a lot of time in awkward positions under the tub table, struggling to attach a pump under the tank mount and trying to figure out the most logical place to put things in order to still access filters that would need regular maintenance.

PLUMBING.png

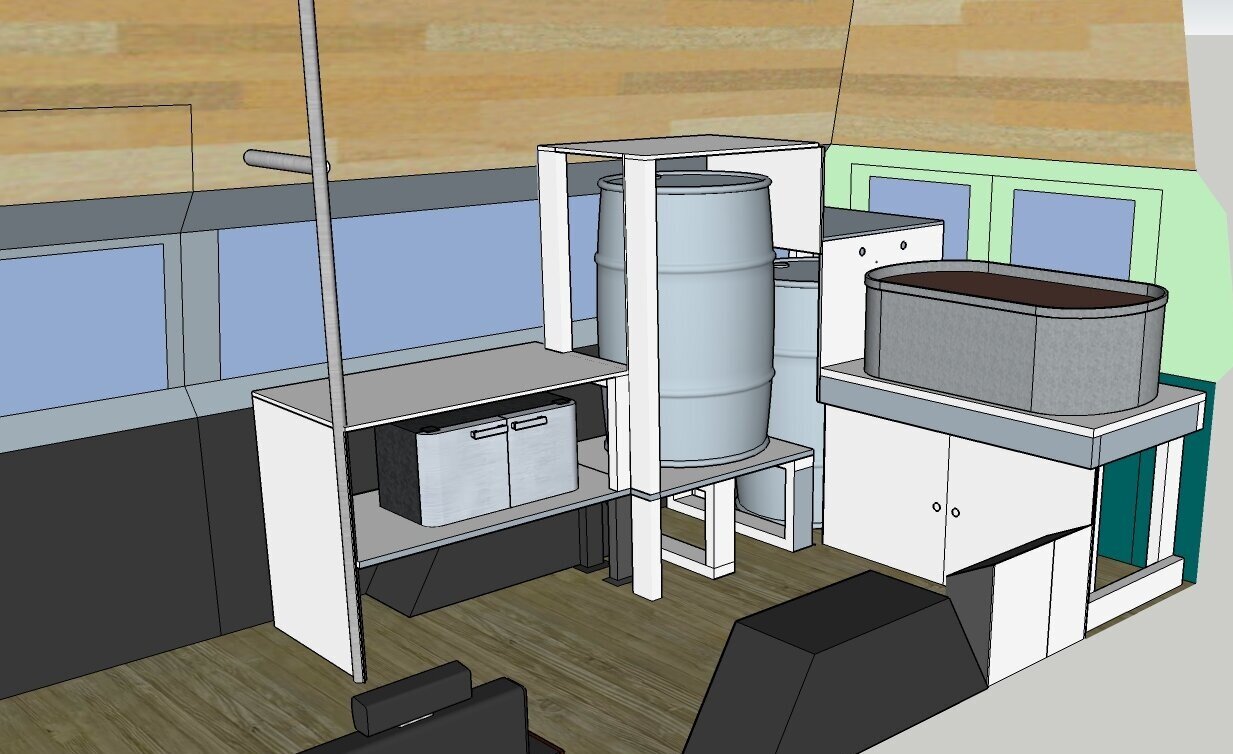
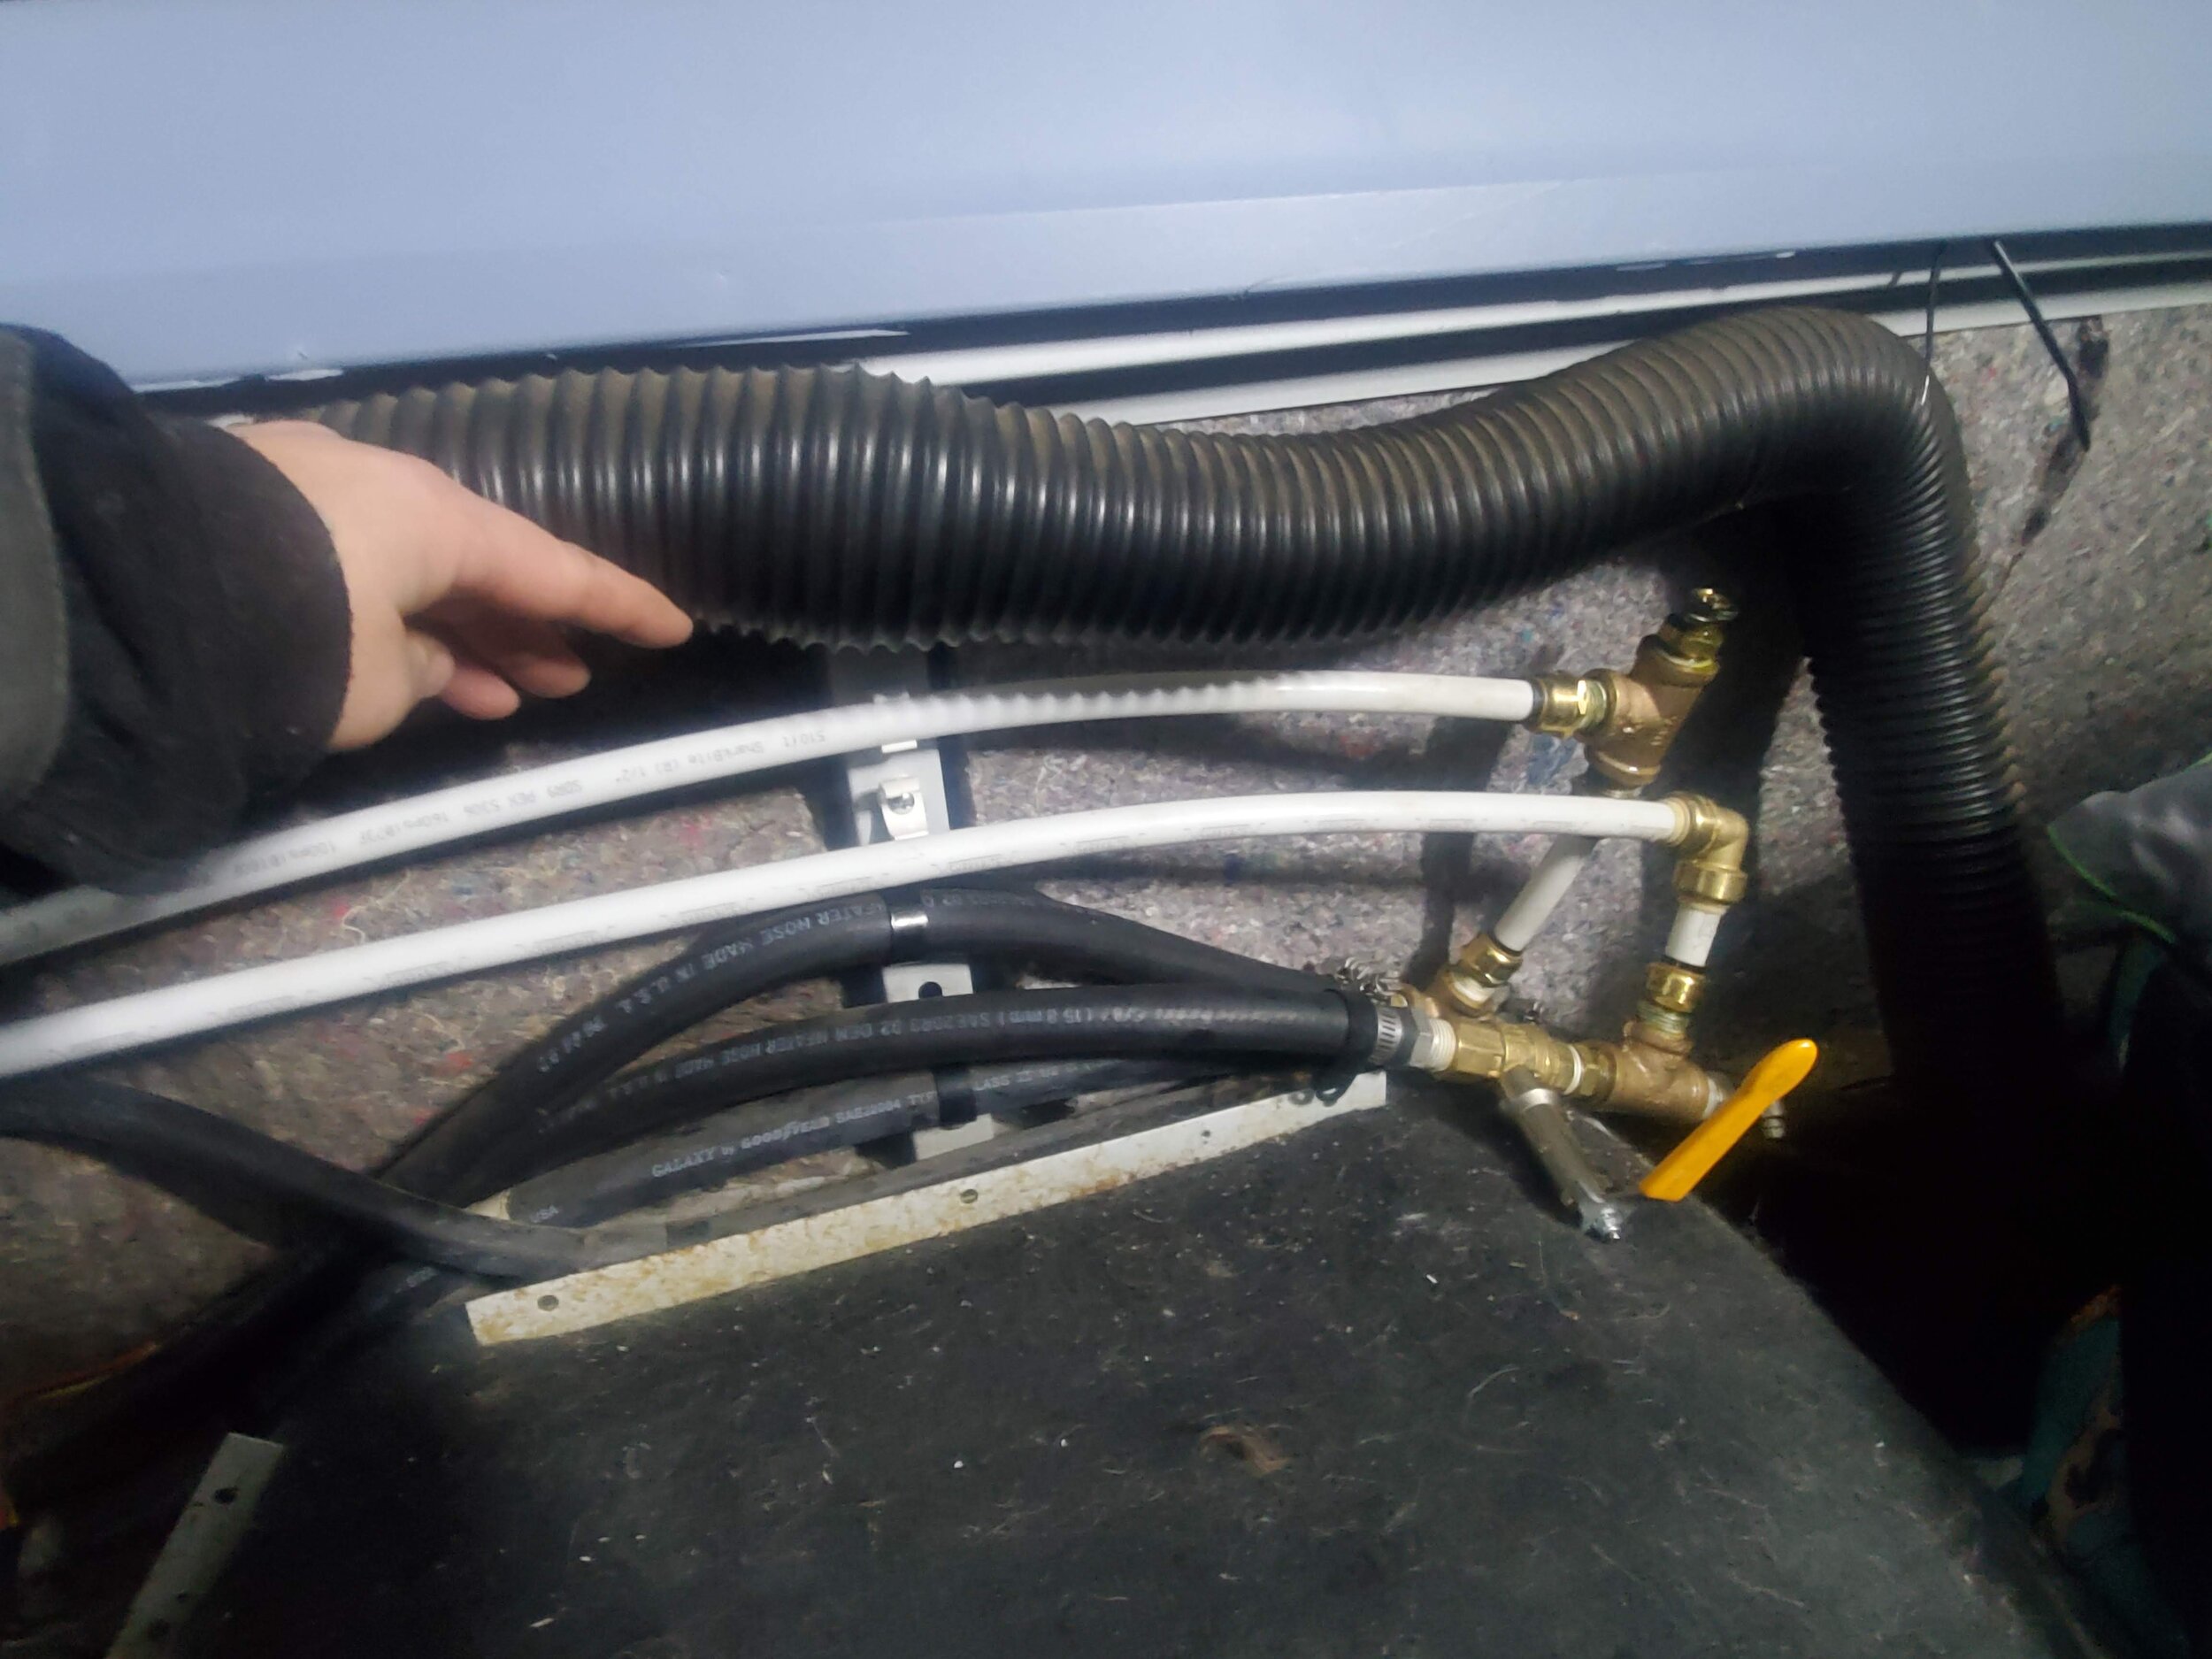
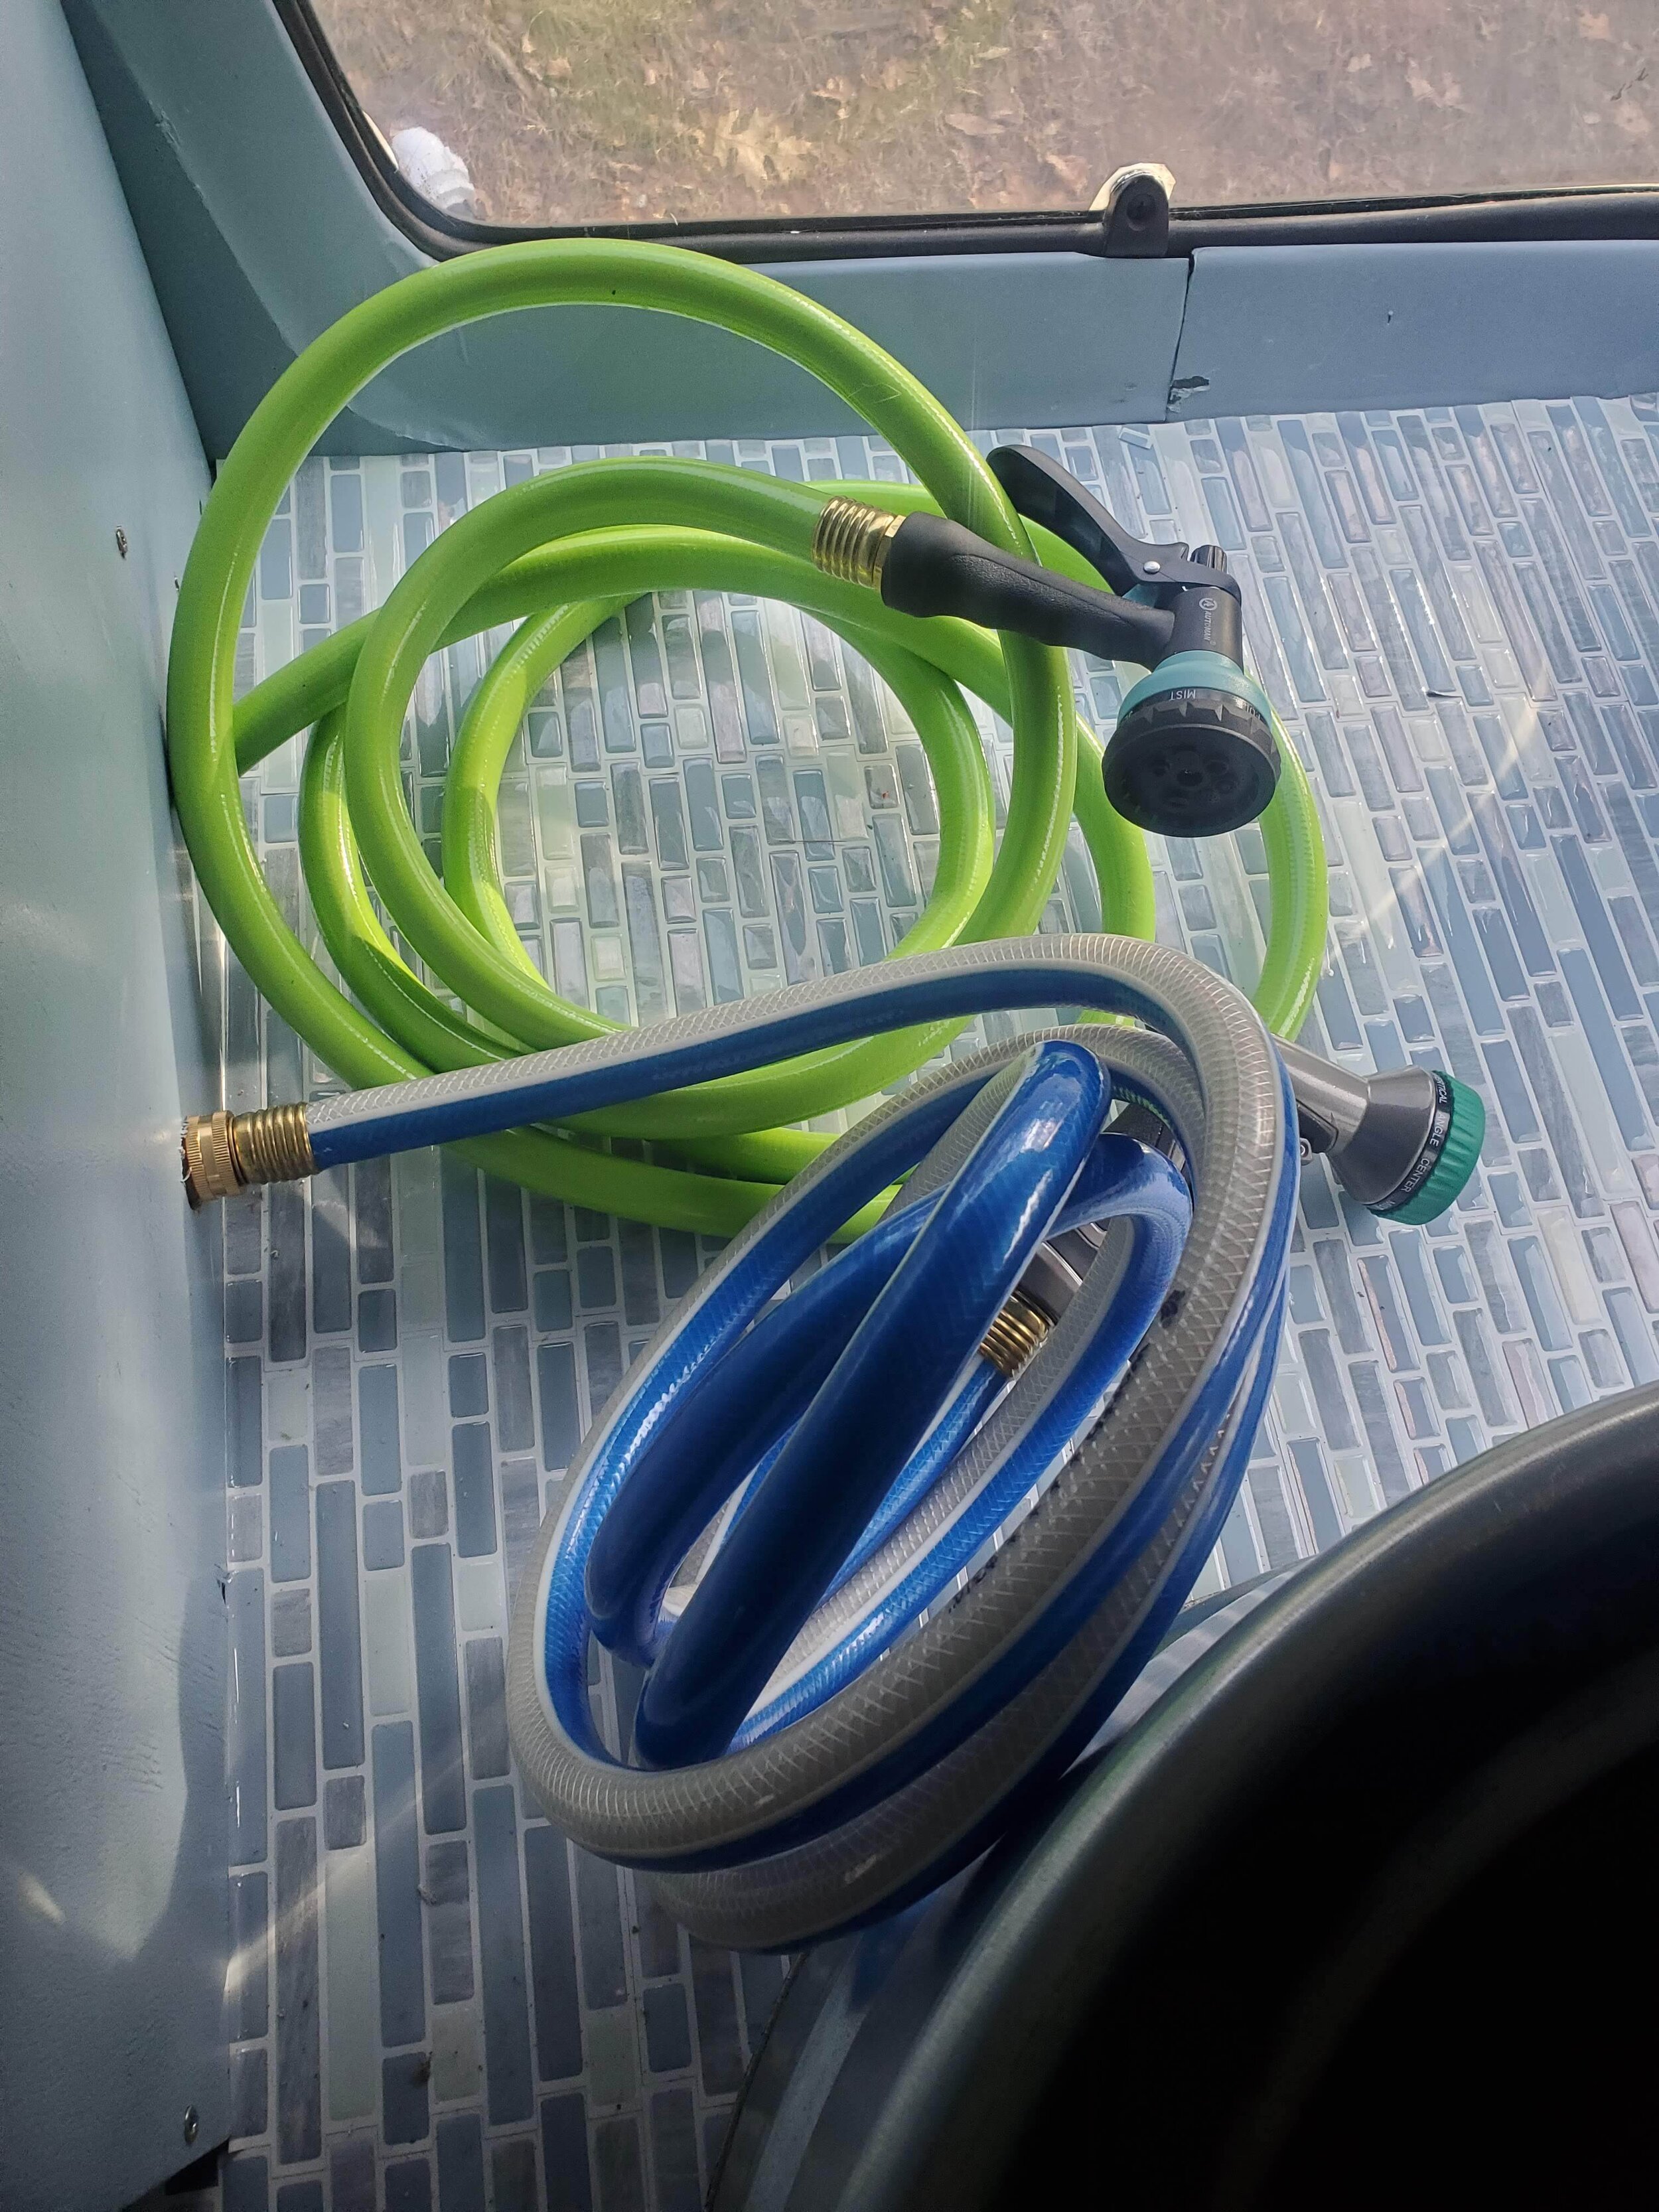
There are basically 4 separate systems involved to make this all happen. The “rinse” system (blue line) goes directly to a filter and pump mounted underneath the tank and then strait through the tank cabinet to a hose in the tub area. Right now this is one of the systems that I have had to manually disconnect every night to drain, so I am adding a valve for easier maintenance. The “wash” system (green line) involves the recirculating pump. Before each bath, that tub is filled with fresh water from the tank and a mixture of shampoos. The process of spraying a dog with premixed shampoo and water makes for a much more effective bath. A long hose is connected directly to the recirculating pump and runs under the table through the tank cabinet to the tub area. The “heat” system (red and purple pipes) has several components involving a heat sensor positioned in the water tank and a pump and electric valve that are activated if the water is cooler than our set temperature. This is another system that is being slightly re-routed and having some drain valves added in order to maintain it in freezing weather. I was nervous about connecting this heating system up to the heater hoses of the car, but my partner luckily had the wise idea to not only drain what coolant we could out of the system beforehand, but then we backed the van up onto a steep slope of our yard in order to shift as much coolant forward out of the hoses I was about to cut into. And it worked! I won’t say there was NO mess, but it could have been significantly worse. It all went much smoother than I expected - even figuring out the directions of the heater hoses, which I was dreading, was pretty straight forward with a helping hand to turn on the car and then off again as soon as I saw which hose was going to start spewing coolant. One other small complication I ran into was that there was not enough pressure in the heater hose to keep everything circulating efficiently. This was temporarily fixed using clamps to apply pressure to the heater hose after the PEX intersection. I have since replaced this set up with a flow control valve and an air valve to help clear any air out of the coolant system. I also have had to make several adjustments to the various spigots attaching the piping and tank to attend to leaks, and have added a small tube on the outside of the water tank to make monitoring the water level much easier.

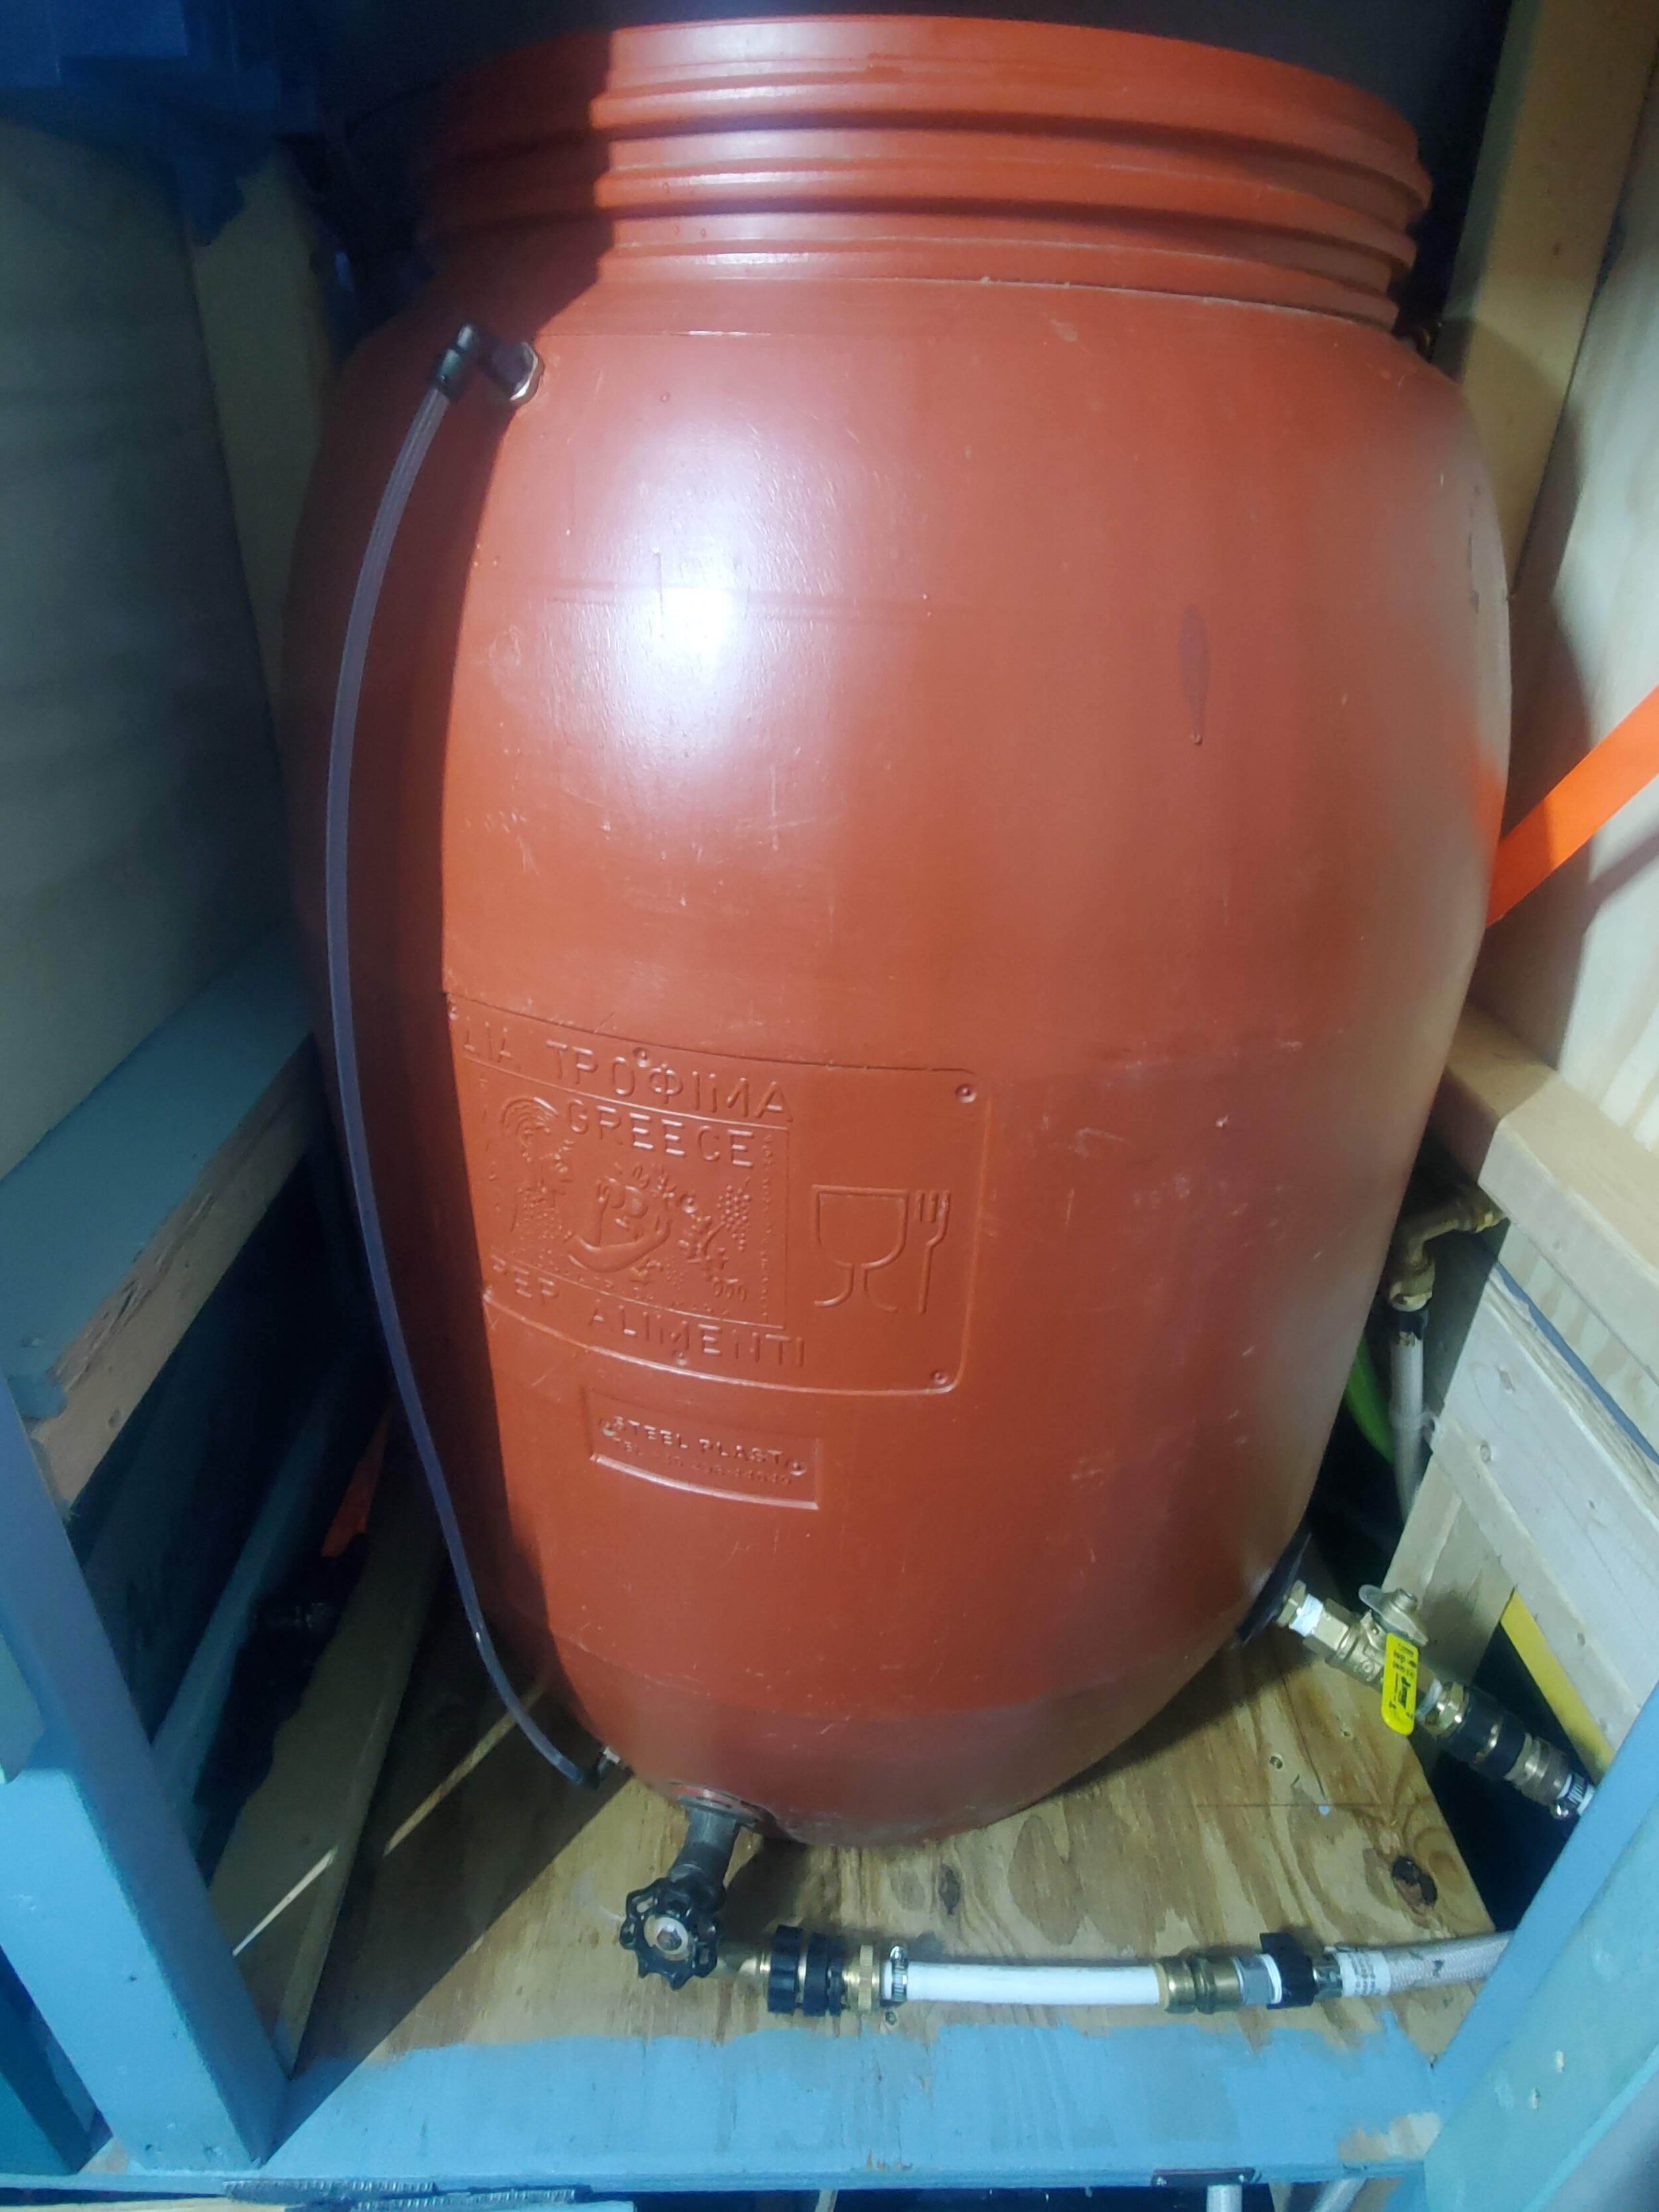
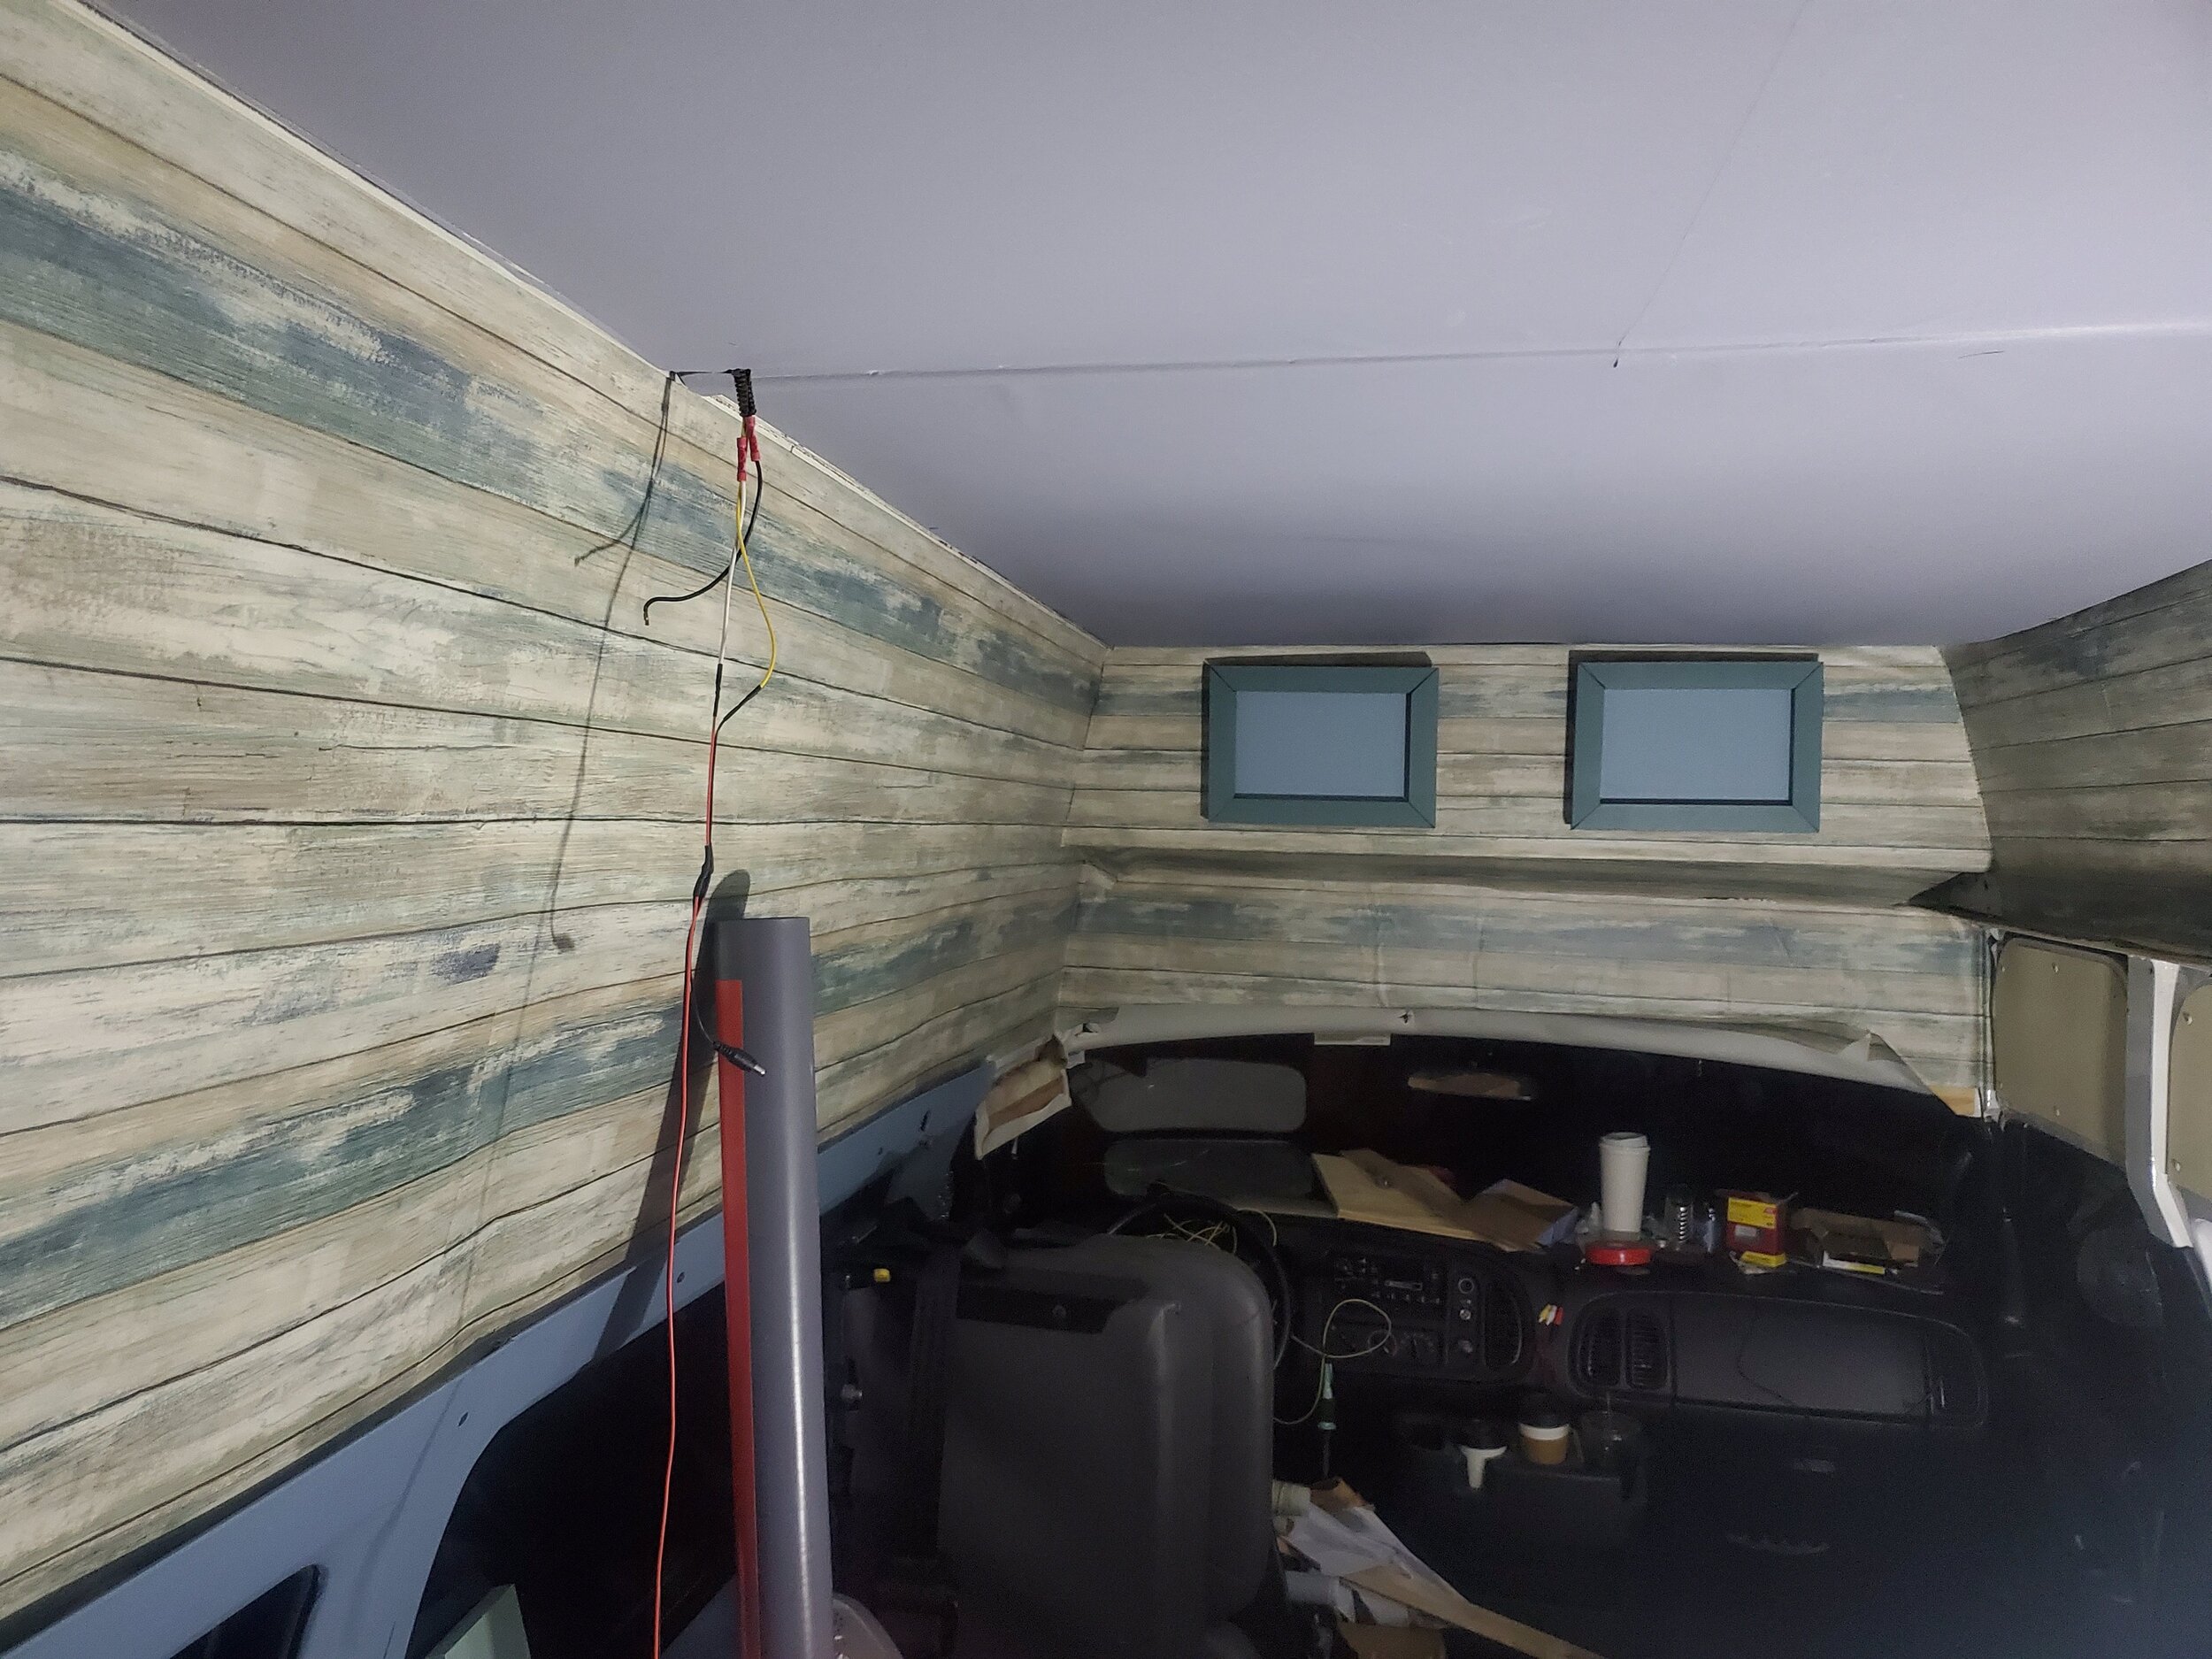
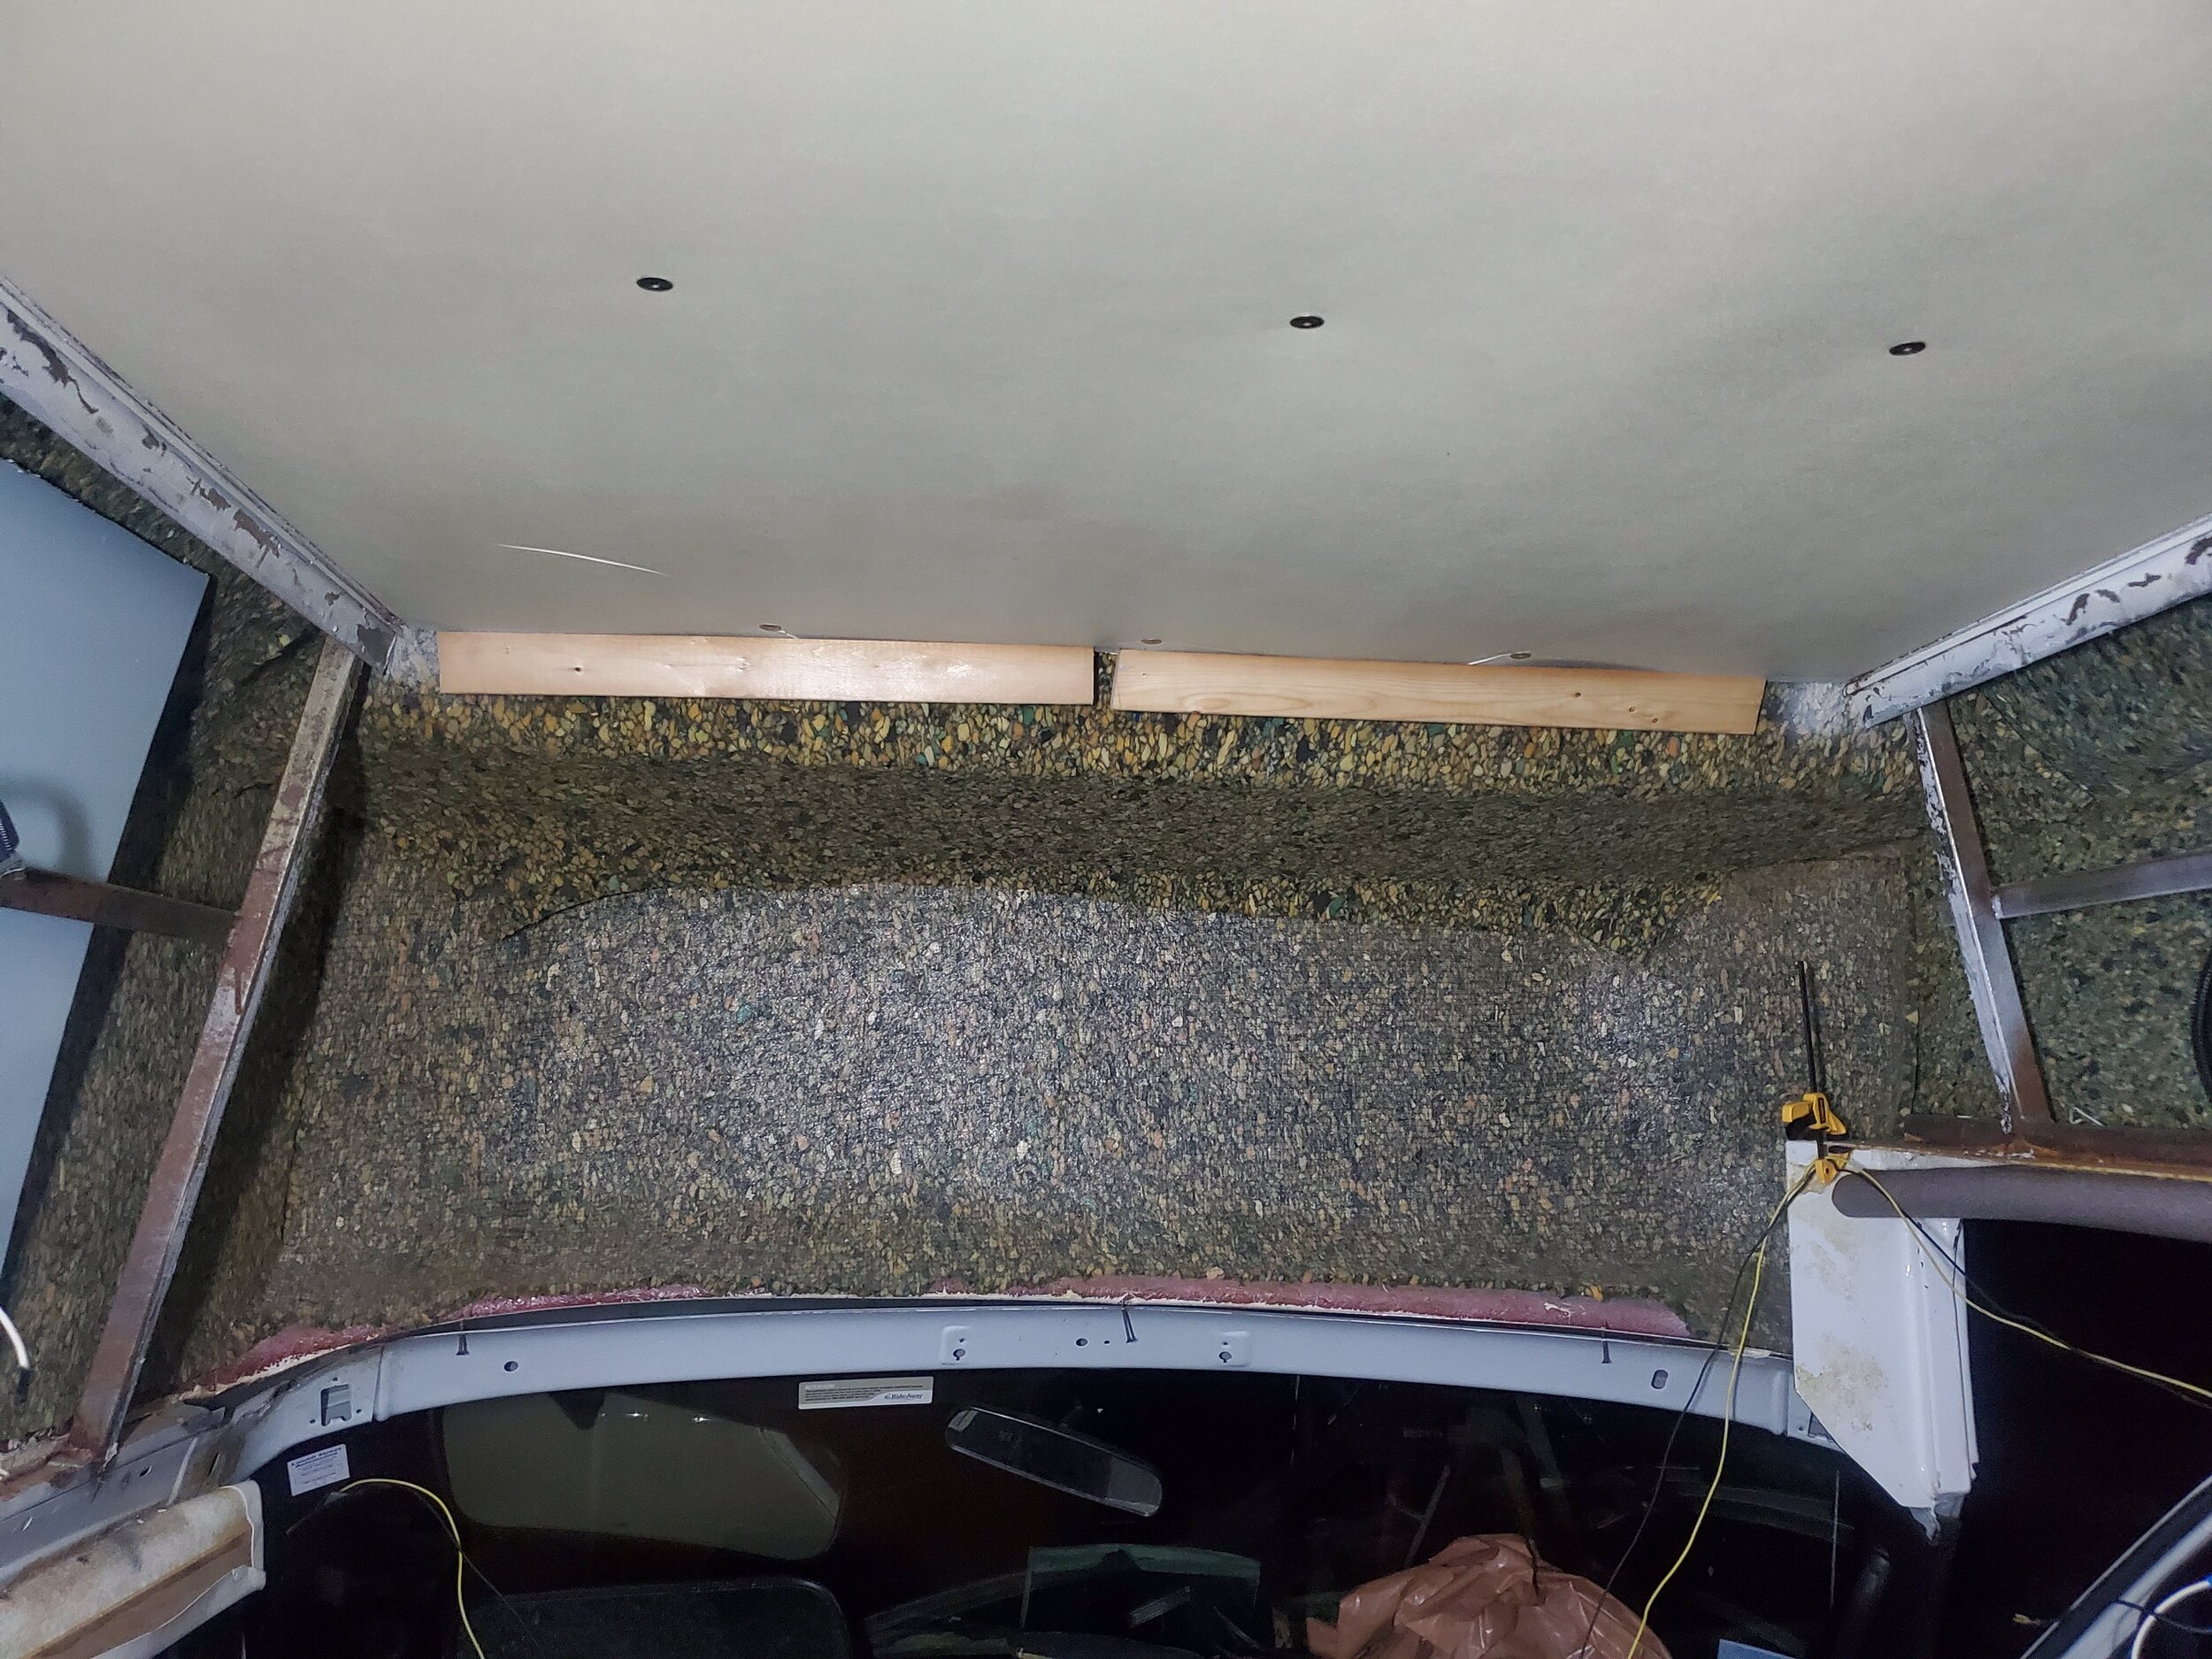
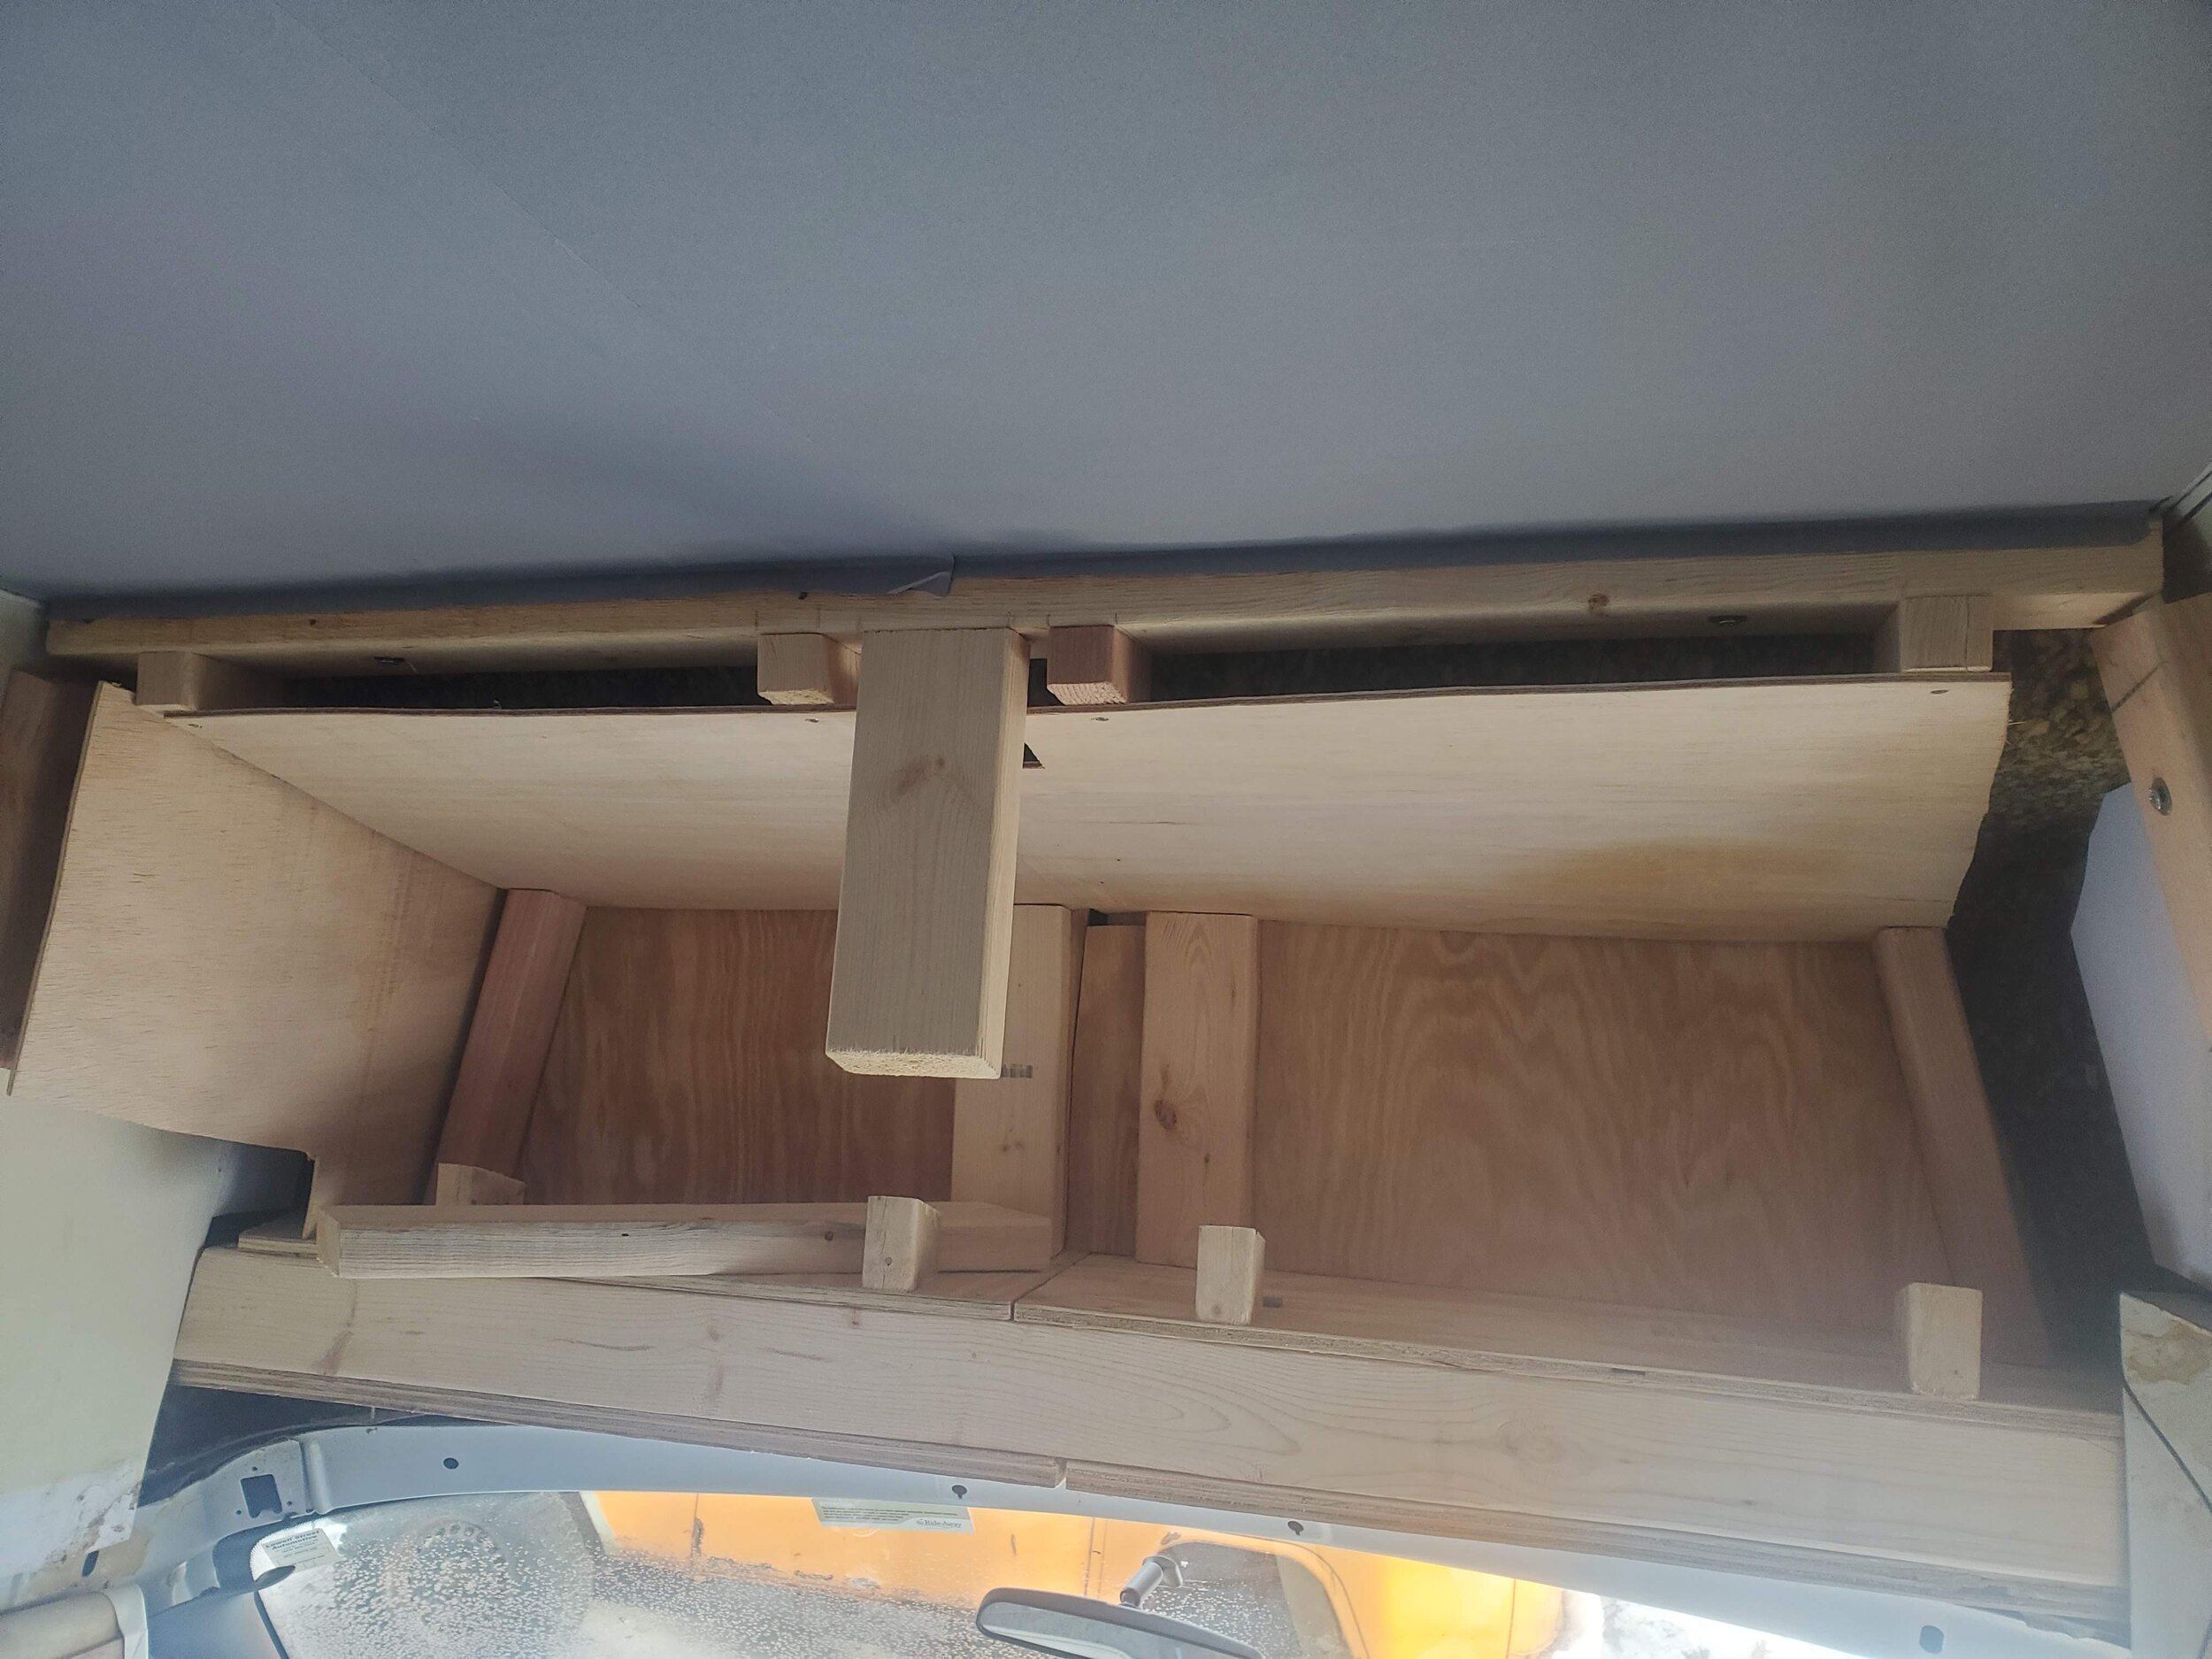
Once the heat exchange was mounted and all the PEX piping was in place, I could figure out where to place the tub drain. This drain is far from perfect and made up of some very mismatched parts in order to create something that would work for our very hairy circumstances. I used a large drain specific to grooming tubs and then attached a large additional hair trap. I used a split for a garden hose in order to manually switch whether we are draining into the recirculating “wash” bin or if we are draining into our grey water bin. Placing the drain I had to keep in mind that I still needed to be able to slide the bins out from the back of the van as well as needing to access the manual drain switch from the inside of the van. I first cut the hole for the drain in the plywood of the tub table and then used a giant metal punch to surprisingly easily cut a drain hole in the tub. I adhered a pvc shower liner to the plywood table and cut the drain hole out before gluing the tub in place and installing the drain. At the same time, I finally closed up the remaining back wall panel. I had to custom cut this piece, add supports to the side wall pieces as well as anchoring to a ceiling frame bar, then used the remaining pvc shower liner to cover the plywood in order to make a much sturdier and water resistant panel than what was there originally. I covered the wall panel with matching decorative vinyl to the other walls and covered the exposed pvc of the tub table with an additional protective layer of decorative adhesive tiles. I also cut shower tiles to fit the bottom and make for a more comfortable bath floor for little pup feet.

20210108_190652.jpg

The next major hurdle was the electrical system. In figuring out what I would need in order to run all our equipment, I had to take account of every single device aboard that would require electricity. I kept this in mind as much as possible when choosing equipment like pumps, trying to choose 12 volt products when possible (I have decided to replace one of our pumps for this very reason of drawing an excessive amount of energy). Not only did I need to know the energy usage of everything in the van, but I also needed to account for how much time everything would be in use in order to have a large enough battery bank to last us through a full work day. If this is something that you ever need to do, I strongly recommend getting your own meter to measure wattage used since specs written about products are notoriously inaccurate.

Volts

Amps

Watts

Min watt-hr

Max watt-hr

Heat exchange pump

12DC

0.7

8.4

8.4

16.8

Tub pump

12DC

7.5

90

90

90

Recirculating pump

115AC

5

575

862.5

Dryer

120AC

8.5 (11.3 startup)

1025 (1350 startup)

1550

1550

Clipper vac

115AC

0.8

92

368

Fridge

12DC

3.75

45

45

225

Light strips (3)

12DC

1.5

18 (54)

270

Light bars (4)

12DC

0.5

6 (24)

120

Thermostat

12DC

3

36

36

72

Fan

12DC

0.27

3.24

18

18

Shut off valve

12DC

In order to decide on what we needed in terms of batteries, I recruited help from my resident engineer. There are LOTS of options for this, and all are very expensive, complicated, and potentially dangerous, so I pulled the expert in to the purchasing process to figure out what would work best for us. We ended up ordering the components needed to build our own battery system. This is only something I could do because I have the help of someone who knows what they are doing. Buying the components individually means that it is ultimately easier and cheaper to repair should one component fail as well as gives us a bit more flexibility in future expansion. However, these really need to be assembled by an expert as the lithium phosphate batteries we went with (ultimately the best choice for a number of reasons) can be extremely dangerous if not handled correctly. Because of this, our final on-board battery assembly is not yet complete. In the mean time, we are using an old car battery we had that does not really hold any charge, but we have it hooked up to the van battery. So for now, we need to run the van in order to operate any electrical components. This is a perfectly fine temporary solution for us as in this cold winter weather we are happy to have the van’s heat on throughout the day.

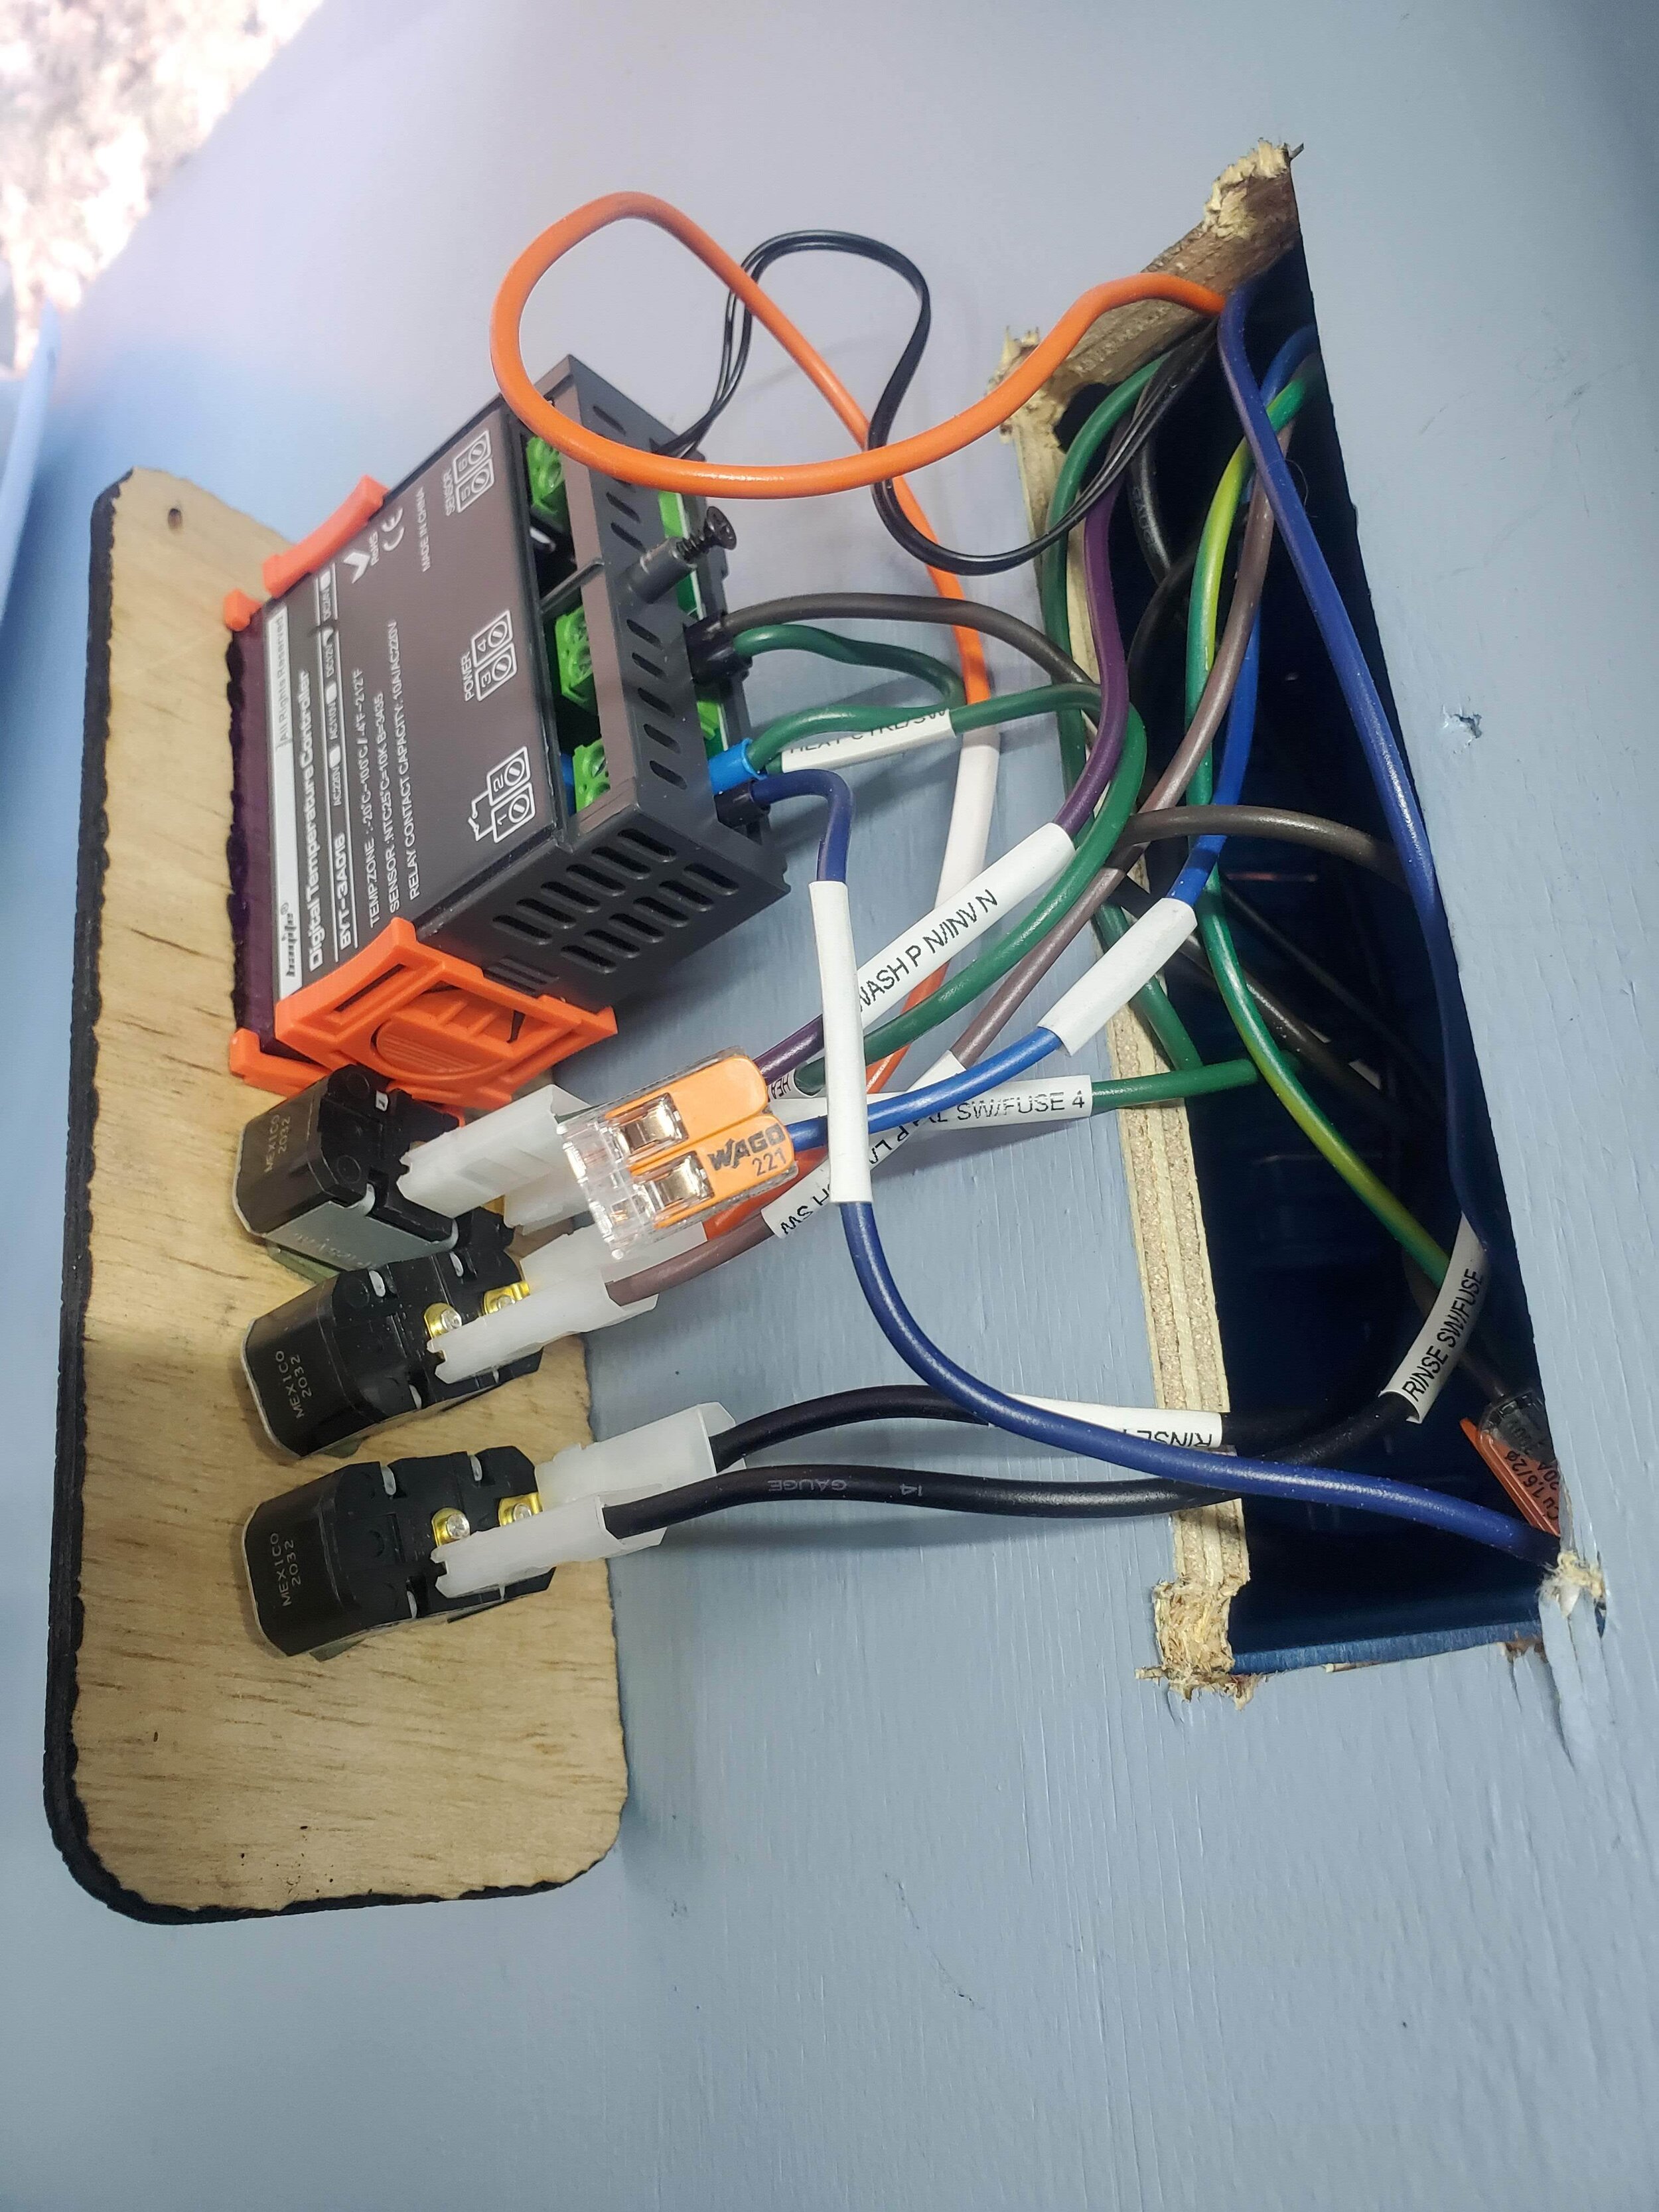
After making sure we would be able to run everything, I needed to actually wire everything up so it would work! With some guidance, I planned out a wiring diagram connecting all of my components to their corresponding switches and then to the fuse box/battery/inverter (there are also several circuit breakers involved in this system and it’s connection to the van battery for safety reasons).

WIRING DIAGRAM.jpg

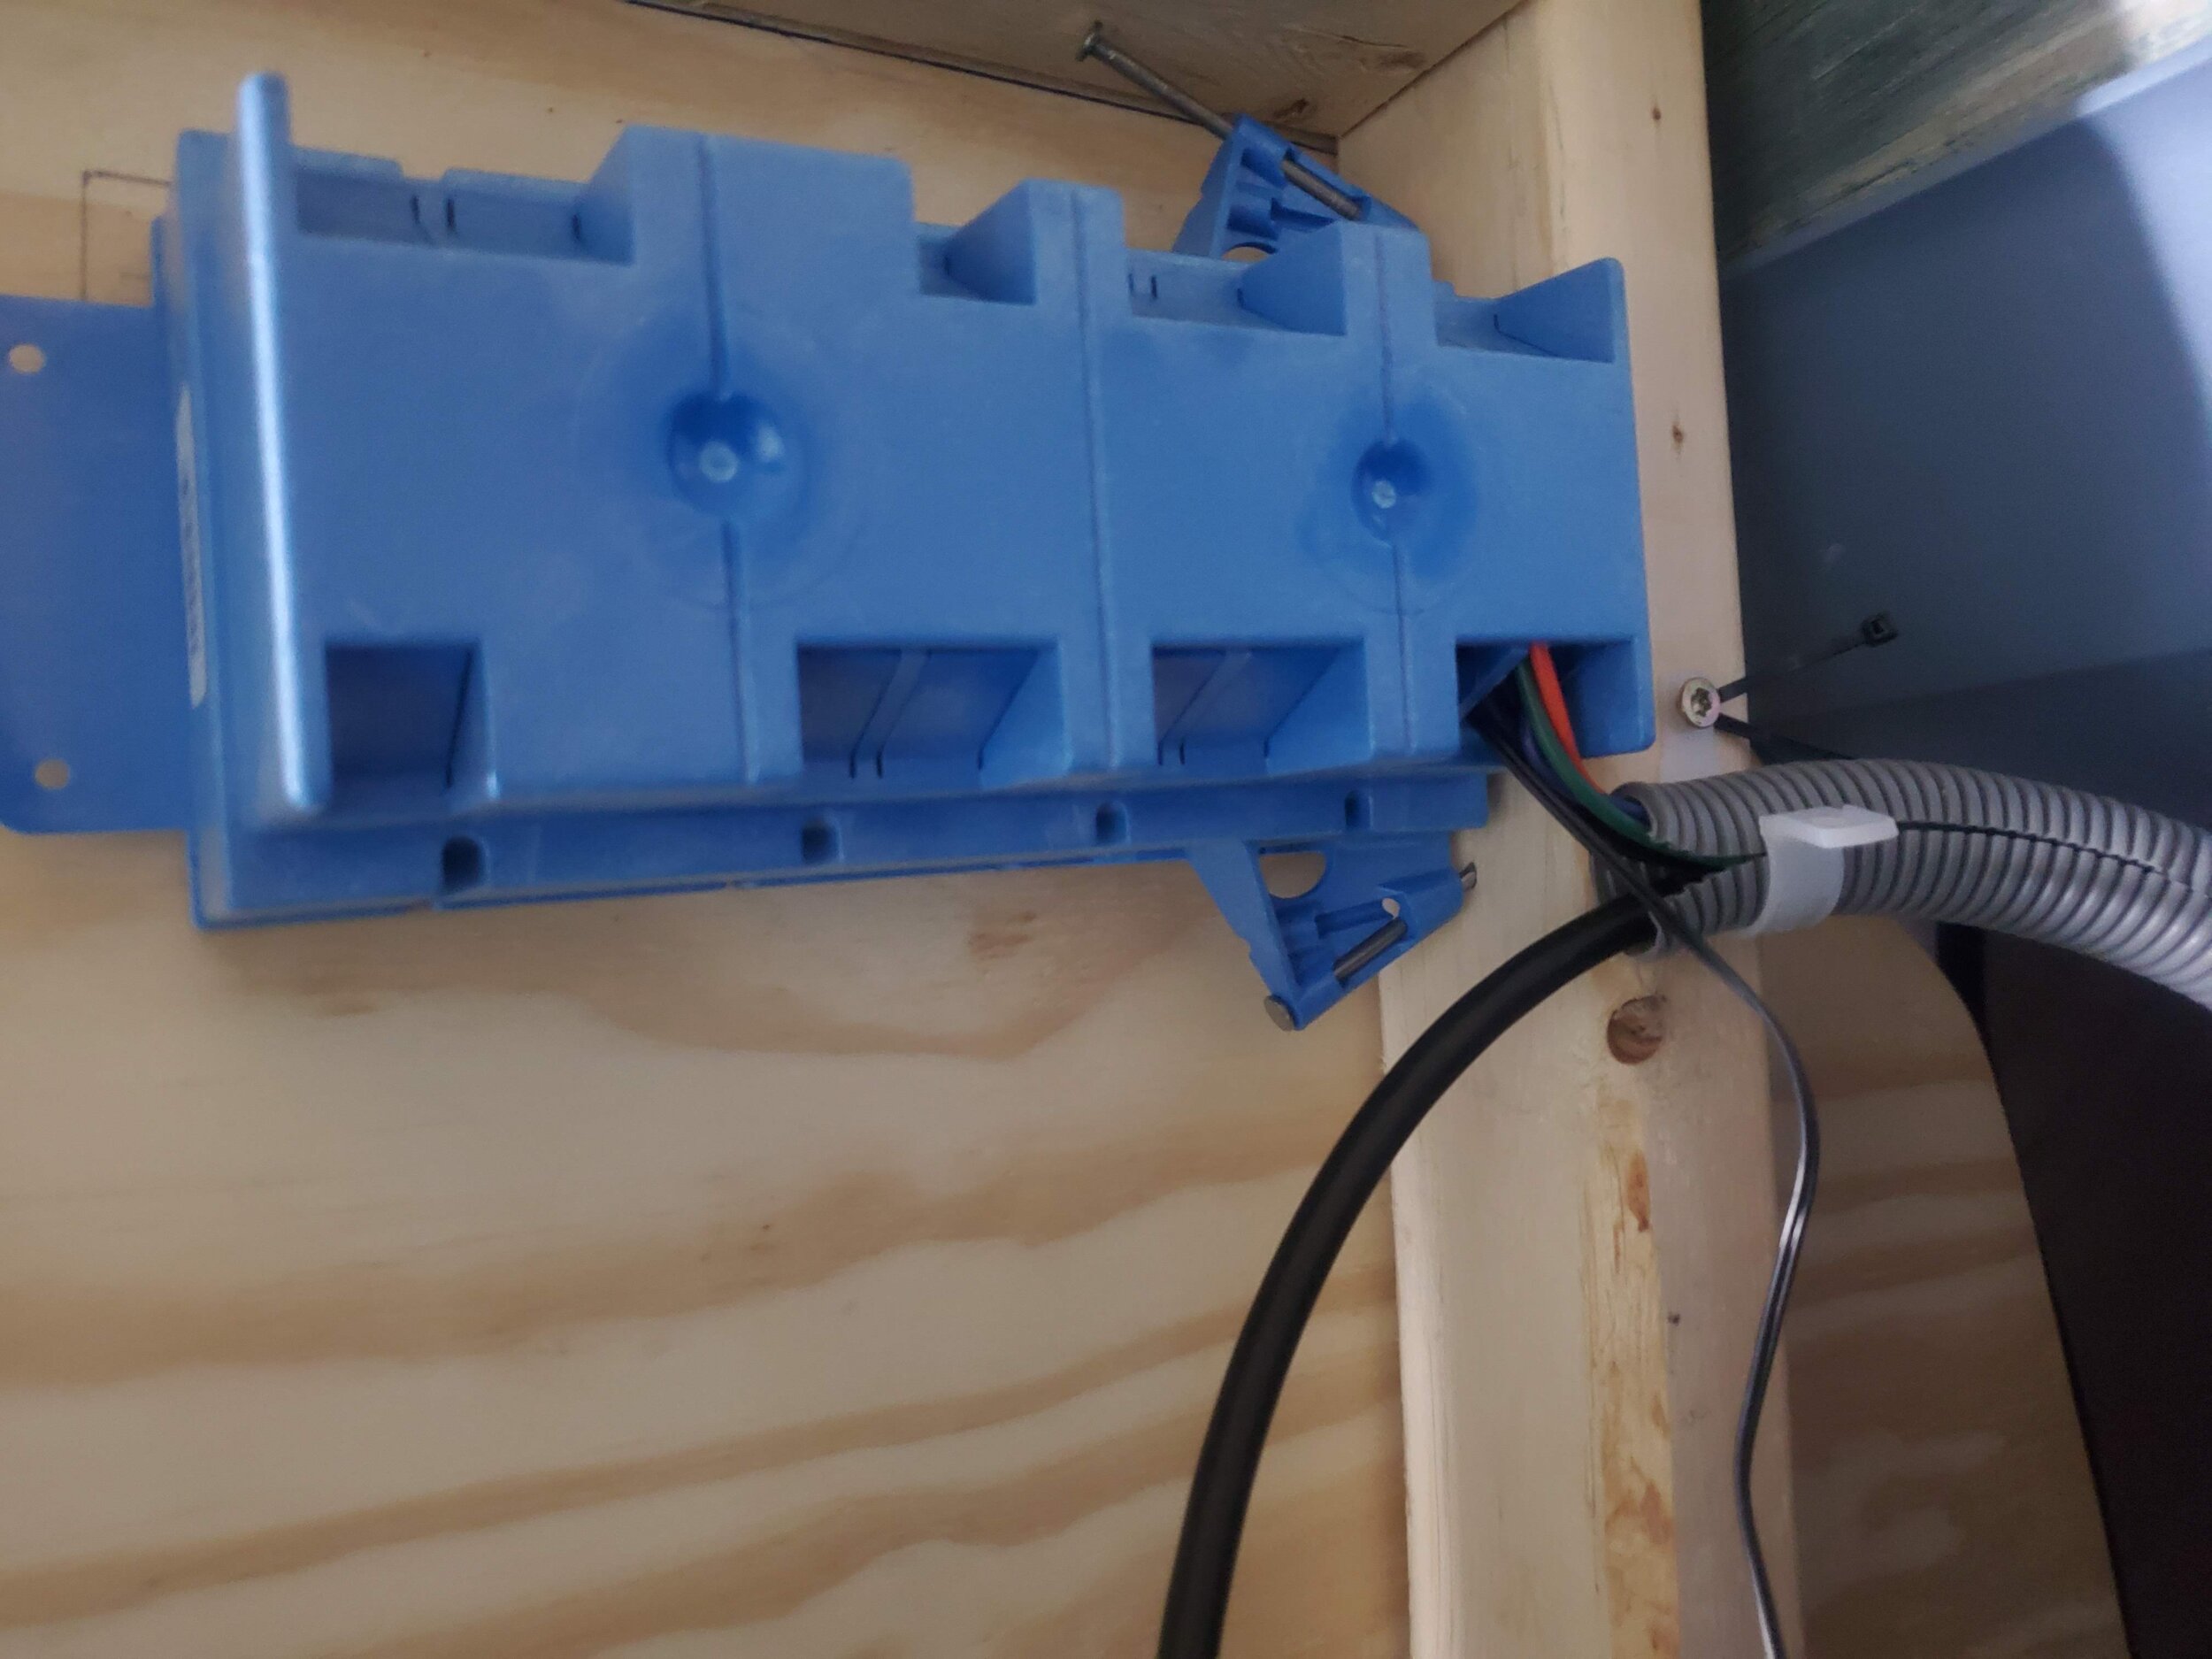
Once I understood everything that needed to be connected, I was handed a pile of novel tools to me and proceded to learn how to make appropriate electrical connections. While I was able to do most of this work on my own, it would have been impossible (and unsafe) without heavy guidance from someone who knew what they were doing. But, once I felt confident that I was using the appropriate gauge wire and knew what connectors needed to be on which wire ends I was able to pull most of it together pretty smoothly. At this point, I also took advantage of owning a laser cutter to design custom switchplates. Once I found a way to sneak a wire from inside the van to the battery (I squeezed behind the glove box and drilled a hole through the van hidden by a panel) I got help on the final few steps to get everything all connected to the battery.

While it’s certainly a huge sigh of relief to have everything up and running, there is still an enormous amount of pressure on my shoulders to keep everything running smoothly. There are a lot of things that I would have done differently if I had the luxury of time…or, you know, help. There are things I am still hoping to be able to improve to make it work better for us and there are a number of finishing touches that still need to come together. I also have a growing list of “things to ask for help with” that I am putting off until spring when I can recruit help with things like replacing the van’s rusted out steps. So for now, it’s not perfect, and it’s not done - but it’s alright and it’s working.

DIY Mobile Grooming Van Conversion - Completing the Build

Grooming Van ConversionMichela Mastellone-SchottmanComment

It has been a busy and tough month. The arrival of winter and excess amounts of cold and rain and snow has not only made working on the van more challenging, but also more pressing as the cold weather is also coinciding with an alarming rise in local COVID numbers so I’ve really been feeling the weight of the van’s necessity as a workspace pressing down on my shoulders. We are now able to use the van as a usable workspace, but my anxiety and stress around finishing the entire van in the next few weeks just keeps building. The construction part was the easiest - not easy by any means - but far more within my wheelhouse of skills. What is left is the plumbing and electrical system, of which I’ve spent hundreds of hours researching and planning. I have said from the get go that I don’t know anything about this yet it is still all on me to make sure it all works. So needless to say I’m exhausted and frustrated and panicked that I won’t be able to make this aspect of the business work that has unexpectedly fallen solely to me. BUT from the outside - yeah I guess it’s coming along.

20201110_192256.jpg

In the last update, I had completed framed out most of the build. It was at this point that I really had to give a LOT of thought about the order of operations to what was left to do. I had to figure out what sections needed to be fully finished before another piece was attached, as well as the added challenge of needing to have the space as a usuable workspace before finishing everything - which ultimately makes more work for me, needing to dismantle some things again in order to access behind some panels. Because I needed to finish components in a weird order, I went ahead and figured out a basic plan for what would be the finished look in the van.

20201116_111833.jpg

We decided it was important for us to have a fridge on the van in order to store the cheese and peanut butter we use as treats for many of our dog clients. I ordered a 12v fridge designed for use in campervans and built a drawer to fit it (and yes, this required some forthought to make sure I left enough space to accommodate this). In the future perhaps I will add drawer slides to this to make it a proper drawer instead of just a crate we slide out, but this will work fine for now.

20201116_164227.jpg

I started to complete what I could before needing to close up all the paneling (which I needed access to in order to decipher all the wiring). First thing to tackle with color was the doors for the cabinet under the grooming table and the water tank cabinet. These needed to be painted before being assembled.

20201120_203729.jpg
20201121_180048.jpg

Once I ran the wire needed for the backup camera I installed, and identified which wires I needed to reroute and reuse for the lights I will install, I was finally able to put back up all the interior panels: first the ceiling, then the upper walls, then the custom cut lower wall panels, then finally the refinished window frame panels that trap everything else in. Once the panels were up, I was able to attach and finish the grooming table, and could finally tackle the bulkhead cabinet (which like everything, couldn’t be finished until the wall panels were back up, and proved to be exceedingly difficult to build in the put together then take apart again style in which everything else was built).

Let me just say: I hate this cabinet with a passion. It is hands down the worst thing I’ve ever built and everytime I look at it I see all my frustrations with it. Every inch of it screams “I DON’T CARE”. The space is a weird shape. Beyond there not being a single right angle (or straight edge), it is also asymmetrical in every direction. So I just sort of gave up and built it as I went, installing rivnuts on the closest frame support I could find to attach it to and then just shrugged as I walked away from it, too overwhelmed with the rest of the project to care too much about this ugly cabinet. It’s fine. It will hold things. But I hate it.

I got some help installing the bench seat that we had removed from the back of the van. This provides a passenger seat in the van as well as a nice additional work space for us (yes, we often groom pets in my lap).

20201213_132052.jpg

With the seat installed I was able to tackle installing the floor and did a few other things to make a usuable work space for us.

20201214_151649.jpg

I can’t even express how much I wish this were all done, but it’s not - I have the most difficult and nervewracking parts left. My last 6 months have been taken over completely by this project that I had no intention of having solely on my plate and did not exactly volunteer for. Everything else in my life has been forced to the backburner until I get through building this van. This is not something that I’ve known how to do or have some magical innate skill or knowledge of. I have put in the effort, the time, and the struggle of taking on this challenge single handedly. Fingers crossed the next steps go smoother than I’m expecting as I work through the holiday, and we will have our promised bathing services to the appointments that are already filling up the books.

We have, of course, already hosted some pretty excellent and very adorable clients of ours in our cozy van space.


DIY Mobile Grooming Van Conversion - Starting the Build

Grooming Van ConversionMichela Mastellone-SchottmanComment

So it’s been a hectic few months. There have been all sorts of ups and downs the last while, from politics to pandemic to weather. Throughout all of it I’ve been hard at work pulling together this van as quickly as I can. In the last few weeks with unusually early snow and cold weather to an increasing number of local COVID cases, I’ve really been feeling the pressure of needing to get this done. Luckily there was small relief with beautiful weather and a light work schedule lately and just recently I’ve finally been able to feel like our future work station is coming together.

The process of the van build itself has been interesting and slightly overwhelming. I have been glad that I have spent all the time I have coming up with plans for every aspect of the van since the build is turning into far more of a puzzle than I would have expected.

I had help getting the chairs and seatbelts and wheelchair lift removed (not an easy job). I removed all of the interior panels and upgraded the insulation. I then started to construct the interior work space. Even though I am pretty comfortable designing and building custom pieces, even this step has come along with surprises.

20200918_090736.jpg

I started by constructing the table to set the tub on. This is primarily supported by wood struts I bolted directly to supports of the van body. While building the framing for the tub table I had to account for the doors that will be added to access underneath the tub from inside the van. I also had to make sure to keep enough space underneath the tub to house the drain plumbing as well as the recirculating bathing system and gray water container. The back supports also need to allow enough space to pull those containers out of the back doors from outside for maintenance. These may ultimately need to be down sized if I need more space when setting up the drain plumbing and the water heating system, but that’s a hurdle to jump when I get there.

20201024_165221.jpg

I made a cardboard template for the piece of plywood to make the tub table top so that it fits snugly against the curve of the van walls. Because I was building the cabinet to house the water barrel simultaneously with the tub table, I needed to cut the plywood table top in half in order to put it in place (the van walls slant in so the width of the table is not able to go over the height of the water cabinet). Ultimately this worked out best anyways for several reasons. The cut down the middle will be irrelevant once the table is fully assembled with a layer of PVC shower liner adhered to it and it made the table much more manageable for sanding and fine tuning the curve for a perfect fit. It also makes my life easier because the table top can not yet be fastened down since it traps in the plastic framing pieces around the windows which can’t be fully fastened back into place until I’ve finished wiring that will need to be tucked behind the framing.

20201101_133538.jpg

The framing around the windows and the upper wall panels have proved to be an annoyance to have to consider in all of this: I am not yet ready to do all the wiring that will need to be hidden behind the panels and I don’t want nicely finished panels to risk getting damaged during construction. This means I need to construct everything in pieces so that I have everything all ready to come together at once after all components are complete.

The window frames dictated the shape of the framing for the water barrel cabinet, so that they were still able to be removed after the cabinet framing was constructed. My main concern for this cabinet was the weight of the full water tank (over 400 lbs), so it was important to make sure I could attach as many points as possible directly to the van. The water barrel has to sit over the wheel in order to maximize our usable floor space and luckily there had been a chair mounted over the wheel, so I removed the chair from the mount but left the mount in place in order to offer a great structural support to bolt the plywood base of the water cabinet. I inserted some rivnuts into the van frame so both sides of the cabinet frame are attached directly to the van. I still need to figure out a way to strap the barrel to the van - conveniently there is a nearby seatbelt bolt so I may take advantage of that.

20201110_192256.jpg

The grooming table takes up the rest of the space left between the water cabinet and the large side doors. Because this whole van build is a puzzle, I constructed the frame for the table and then clamped it in place temporarily in order to cut the piece for the grooming table top. I thought I might need to make a type of PVC pipe bumper along the back edge of the table along the window to prevent fur from falling behind the table into the area in which we will house our fridge, batteries, and inverter. But I was able to cut the piece precisely enough to have a pretty tight fit along the window, so the bumper may be unnecessary.

All of these cabinets will be closed in with access doors that I need to finish constructing and I still need to tackle building the bulkhead cabinet. I have a pretty clear design in mind but won’t waste my time trying to come up with a drawing of it since it is an extremely weird and asymmetrical shape and I am not that great at drawing programs. I have spent a ridiculous amount of time though just staring into this odd space and I think I have a good design that will utilize as many points as possible to be attached to the steel bar frame of the van top. The design for the bulkhead also has to incorporate a way to re-attach a vinyl piece to finish off the interior of the van along the top of the windshield.

20201110_192451.jpg

There are lots of other components to the van build that I am simultaneously working on. I am putting together all the pieces of the plumbing and electrical systems. This has involved lots of research and learning on my part - but I guess now at least I know how to identify and measure different thread types? I’m gathering everything I need to make it all work - all the way down to switches for the LED light strips, but I think these are all things I will cover more once it’s closer to being complete - hopefully soon!!

DIY Mask & Key Organizer

DIY & ProjectsMichela Mastellone-SchottmanComment
diymaskkey.jpg

My mom’s birthday was last month and it seemed like a good opportunity to throw together a project I’ve been thinking about for a little while - a mask organizer! With masks being a daily necessity now, I’ve been finding them hanging around the house everywhere yet am still always scrambling around looking for a clean one. I imagine I cant be alone in this new annoyance.

20200817_095850.jpg

This project came together so well and was so easy that since creating the original for my mom’s birthday, I have made 2 more for my friend and I. Use whatever scrap piece of wood you have laying around. I started off by using leftover paint from house projects to put down a base coat. Once that was dry, I decided to use a toothbrush to splatter paint the background. Originally I did this to correspond with my parent’s front hallway that has remained unchanged from when I was given free reign to splatter paint it as a child, but the result was so great I repeated it for the other ones I made as well.

20200905_152720.jpg
20200816_200004.jpg

I chose to custom mix my color pallet since I only own a small basic collection of acrylics. Using the same pallet, I splatter painted the base board by running my thumb over a toothbrush. I then did base coats on a variety of sizes of clothespins (I found that using toothpicks as stands was the easiest way to do this). After the closepins had a dry base coat, I made a variety of patterns using straws, brushes, and toothpicks.

20200906_211407.jpg

Once the splatter paint had fully dried on the baseboard, I added nails to the sides, driving them in most of the way but leaving 1/4” or so sticking out and able to tie a string around. I did not bother to measure these out for even spacing as I don’t really care, especially as the string will be tied down in a randomized fashion. But if you are the kind of person who likes to measure, go ahead and do that.

20200817_085618.jpg
20200817_093114.jpg

I had a variety of colors of hemp cord which I chose to use for this. The hemp cord seems seems like the right strength to use for this - i think thread would be too fragile and yarn would likely sag too much under the weight of masks. Any kind of twine would probably also be appropriate for this, and even embroidery thread might work. I tied the cord as tightly as I could around the nail heads before hammering them down over the knots, securing everything. I left tails on the string and taped the extras to the back to give a clean look on the edge. I also attached a picture hanger to the back for ease of hanging.

20200907_152335.jpg

On the original mask holder I attached a variety of hooks to the bottom edge to be used for keys or extra masks, gloves, etc. When I started to work on a mask holder for myself, I decided I wanted to attach a small jar in order to contain the small silicone fasteners I’ve been using to tighten the elastic ear bands on several of my masks. I also added a large hook (maybe for a hat?) that I had laying around as well as a few key hooks underneath. For my friend, I thought the larger hook I had was the perfect spot for a dog leash, so I added an additional jar on hers that perfectly fits a roll of doggie poop bags!

20200923_081437.jpg

These were so simple and fun to make, and something that practically anyone these days could find helpful. Since beginning to use mine in the house, I’ve realized this is really multi-purposed. The clothespins are perfect for quickly storing things like receipts, notes, mail, etc! I’ve already got a few more for friends planned out - maybe playing with dripping paint rather than splattering? Really you can customize this project in infinite ways. Not into painting? - modge podge some patterned paper or fabric to your board and use plain clothespins or whip out your sharpies to add some simple designs!

DIY Mobile Grooming Van Conversion - PLANNING

Grooming Van ConversionMichela Mastellone-SchottmanComment

It’s happening!! Our kickstarter is up and running and we are in the process of raising our goal of $10,000 to accomplish this conversion. While this is going on, the plans are well underway. This has been a somewhat overwhelming, but very exciting project to fall into my lap.

For a very long time I have been extremely interested in tiny homes and other small and or/mobile dwellings. I also have a good deal of experience designing and building my own furniture. Throughout this past year often in my workday I have pondered the possibility of a fully functioning grooming van and felt like that was probably something I would enjoy/be capable of tackling.

I did NOT expect it to actually happen. This entire van opportunity has been a whirlwind. I couldn’t be happier with the vehicle parked next to my house, slowly being gently dismantled and altered and upgraded, but it’s been quite a learning process.

Turns out, tiny houses, RVs, and campervan resources, which I was largely counting on, are not actually that helpful in this project given our unique needs:

  • We need a decent amount of water on board to give multiple baths in a day. This water must be somewhat heated (not hot, but a heating system is still necessary).

  • We need a considerable amount of electricity available to run our grooming equipment.

  • We are traveling from place to place throughout the work day

That’s not to say I was not able to find very helpful resources, I just had some special considerations to keep in mind. I especially found the youtuber, Greg Virgoe, extremely helpful with posts from several years ago detailing a sprinter van conversion. He has a background in engineering and is very skilled at breaking down complex systems into understandable terms. I also conveniently live with a partner who is an engineer with a passion for VW campervans (and has an awful lot of relevant know-how, skills, and useful tools). With a great deal of time utilizing all of these resources, I've come up with a PLAN!!


To start: PRIORITIZING. The most expensive part of the entire conversion is the electrical system. I was very surprised doing research into different options for mobile grooming units to find that many utilize standard propane generators. I’m really not sure how they are able to incorporate enough ventilateion to feel comfortable with that. I knew that I did NOT want to have to rely on a propane generator to function in our van. We will be running our system off a battery bank that will be charged as we drive/overnight at home (or perhaps with an extra alternator to independently charge the batteries as we drive/solar panels mounted on the roof). I did some rough estimates of what our electrical needs would be so that I could get an accurate budget and sense for what our grand plan was to make sure we could accommodate everything we need.

At this point, now that the system is generally planned out, it is being deferred until later on in the conversion process. The batteries and inverter system are the bulk of the cost so will have to wait until our kickstarter is complete and those funds are available. I am also going to need to recruit help from my resident engineer to get everything safely hooked up, so it is a project to tackle at a later time.

In deciding how to be able to run our entire system off solar energy - the water heater was a bit of a challenge. Water heaters obviously draw an enormous amount of energy. As a more sustainable option, that works given that we generally are driving in between appointments: we will be utilizing the heat generated by the car engine. Conveniently, the van’s radiator is easily accessable from the interior of the van, close to where the plumbing system will be established. I will divert the radiator hoses to a plate heat exchanger which will heat our 50 gallon water tank to the temperature that we set, automatically shutting off the system once the water has reached the desired temp. I will talk more about the details of this system later as I set it up.

van plumbing.jpg

There are a LOT of moving parts in this conversion. For the most part, I feel confident that I have a well thought out plan. I can tackle the majority of it on my own and have a small list of tasks I need some more knowledgeable and skilled help with, but luckily I have those resources available to me. I won’t bother discussing some of the more straight forward alterations (like installing a backup camera and monitor), but I am gearing up to start insulating behind all of panels I have removed and then to start some actual construction!


Before our kickstarter is complete, I am beginning to tackle the parts of the van that are relatively inexpensive but very time consuming. I have taken a lot of time figuring out the plumbing system in the van that will work best for us and now that I feel confident that everything will fit in our confined space, I can start some of the construction!

I removed all of the interior panels from the van to see what I was working with. This has opened up the van to not only allow me to insulate better and close off the interior to better suit our needs (keeping in mind that we will have a tub in the van so water damage is a concern) but also let me clearly see the van’s internal structure and areas where I am able to secure materials. Removing the panels also allowed me to see that a standard roof vent/fan will not fit our van and I will need to come up with a creative solution (more on that later).

I made a detailed model including the internal metal ridges in the van and points at which I can attach wooden struts. I then came up with a rough idea of what the table to place the tub on will look like (with space underneath to accommodate our bathing system and grey water tank).

This is different than any other building project I’ve done before. I generally plan, plan again, then do another plan and have basically all the details figured out before I even purchase materials. This time, that is not the most practical way to go about this. I’m primarily going to build directly in the van and adjust and figure things out as I go. This is mostly because the van is a weird shape (working around curved walls, windows and wheels) and I have some strange shaped things that need to be accounted for, like our large water barrel. I am taking advantage of one of the old chair mounts that I left in the van in order to have a sturdy platform for the heavy water barrel to safely sit over the wheel.

Okay - with all this planning done, it’s time to start some building! Updates to come!

Don’t forget to check out our kickstarter if you are able to donate any to this exciting project!!

DIY Mobile Grooming Van Conversion - The Beginning

Grooming Van ConversionMichela Mastellone-SchottmanComment

About a year ago, I began a big new adventure: I started a mobile pet grooming business with a close friend of mine. She has been a talented groomer for the last 17 years, and with my 15 years of animal care and expert handling skills, we make a pretty phenomenal team.

I was hesitant at first, starting this journey, as I never had much interest in grooming and was coming out of a toxic work environment in which I repeatedly had drilled into my head that my experience and skills are worthless and my personal integrity was attacked. Deciding to continue in the animal care field was difficult, even though I have enormous skill and passion for it; I felt so defeated. Quickly though, with the support from my friend and business partner, I realized that finally I had fallen into a job that felt like the right fit. I have yet to say that I have any sort of passion for pet grooming, but I do have a skill for handling all sorts of animals (especially “difficult” ones with less than perfect behaviors) and I have been able to experience for the first time a relaxing, stress-free work environment, where I enjoy my entire day and my work ethic, skill level, and personality traits are recognized and appreciated.

Our business, Wild Rover Pet Grooming, has taken off faster than either of us expected. We have an amazing group of clients who are so supportive of what we are doing. In fact, the incredible support we’ve received from our Wild Rover family has encouraged and allowed us to take the next steps in growing our business: in addition to recently being able to hire on my best friend part time to assist us with administrative work we are drowning in, we were also able to get a VAN!!

20200723_193706.jpg

Having a full functioning mobile grooming van means so much to us. It will allow us to offer more services (like baths) and to have some of our favorite products available for sale, and perhaps most importantly, our OWN SPACE. Until now, we have been reliant on the generosity of our clients to help find a quiet space in their home where we can set up our grooming table and plug in our clippers. Since the dawn of the COVID era, this has become increasingly more uncomfortable and challenging for everybody. Not only are there benefits to our health to have a designated work space of our own, but I’m excited at the idea of feeling slightly less scattered and transient (not having to throw all our tools in a bag and sort through everything again at the next house is going to be an enormous sigh of relief and huge time saver).

20200725_192206.jpg

So a little more about the van: we love it. We found a van that fits our needs perfectly - super high ceilings comfortable to stand up in all day, and plenty of windows that open to put my slightly claustrophobic mind at ease. It is an older vehicle that has been maintained meticulously with very few miles put on it. A very kind gentleman was selling it for a wonderful price, and even more amazing - one of our favorite clients was incredibly generous and covered the cost of the van for us!

Now that we have the perfect vehicle - we have to convert it to fully function as a mobile grooming unit. That project is primarily falling on me, which is exciting but also a little overwhelming. There are lots of different things that must be tackled - beginning with dismantling seats and the currently installed wheelchair lift, to installing a tub with a working plumbing system and an electrical system that allows us to run all of our necessary equipment while parked at a clients house. I have spent countless hours researching different systems and am lucky to have access to tools and some expertise to help me sort through some of the logistics.

van+conversion.jpg

I started by making a scale model of the van (primarily to be able to help explain the picture in my brain to other people involved). There are going to be many steps of this project, starting with our Kickstarter campaign to raise money to fund the conversion.

This post has gotten longer than intended with all of my excitement about the thriving business and the upcoming changes. I will stop here for now with the promise of updates as the conversion progresses and the van gets even closer to being the work place of our dreams.

van+outside.jpg

DIY Board Game

DIY & ProjectsMichela Mastellone-SchottmanComment

I realize this is a strange time to post an idea for a party game, as there should certainly be NO PARTIES in the forseeable future. However, there is continued interest in the game I created and I have had multiple inquiries from people interested in making their own versions. So I figured I would finally get around to posting about my updated version of the game and make available pdf downloads for those who are interested in creating their own version. I also feel like some aspects of this game may lend itself well to a virtual zoom-party type game, so perhaps someone with more time on their hands than I currently have will take some of my ideas and run with it!

If you are one of the few who has been following this blog for awhile, you may recall the fantastic DIY Bachlorette Party Game I created for my best friend's wedding. Since then, there has been high demand in our group of friends to come up with excuses to play. This is by no means a casual game, it is something that you should curate a hilarious group of people to participate and can most certainly make a party on its own. We have now had the oppurtunity several times to play the original game with new groups of people, and while it has always been super fun and a huge success, it has allowed me to think of some key details to change to improve on and make myself my own (second edition) version!

As a first step, I decided to redesign the card deck. I came up with some digital designs for 2 sided cards, making the cards a bit smaller this time around. There are a lot of ways to accomplish designs like this, with a huge scale of technical skill required. A very basic way to do something like this (the technique I used to create the designs for the origial game deck) is to hand draw designs, scan, and then import into the program of your choice to rescale/manipulate to fit your needs. This time around, I simply used the open office drawing program to make designs using free symbols and images available. Gimp is also a great program (very similar to photoshop, but free) for simple digital designs/text art.

card samples.jpg
card samples2.jpg

There is a mixed game deck with 4 categories: Head-To-Head, Would You Rather, Guess Who, and Challenge. There is a separate deck of Penalty cards. For this version, I opted to get rid of the penalty wheel and instead increased the number of cards in the penalty deck and I decreased the number of cards in the game deck, keeping the best of each category, as we never got close to going through them all in a game. I printed the cards double sided on colored cardstock (I used the printer at work so unfortuntely some of the cards are a little out of line). After using a paper cutter to cut out all the cards, I rounded the corners with a paper punch and then laminated them and did a final trim of all the cards. 

20180226_101549.jpg
20180226_133950.jpg
20180226_155234.jpg

I altered the rules only slightly in this new version, mostly adjusting scoring in order to help game play move along a little quicker.

20180227_140404.jpg

As players gain and loose points, they move their pieces around the scoreboard. To create this scoreboard, I made a tri-folding board out of scraps of chipboard (cardboard would have worked fine too). I decided to cut the chipboard to a size that allowed me to utilize an empty shoe box as a game box. I made hinges for the trifolding board using folded piece of thin chipboard and duct tape. I then wrapped the board with a burlap patterened wrapping paper, making sure to carefully fold the board as I pasted the paper down, ensuring that the board would continue to fold well without ripping the paper. 

Each score on the scoreboard has a corresponding rule. The rule must be followed at all times while a player holds that score. Again making an alteration to the original game, I cut the scoreboard down to 20. I printed out my scoreboard scores and rules on cardstock. I mounted the rules on the board boardered by patterened paper and used the cardstock numbers as stencils to cut the scores out of cork. In retrospect, I should have planned better and either printed the rules in smaller text or used a larger board, since it is a bit more crowded than I would like.

20180227_212833.jpg

If it any point a player does not follow their rule, they must draw a card from the penalty deck. These cards range from simply losing a point, to gaining points but needing to follow multiple scorboard rules, to sometimes silly/embarassing (though none too mortifying) penalties such as hula-hooping with an invisible hoop. 

20180228_134753.jpg

I did a test run of this version of the game with a few friends. It does in fact work just fine with 3 people playing, though the pace of the game (and the entertainment factor) definitly benefits from a larger number of players. This game is great for a group anywhere from 4 to about 12 players (so maybe not the best entertainment in this COVID era). Obviously, the more players in the game, the longer the game may run, but higher scores can be attained so players move faster around the board. It's a super fun game to pull out towards the end of a party (often with varied levels of sobriety). One benefit is that players are involved in the game regardless of whose turn it is. The only limitation to the number of players is the number of game pieces, but anything can be used for these. I have a fun collection of plastic animals/monster finger puppets that we've used, but anything small enough to have multiple players on a score will work just fine.

If you would like to try out making a game for yourself, I now have pdf files with the cards, scoreboard and rules available to purchase and download.

DIY Face Masks

DIY & ProjectsMichela Mastellone-SchottmanComment

Unfortunately, ‘tis the global pandemic season when everyone with a sewing machine is cranking out masks and distributing them as widely a possible. I had requests from my own family to make them some masks to help during this time, so I wanted to find a design that featured all the recommended safety precautions as well as one that was a one-size-fits-all design that was relatively comfortable to wear.

DIY face masks.jpg

A word on masks: the CDC recommends that ALL people in the US wear a face mask when out of the house. At this point hopefully everyone is onboard with the effectiveness of wearing masks, but even if somehow you are still skeptical as to the safety feature: there is significant value even in just the social signaling and destigmatizing of masks. If you go into the grocery store and everyone around you is sporting a mask, it signals “Hey! There’s something major going on!” and peaks your awareness and level of caution which is a GOOD THING. But seriously, WEAR A MASK. Most stores rightfully will not allow you to enter without a mask and several cities have impletmented fines for people seen out and unmasked. Masks are here to stay for awhile, so perhaps it’s time to pull out the sewing machine again and make a few more masks to add to your rotation.

There are dozens of tutuorials available online now for a variety of different styles of masks. If you are someone who would like to produce masks to donate to local hospitals (if your local hospital is still in need) - please check first with the place where you would like to donate as many places have very strict guidelines as to what they can accept. I was surprised though as I looked through designs that it was actually somewhat challenging to find a tutorial that gave me simple measurements rather than needing to go through the process of using a template. So I was left to do a little bit of trial and error to find a design and size that worked.

mask cuts.jpg

You will need a single piece of fabric 8”x18” for the mask. Everything I’ve read has suggested using only 100% cotten for this, with the tightest weave you can find. I have plenty of cotton quilting fabric so I used that. Then you will need ties: if you have bias tape, this will save you the time of creating your own, or you could probably use a material that does not fray (like a t-shirt) and use those as ties to avoid needing to sew down the entire length and just attach to the sides of the mask. I settled on making my ties 38” long to allow for a larger range of sizes.

20200410_102221.jpg
20200410_103100.jpg

I first ironed a double folded hem on each short end of the mask. I then inserted a twist tie into each hem and stitched it shut to allow the wearer to squeeze the mask to the bridge of the nose for a tighter fit. In retrospect, an unbent paperclip may have been a better choice, providing even more structure around the nose.

20200410_101945.jpg

Once twist ties were in each end of the mask, I folded the mask in half with the right sides facing out and ironed into several pleats. The finished mask should have a height of only 3.5-4”. This height is important for how closely the mask will fit to your face once tied.

20200410_105414.jpg
20200410_105513.jpg
20200410_105535.jpg

For the ties, I essentially created my own double-fold bias tape (folding into quarters so that raw edges are on the inside). There are many ways to finish the ends; I simply snipped away some of the excess fabric, then folded the ends in to create a square end.

To attach the ties to the mask and finish it all up, simply place the raw edges of the mask into the fold of your ties and sew down the entire length of the tie. The top portion of the ties must be longer in order to comfortably tie around the upper, larger part of a head. The bottom ties are tieing around closer to the neck. About 22” above the mask and 11” below works nicely.

To fit the the mask to your face you should have the downward facing pleats on the outside. I found it easiest to first squeeze the mask to fit my nose and then adjust the mask to the rest of my face.

20200409_105433.jpg
20200409_105327.jpg

You’ll notice this design also leaves the top hem of the mask open, like a pocket. This is so an inner filter layer can be inserted. I highly recommend using this extra layer. I’ve seen many recommendations of materials that can be used. Anything non-woven should work such as: vacuum bag, tissue, coffee filter, or simply 2 layers of papertowels (which I’ve been told is one of the most effective).

I made a handful of these and then washed and packaged them up and sent them on their way to some friends and family. This is such a strange time with so very many big unknowns, it felt nice to know that at least there was one thing I knew I could do that could have a positive effect for someone. Once you are making one mask it really doesn’t take a lot more time to make a few more (and not everyone has a sewing machine or the know-how/time!), so if you’re thinking about tackling this project- make a few extra to send to loved ones or have on hand for someone in need. My few extras have already found homes so I expect I’ll find myself making a new batch soon.

20200411_135707.jpg

Update: I am now tackling a pattern utilizing elastics rather than ties as there are some applications that I’m finding myself preferring the fit of elastic bands rather than ties, and have had some requests for masks that don’t require the hassle of tieing. so stay tuned for an alteration to this design to encorporate elastic!

5 Games To Help Beat Boredom

Scribbler's SuggestionsMichela Mastellone-Schottman1 Comment
gametext.png

There’s a point during a New England winter when you start to feel that you will never see nice weather again I’ve already been at the point for a while, and we are no where near the end of the season. While catching up on your Netflix watchlist and stack of books on your shelf is a decent way to pass the winter slum, those aren't always the best activity options for when you are trying to socialize. Instead, I find a good go-to indoor entertaining option is board games!

I am far from an avid gamer. I have cousins and friends that love diving into a complex rule book, but I tend to prefer games that are easy to play casually with a group, not requiring too much focus on any sort of strategy and easy to still socialize simultaneously. While some of my favorite games are ones that can be played well with 2 people (like bananagrams), for this recommendation list I thought I'd stick to games that are well suited for entertaining a group of people. 

1. MALARKY

malark_new.gif

This is a contentious game in my family. I suggest playing this among friends and NOT know-it-all family members with whom you may already have trust issues. The premise is essentially a random question from the deck proposed to the group such as "why do traffic lights appear red, yellow, green from top to bottom" or "what is the casing of a hot dog made of" or "what is the origin of the term 'getting sacked'". Each player then comes up with an answer to present to the group, and one player secretly has been dealt the correct answer. Everyone votes on the real answer, people scoring points both for their ability to discern the correct answer and their ability to fool others with a made up answer. 

2. BOXERS OR BRIEFS

boxers or briefs.jpg

This is a game that I've had for years, and find it to be a really good one to pull out in larger groups of less familiar people. It's a bit like a more structured, less crude "truth" part of truth or dare. Cards with descriptive phrases are chosen to describe players attributes. Each turn, the player whose turn it is deems which phrases chosen are most "true" or most "funny". The descriptors range from things like "I only wear black socks" to "I am obsessed with the tooth fairy". It's a game that is easy to play for an undetermined amount of time, so a good option if you are simply looking to kill some time.

3. DIXIT

dixit.jpg

This is a relatively new game to me, gifted to me by a game enthusiast friend of mine. I love it. It's a quite different gameplay from anything else I've tried. The cards are all beautiful illustrations. Each turn someone picks a word or phrase to describe one of their cards. Each player chooses a card from their own hand that can be described in the same way and then everyone votes on the original art piece that was described. The way the scoring works, a player benefits by being able to describe a piece in such a way so at least one player guesses correctly, but not so  obviously that all players guess the original card. This is a great game, very slow casual play, no set play time, and an awesome choice for an artsy crowd.

4. QUELF

quelf.jpg

One of my favorite games ever, but can be an event in itself and benefits from a well-chosen group of participants. The best way to describe Quelf is a combination of pictionary, charades, dares, and general silliness. It is active and goofy and may require you to make a mask out of household objects or to make up a haiku with ice down your pants. It was an ideal choice frequently in college when you had a mixed group of people drinking and not - often a hard bridge to gap in having games be fun for everyone, but this is a winner. As long as you don't have anyone in your group begrudgingly playing along, everyone will have a hysterical time.

5. JOKING HAZARD

joking hazard.jpg

I bought this game on a whim and I'm SO HAPPY that I did. It is made by the creators of Cyanide and Happiness, so I had high hopes for it (if you don't know their webcomic, you should). It is essentially the same game play as cards against humanity (or apples to apples) but you are creating a 3 panel comic. I definately recommend allowing the deck to play, throwing in a random card, as I've been surprised how often the randomly selected option gets chosen as the winner.


So give these games a try if any sound of interest, and I recently aquired a few new board games and have some game nights planned with friends coming up, so hopefully I'll have some more recommendations to share soon!

Getting Back Into The Swing of Things

LifestyleMichela Mastellone-SchottmanComment

Once again, life has thrown me several curveballs over the year and this blog has fallen slightly to neglect. Stuck trying to get my feet back under me and some sort of human like routine after a move and dealing with an emotionally tolling job that was very socially challenging for me, I was left with very little creative energy. Nonetheless - I always have projects going, even if I fail to share them.

I’ve got a new motivation though with a much needed job change. I now have a schedule that allows me time to work on projects and other endeavors as well as getting me out of a toxic environment that zapped me of the ability to pursue other things I value and enjoy - like creative projects!!

Over the past few months I’ve done some massive home interior work, giving our shabby run down house a great breath of fresh air. I will hope to get some pictures of my extensive painting work up soon to share, but for now I can leave you with a promise of more regular updates and a whole lot of fun new creations.

Also our house has now reached max CATpacity, so I will leave you with some adorable pictures of the fur-kids.

leeroy.png
 
sausie.png
swampy.jpg
george.png
cheese.png
squeegee.png
giggle.png
bait.png


5 Essay Collections To Add To Your Reading List

Scribbler's SuggestionsMichela Mastellone-SchottmanComment
essays.jpg

I've been making the effort to try and get more of the projects I've been working on up and posted, but realized it's been a long time since I posted some stuff from the non-crafty side of my life. I've always been an avid reader, though as most know, time and interest in reading varies over time. While I generally gravitate towards primarily science based non-fiction, recently I've been reading many more essay collections and loving them. It's so easy to fly through a collection in a night or two, a big difference from most of my non-fiction reads, which leaves you with a very different fleeting immersive reading experience. While compiling this list, I became aware that practically all of these authors have well-read blogs that inspired the books. So, if you are someone who enjoys reading blogs (I hope you do!) they are definitely worth checking out.

1. The Wrong Way To Save Your Life By Megan Stielstra

wrong way.jpg

It is a quick read, which I generally expect from essay collections, but I was really impressed by the varying format of essays. In some chapters, she succinctly summarizes major events of a decade of her life, simply highlighting major events, feelings, experiences etc from various years of her life. In other essays she goes into more depth of certain areas of her life such as her career in higher education, helping educate teachers about inclusiveness in their ever changing world of academia, or her experience as a new mother experiencing postpartum depression. 

What really stood out to me however was how strong her voice and personal opinion came through in all her writing. This is a very new book, published in the midst of the chaos of the Trump candidacy, and while this is far from a political book, her strong feelings ad frequent outrage about what is happening in our world was of course inevitably mentioned in certain essays. There was something comforting to me about reading her anecdotes. I very much connected to her voice and often felt like her views were a seamless combination of mine and my best friend's: almost like reading a transcript of a leisurely conversation of ours over a cup of tea. 

This book is one of the most enjoyable I've read in awhile.

2. I'll Tell You In Person By Chloe Caldwell

tell you in person.jpg

This was a very fast, yet enjoyable read. It is somewhat forgettable as it is a self-proclaimed collection of essays from the life of a 30 year old who has not done anything particularly remarkable in life. For that reason however, it is quite relatable. Each essay keeps you reading on to the next, telling snippets of life going through teenage years and then through her 20's, dealing with changing relationships with parents and friends, drug abuse, skin problems, general growing up in a fairly average way. To her credit, the author manages to make the mundane enjoyable to read. 

3. People I Want To Punch In The Throat By Jen Mann

punch in the throat.jpg

For me, this was yet another somewhat forgettable collection of essays, which I still enjoyed reading. I think for many this collection would be much more relatable, but for me there were not very many essays in this collection that really struck home for me. Largely her essays deal with her experiences in motherhood and marriage - things I relate very little too. However, for people with more interest/experience in a typical suburban family life, this would be a great read. Her writing is very funny, if at times walking the line of hyperbole and stereotyping. 

4. We Are Never Meeting In Real Life By Samantha Irby

never meeting.jpg

I really loved this collection. Very quick and mostly light hearted, I would strongly recommend this as a "summer read" sort of book. The author is clearly a comedian and has a great skill at intertwining her wit into everything she is writing about - from her awkward romances and "less than perfect" body to her disinterest in going outdoors and the long lasting effects of being raised in poverty. The humor is more often than not fairly self-deprecating, and several essays may be a little too graphic for some reader's taste - I however loved it. Of special interest to me was her hilarious relationship with her cranky decrepit cat. She occasionally tells stories involving her work as a receptionist at a vet hospital, which as an animal care professional, I couldn't help but appreciate the somewhat distasteful humor that we all in the field have to develop, but have very few with whom it's appropriate to share.

5. Stories I'd Tell In Bars By Jen Lancaster

stories in bars.jpg

I have very mixed feelings about this essay collection/memoir. Truth be told, I would be super irritated by anyone who told me any of these stories in a bar. While Lancaster is certainly a talented writer and I found her writing very compelling and easy to read, the content itself annoyed me. To me, she came across as a very self-absorbed, somewhat obnoxious personality. While the book by definition is a collection of memoir based essays, a better-than-thou air comes through in her writing that I didn't find as oppressive in other similar collections. The essays are largely focused on her relationship with her husband (a relationship that I personally would not want to emulate, but that she freely offers advice as if she is the only one who knows the secret of a long lasting relationship). She disseminates other lifely advice and opinions of others (that I generally disagree with) in such a brash and definitive way that I am extremely put off by her. At one point in the book there is even an off-handed comment about her need to self-publish her memoir due to others lack of interest, a feat that she proudly congratulates herself for, but for me was just a fact that made me feel more justified in judging her for her all too self-important air. Nonetheless, I can't deny that the book itself is decent, even if the voice in it annoyed me. 

DIY Livingroom Curtains

DIY & ProjectsMichela Mastellone-SchottmanComment

I'm getting ready to move at the end of the month. It's a little bit bittersweet, as there are many things I love about where I am living now, but there are many positives to the move as well. As much as I hate moving (I've done it a decent amount and I hate it more and more each time), it is always exciting for me to think of new ways to fit my things into a new space. Recently it's making me really appreciate and think more about some of the little projects I've done around the place. I thought I'd share the quick livingroom curtains I made a while ago (and unfortunately did not take photos in progress). Nonetheless, curtains are something so easy that anyone should try.

diy curtains.jpg

Curtains I'm sure are one of the first sewing projects that people feel comfortable tackling. I am a decent sewer, but am far from a perfectionist, so slightly imperfect curtains are a project that pull together VERY quickly and make a big impact on a space. Our little livingroom space really needed to be brightened up a bit, since it easily starts to feel a little cave-like. 

I've gradually done a lot of projects in the livingroom, such as our small storage couch and large futon with covered cushions, which both have a lot of light bare wood keeping the space feel more open. I opted for a cream colored sheet music patterned fabric for the curtains, coordinating well with our light neutral walls and all the bare wood.

20180425_110210.jpg

To add a little pop of color I made fabric loops for hanging the curtain. I started by hemming the two curtains (due to my amount of fabric and the placement of our windows, each window only has one large curtain). I ironed flat the top hanging loops, folding raw edges in, then stitched the loops at the bottom to adjoin them to the top edge of the curtain. 

20180425_110124.jpg

I picked up some 1" dowels to use as curtain rods. I had great plans to make simple wooden hanging brackets to slip the dowels through, but I had a very frustrating afternoon of uncooperative power tools, so I gave up and came up with a cheap and simple solution: metal shelf brackets and zip ties. Now, you are likely classier than I and think this is an unaccepatable look, but I've actually found it to be very subtle and keeps the room feeling open. However, any number of curtain rod solutions could be used. 

A friend recently visiting my place and admiring many of my sewing projects asked me where I find such great fabric. The answer is simple: online. I am someone who HATES going shopping, so I quickly jumped on the rising trend of online shopping. The only trick is that you aren't able to closely match colors (if this is important to you, hit up a local fabric store with a paint chip or other small sample to compare your fabric selection to). If you are picking a fabric online, make sure you pay attention to the TYPE of fabric you are selecting (these curtains are a simple quilting cotton that allows lots of light in but many people prefer a thicker canvas/upholstery fabric for curtains) as well as pay attention to the measurements given with the sample view so you can get a sense for how large the print you are picking out is in reality. My two favorite places to find fabric are Fabric.com and Fabricworm. So do a little browsing, pick out a fabric you love, and tackle some easy DIY curtains to give a room a quick facelift!


DIY Cushion Covers With Piping

DIY & ProjectsMichela Mastellone-SchottmanComment
diy cushion covers.jpg

Couches have been a sore spot of conversation in our house for awhile now. After several frustrating moves and stressful roomate conficts, I ended up with a strage mixed matching of couches that probably belonged at the dump and didnt at all fit our space. I remedied our small livingroom seating through making a small storage couch, but we were left for a long time with our comfortable, but disgusting, large couch as our primary seating and only option for overnight guests. The couch went through many phases of its transformation. On a whim, when we arranged for other bulky items to be picked up as trash, we threw out the frame of our couch, hanging on only to the inner mattress from the pull out couch feature and all of the cushions. I pulled an old futon frame out of storage to be used to support the matress with the cushions placed on top. This was a comfortable solution and easy to cover with some fabric (a necessity to have washable covers with pets in the house) but the fabric would always quickly get tired and start falling out of place. There was a very simple solution: sew cushion covers. I FINALLY got around to doing it, and what a huge difference it has made! 

20170417_200032.jpg
20170503_124150.jpg

To start, I simply measured the existing cushions to figure out the dimensions needed for the covers. There are 3 bottom and 3 back cushions, but I decided to make two long cases, rather than individual cushion covers. This was in part do to my laziness, but also I think helped with the comfort of the couch since the futon frame is longer than the cusions, the covers help keep the cushions tightly squished together and prevent you from wedging yourself into cushion crevices. 

I didn't have enough pattered canvas to make the entirety of the covers, so I used a plain canvas drop cloth as a back to the covers. As a note: canvas drop cloths are a great tool for cheap, sturdy canvas fabric, but it does fray easily, so give yourself extra seam allowance. I decided to simply overlap the back pieces to allow the cushions to slip into, which in retrospect was the wrong choice. The overlap space was very tight to get the cushions into, and a zippered closure would have been a much better choice (though I wouldn't recommend using the dropcloth canvas with a zipper). 

I have never sewn piping on a project before, but thought it would add a nice accent to the cushions and didn't seem too tough after I looked at a few tutorials for piping. I already had clothesline laying around and easily found extra fabric to use for the piping. According to all the tutorials I referenced, fabric for piping should be cut at a 45 degree angle as to allow for the best stretching around the piping/corners of the cushions. I cut 2" strips along the angle and stritched them together to make a long piece of fabric. I wrapped this around the clothesline as I went and stitched it (using a zipper foot so I could get nice and close to the clothesline) to the top pieces of the covers. In theory, this would have been nice to do to the backside as well, giving the cusions a more polished look, but i didn't have enough clothesline on hand and I was enjoying having this be a one-day project.

20180425_105448.jpg
20180425_110435.jpg

Originally I had thought I could sew the piping with a single seam, sandwiched between the top and side pieces, but all the tutorials I looked at for piping suggested sewing the piping first to one layer, and then adding the side pieces on after, with a second seam. Some even suggested sewing the piping first on its own, but that seemed really unnecessary. I did however go ahead and sew the piping to the front pieces before attaching the sides, thinking that perhaps it would be more difficult to sew close to the piping if it were sandwhich between layers.

20180425_105439.jpg

After adding the side pieces, I added the canvas drop cloth pieces overlapping at the back (again, if I were to do this again, I would use a different technique, like a zipper) then flipped the covers right side out and stuffed them with the cusions. A few throw pillows and blankets startegically placed on the futon for maximum lounging comfort and VOILA  a super comfortable seating option that fits much nicer in our space and provides a comfy place for our friends to crash.

Scrap Paper Wall Map

DIY & ProjectsMichela Mastellone-SchottmanComment
maptext.png

This is a project I've had in the back of my mind for a long time. Like so many other projects, it's taken me a while to sit down and take the time to finish up this (very tedious and time consuming) map project. I have a seemingly endless supply of mostly useless small pieces of scrapbook paper. This was an ideal project for using up some of those tiny hoarded scraps. 

I had an old, cheap world map poster that I decided to sacrific in order to use it as a stencil for this project. I repurposed the back board from a broken poster frame that was the same size as my map poster and wrapped it with brown butcher paper as a background for my map. Cardboard or foam board would have worked just as well for this.

20170703_155621.jpg

This entire project was done with no other tools beyond a pencil, glue stick, and exacto knife (I find swivel knives to be the best tool for detailed cutting work). I started by cutting out the continents and then using the map as a stencil to trace the placement of the continents onto the brown background. I left islands attached to the map poster, saving them to add last in order to not loose tiny cut out island pieces.

20180117_200136.jpg

I started the tedious task of cutting out countries individually, tracing the country from the map poster onto a piece of patterened paper, then carefully cutting out the patterened country and gluing it into place on the brown background using a glue stick. In retrospect, it probably would have been a little easier to clump some of the pieces together, such as gluing all countries from a continent onto a separate continenent piece (perhaps using a patterened paper, so very small countries could simply be represented by the background paper peeking through, rather than having to struggle to cut out a tiny shape and place appropriately). The islands were easy to add at the end, once again placing the original cut up wall map on top and using as a stencil. 

20180321_173031.jpg
20180321_173041.jpg

I absolutely love the way this project turned out, and while it certainly took a little while of careful cutting work, it was actually extremely easy. Even easier if you have something like a cricuit or other cutting machine!

map.jpg

DIY storage couch

DIY & ProjectsMichela Mastellone-SchottmanComment

Furniture in my house has been a sore point of conversation for awhile. I had a very upsetting, contentious interaction with a former roommate that resulted in much of my furniture no longer belonging to me and some furniture waiting to be taken to the dump offered to me instead. Needless to say, everytime I glanced in the livingroom and saw our ugly, smelly, out of place couch it made me want to scream. Not to mention that it did not fit the space at ALL and forced us to have a pretty awkward, uncomfortable livingroom layout. 

This couch has been a long process, and come together in many stages. The first thing that needed to get done was to trash the old bulky frame and come up with a new frame design that actually worked for the space. 

I was able to entirely construct this frame from scrap wood from previous projects (mostly leftovers from my storage bed). It's a very simple design. I based the size of the frame off the one nice cushion I had saved from salvaging good parts of a small second hand couch. I decided to add some extra leg stretching room, and added storage, by making an ottoman cube that also allows for different layouts of the couch. The top of the ottoman lifts off to reveal a large empty area for storage, and there is just enough space under the main seating section to fit 4 crates (yay crates!). 

At this point, the couch was functional and we were in desperate need of seating, so it lived for many months awkwardly unfinished with mis-matched blankets and pillows.

I finally got some time to finish up the couch (really I just wanted to make it cuter). I painted all of the trim a nice blue/gray color, I think it's called "denim blue". I decided to use one of my favorite craft materials: contact paper. I used an adhesive cork, but I decided it was too difficult to peel it smoothly off the backing, so instead of using the adhesiveness I used my own spray adhesive to attach the cork (with the backing still on) directly to the wood. I covered the back piece and head board and the bottom section of the ottoman. As an update: all the cork will soon be stripped down and the surfaces instead spray painted with a faux stone textured paint, since my bunny has decided that anything cork must be chewed to bits.

For the cushions, I decided to use a painters drop cloth as fabric. This is a great option for cheap upholstery fabric. I wanted something sturdier than a cotton fabric because we have pets that can be a bit rough with furniture, but upholstery fabric can get pretty expensive. I made simple pillow cases for all of the cushions. My favorite technique for pillow cases is to simply have the case overlap in the back, leaving a large split across the back to fit the pillow in. It does make the case one-sided, but it's so simple and easy to fit cushions in. 

I added an adorable girl on a bike fabric that I've been saving for the perfect project to the back pillows. It matches the colors better than I could have hoped for. I am thinking that in the future if I need to cover up any stains on the bottom cushions I can stencil on some gears or bike wheels. I may also stain or paint the crates in the future, and I've been thinking about adding small hooks to the back for keys, etc. But for now, this couch continues to do a great job at helping make this space feel cozy.

The Cat Saga Continues

LifestyleMichela Mastellone-SchottmanComment

I recognize that all too often, "cat people" (for lack of a better term), can get a little too animated and excited about their cats and the daily antics that come with them. So if you are one of those people that rolls your eyes when people start discussing their cats, maybe skip this post. I've recently had another wonderful cat join my life (yes....another). 

20180107_173655.jpg

Working in an animal shelter comes with lots of perks (like plenty of adorable fluffy snuggles) but also has a bigger list of frustrations than most people realize. There's a long list of things that people working in animal shelters have learned to not even try to discuss with "non-shelter" folk. Not only just the difficult euthanasia decisions we occasionally need to make or the tricky process of getting to know and evaluating a new animal and determining what sort of home will set the animal up for success, but also the vast majority of interactions we have with the public. There are of course some infuriating situations with people surrendering their pets, blantant lies we are told over and over again, but less obviously, some of the most trying interactions are with people looking to adopt pets. Often times, the public is simply uninformed about how a shelter functions and that we are not a pet store but rather a place that cares deeply about every animal there we are caring for and our primary concern is not simply getting the animals into homes, but finding appropriate matches for both the animals and what the adopters are looking for in a pet to ensure that we have done our best to send that animal into what we hope will stay its forever home. Some examples of this are say, a dog with a history of snapping at children or a cat becoming very fearful in loud environments or around quick movemts, we will not send to a home with young kids. For the most part, once this is explained to people, adopters are receptive and understand that our aim is to help find the family what they are looking for in a pet. Unfortunately, that is not always the case, which often leads to people's worst sides and tempers being thrown at us (working in animal shelters is the only job I've ever been at that multiple occasions the cops have needed to be called to assist with unruley and threatening clients). This preface leads me to talk about how this new cat, Mayor McCheese, found his way into my life.

mccheese cuddly.jpg
20180125_185808.jpg

Mayor McCheese (we obviously named him at the shelter) was brought to us with his 2 sisters when they were about 9 months old. They had been born in someone's basement to a stray or feral cat. When the family discovered them, they simply let the children care for the kittens, but didn't interact with them a whole lot, allowing the 3 cats to grow up in the basement and roaming inside their walls. Once they were no longer adorable kittens and the children lost interest in feeding them, they were brought to the shelter. Sadly, had these cats been brought in as kittens, they would likely have been totally normal, very adoptable sweet kittens. Instead, we were brought 3 full grown adolescent cats who were decently scared of people and were totally overwhelmed in a shelter environment, outside of their basement walls. McCheese was by far the worst of the 3, totally petrified and shut down completely in a cage. After many weeks of working on gaining his trust and building his confidence, we decided to move him into an office space to help him get more comfortable with people, outside of a cage. Once in the office we discovered what an incredibly sweet, affectionate boy he is. He remained pretty skiddish and freaked out if you tried to pick him up, but with some patience and a handful of treats he would happily befriend you. Unfortunately, he was young and very cute at a time of year where there are few to no kittens available at shelters, which made him top choice for every kitten seeking family. When introducing him to a family we would, as always, explain to people our best guess at what he would be like in a home. We knew he liked other cats and felt that he really would do best and thrive in a home with another social cat that he could bond with and pick up on their confidence around people. He ended up being sent home to a family that, unfortunately not surprisingly, did not listen to a word we said about him or how to appropriately introduce a cat like him into a home. He was brought back within a week with the adopter loudly proclaiming as she walked through the door "this cat is EVIL". A word to the general public: announcing something like that to a staff full of people who have loved and cared for a cat that they know much better than you is NOT COOL. 

20171217_001006.jpg

Heartbroken about his return and knowing that this experience certainly did not help him, I started to think realistically about how he might fit into my life. (As a side note: our other cat, Leeroy Jenkins, went through a very similar experience with a quick return from adopters who disreguarded all the information we gave them about his fiesty behavior). Mayor McCheese needed a quiet, cat-savvy adult only home, ideally with a cat companion. We had all of that. I talked to my partner and we decided that Leeroy really could use a playmate (especially as I was unhappy about how rough he played with my cat, Sausage) and I felt like Mayor McCheese was likely to be a great match for Leeroy's energy level and play style. We decided to bring him home for a bit to see if they would bond (yes, a perk of working at a shelter). It was quickly obvious to us that he was a keeper. It took him a little while to become totally comfortable with us, at first frequently needing to be bribed out from under the bed with treats and only allowing fleeting pets, but he and Leeroy were instant buddies. He is now officially part of the family and has been an incredible addition. Leeroy loves him and it has brought peace to Sausage and Leeroy's friendship as now there is another young cat for Leeroy to chase and play with and McCheese continues to get more and more comfortable with us, now even frequently settling next to or on top of us and demanding attention and snuggles. We've even been able to start scooping him up and giving him kisses without him freaking out (he still kinda hates being picked up though...). He is sweet and appropriate with my rabbit too, another prerequisit to joining the family.  

20171226_101132.jpg

So I hope you took heed of my cat-talk warning, as I know this post could cause lots of eye rolling from non-cat folk, but a lot of my life is cats, so I thought I'd give an update about my evolving cat clan.

20180127_173805.jpg

DIY Holiday Decorations

DIY & ProjectsMichela Mastellone-SchottmanComment
diy holiday decorations.jpg

I have never had much of an attachment to holidays. I grew up doing half-hearted celebrations for an eclectic mix of holidays, mostly all as an excuse to enjoy an excellent meal with friends and family. In fact, I generally really dislike Christmas time and the air of capitalism it always seems to bring with it along with lots of uncomfortable social obligations. This year however, I lucked out in avoiding most of the negatives around the holidays and decided to try and do a little embracing of holiday cheer to try and brighten what has been an otherwise very dark, bitterly cold last month or so.

20171221_214139.jpg

I picked up a small indoor Christmas tree, a Norfolk Island Pine, at home depot and some cheap lights and ornaments. I've always liked to decorate Christmas trees sticking with a blue and white theme, as a nod to my Jewish heritage. To add a little more to the house besides my tiny tree, I decided to use some of my scrap paper to make a variety of paper stars to hang from the ceiling. 

I chose to make 3 different varieties, more or less following some decent tutorials I found. I made a bunch of 3D spiral star/snowflakes based off a great post over at Wonderful DIY, I added some cute button accents to finish off oragami stars I made utilising the tutorial I found at Homemade Gifts Made Easy, and I made a handful of 3D stars I found on a craft blog Gathering Beauty, though ultimately found them to look less polished than the others for the amount of effort (and adhesive) required. 

20180104_102610.jpg
star collection.jpg
20171221_180506.jpg

We have also had a small taped christmas tree outline on the wall that has stayed there now for multiple christmases, so I thouhgt I'd use some of the remaining scrap paper to string up some simple 2D star cut outs, just to bring a bit of the festive cheer into the kitchen.

Having extremely low ceilings made tacking up stars a simple task. I had some decorative string lights hanging around unused in a big tangled mess, so pulled those out to string up around the house and bring in a little holiday mood lighting. The tree ended up getting tied down to a crate to prevent our curious kitties from constantly pulling it over and I wrapped a handful of gifts to coordinate with the stars (yes, most of the gifts are for the fur kids). 

stars.jpg
20171221_180452.jpg


Overall, I still think holiday decorating is pretty silly, but I did have fun pulling it all together, and I'm sure the decor will stay up for long enough to help keep a little cozy cheer in the house while we are forced into hibernation with the New England snow for the forseeable future.

Podcasts To Listen To

Scribbler's SuggestionsMichela Mastellone-SchottmanComment

I'm just going to jump right back in with a few more podcast suggestions that I think might make your ears happy. If you haven't already, be sure to check out my first and second lists!

SERIAL

If you've heard of podcasts, you've likely heard of Serial. Yes, it's great and yes, it is one of the firsts to do that sort of formatted episodic podcast season, but it's not necessarily going to be your thing. Personally i much preferred season one, which is true crime in podcast form. Season 2 was great as well, but the story did not grab my interest quite as much. Definitely see if it pulls you in, and be prepared to be frustrated when you get to the end of the season and want more.

FREAKONOMICS

This is a podcast with one of the authors of the Freakonomics book, Stephen J. Dubner. while technically the themes discuss "economic" issues, don't let that disinterest you. It's an awesome podcast that is well produced and talks to interesting people and interesting things. Scroll through the archives to get a sense of some of the many cool things they talk about.

99% INVISIBLE

This is a podcast with Roman Mars, and honestly, I'm surprised I like it. It's about design and architecture, but pretty loosely. It's great to listen to - very well produced, and i'm surprised by how many of the topics I find really interesting. It did take me a little while to get into this, and certainly not every episode is a winner for me, but there is a huge range of interesting topics in the archived episodes.

DIY Randomized Quilt

DIY & ProjectsMichela Mastellone-Schottman1 Comment

This quilt has been a project I've had on my "to-make" list for a very long time. I've been collecting (NOT hoarding) bits of fabric for a while, and finally had a collection that gave me excessive options for a quilt. I love randomness and asymetery in patterns, so got to work sketching out a design for a queen size quilt. Because I had so many beautiful patterened fabrics, I wanted to have several large areas of the design to allow the fabric to really be showcased.

fabric.jpg

Once I had a design I was happy with, I went through my fabric and assigned different patterns to different quilt patches, using solid patches to break up some of the patterns. All of my patterned fabrics are a nice soft cotton, and I love having a little bit of texture variety on quilts, so my solids are all flannel or jersey material. It was at this planning stage that I measured all my fabric, making sure i had enough for the design, and making adjustments as needed. Once all my measurements were done, I went through and cut out all my rectangular patches, using my design template as a reference. 

Piecing together an abstract quilt design is not simple, and does require some intermediate sewing skills in order to carefully line up seams and avoid gaps in between sections. Really, the rectangles can be pieced together in any order. I chose to try and make slightly larger rectangles first, chosing some of the longer straight seams to tackle first and then piecing things together from the center out, hoping that any slight misalignment would be easier to hide at the end if at the edges, rather than oddly bunching at the center. 

Once the top of my quilt was all assembled, I had to decide on how to turn it into a finished piece. I decided I was most in need of a light-medium weight quilt for my bedroom. I found a queen size cotton blanket to use as my backing and chose to add a little extra warmth to it with a layer of cotton batting in between. I'm always experimenting with how best to finish off the edges of quilts. This time, I chose to utilise the folded over hem of the cotton blanket backing. I simply cut the inner cotton batting to fit snuggly within the frame of the hemmed blanket, wrapped the edge of the quilt top over the batting, and used a decortive zigzag top stitch to attach the layers to the backing. 

This quilt came together so much more smoothly than I was expecting. It definately encouraged me to tackle more sewing projects soon. I've been using the quilt on my bed for a while now, and love having it as a focal point in my room. 

Pulling it back together

LifestyleMichela Mastellone-SchottmanComment

So yes, it has been a long absence from the blog. Life has thrown a few big changes at me which has meant lots of travel and restructuring of my time to include everything I want to be doing.  

Primarily, I've been busy with work at an animal shelter as well as a decent amount of pet sitting work I do for families. 

As anyone who knows me is well aware, my pets are the main priority in my life. Because of this, I've been primarily concerned with integrating some new very important pets in my life: my rabbit, Garbanzo Bean, and my partner's recently adopted (and very fiesty) cat, Leeroy Jenkins. In addition to figuring out how to provide the happiest environment for all the fur babies in my life, we've also been swamped in the season of kittens at the shelter, and have been frequently hosting temporary fosters at home. 

bounce house.jpg


While my life has been predominantly busy with my fur family, there have been lots of other things fitting into my life, including a recent birthday party we threw, complete with a bounce house!

So stay tuned, there have been lots of projects still happening that I'm beginning to find time to share here!