
If you've read some of my past posts, you may have seen in my DIY Crate & Pallet Desk post that I moved into a smaller space and I LOVE using crates for functional storage. As part of downsizing my space, I needed to ditch my box spring and my dresser (neither would fit in the moving truck and both were originally aquired from the trash). Once moved into the new place, one of my first projects to complete was to build a bed that could also store all of my clothes (and more).
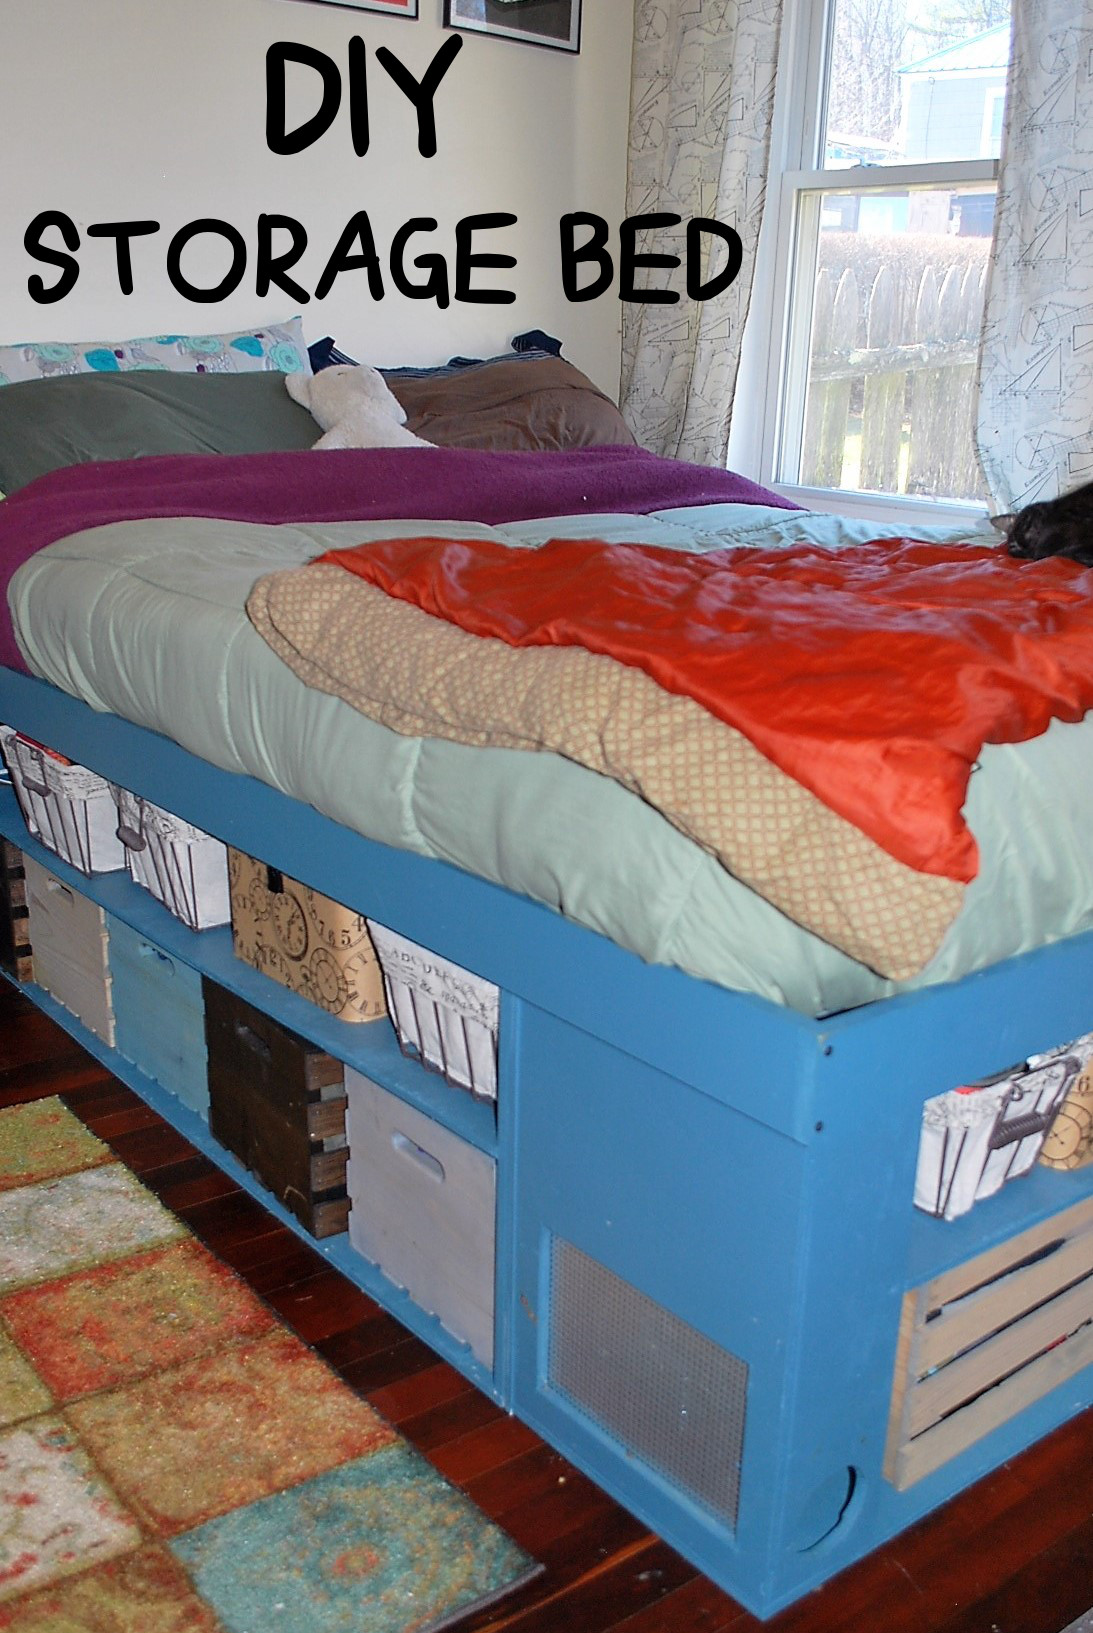
Oh yeah, and there was one more weird thing I needed my bed to accommodate: my free-roaming ferret. I share my bedroom with my best weasel friend, Xylophone. He is pretty much the greatest thing ever, but there are a few things that need to be customized in a room in order for us to happily share a space. Xylophone has the hilarious habit of hiding shoes. If there is a shoe in the room, he will drag it behind a couch, into a corner, or his favorite: under a bed. Because of this, it was important to me in designing a bed that a ferret could not get underneath to hide things in an unreachable zone. Another "ferret friendly frame" adaptation I decided was important was to make it high enough that Xylo can't climb into bed with me. As much as I love when he crawls into bed to snuggle, I've grown to learn that not everyone appreciates a ferret in the bed....And the final requirement I had for my bed frame was a strange one: a ferret eating station. Among the challenges of having a free roaming ferret is how to keep my fat cat away from the tasty ferret food. Easy solution: a ferret feeding station under the bed with a ferret sized opening!
Building something this big can be very intimidating, but it's actually really straight forward, and I am lucky enough to have access to a wood shop and some professional help with cutting and assembling large pieces of wood. I have a queen sized futon mattress, so I based the size off the matress size, hugging it close in order to minimize the footprint of the bed. As always, crates are my go-to furniture storage option, so I decided to base the bed frame off of 3 basic low cubes, with the bottom shelf sized to perfectly fit wood crates. I decided to make a top shelf to provide additional storage as well as my desired height of the bed. The cubes are all out of 1/2" plywood. Even though my bed is in a corner, the structure of the frame is identical on each side so that in future homes I have the flexibility to position my bed to access storage on all sides.
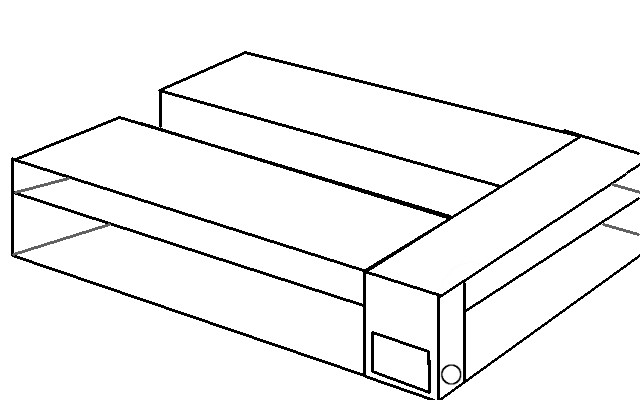

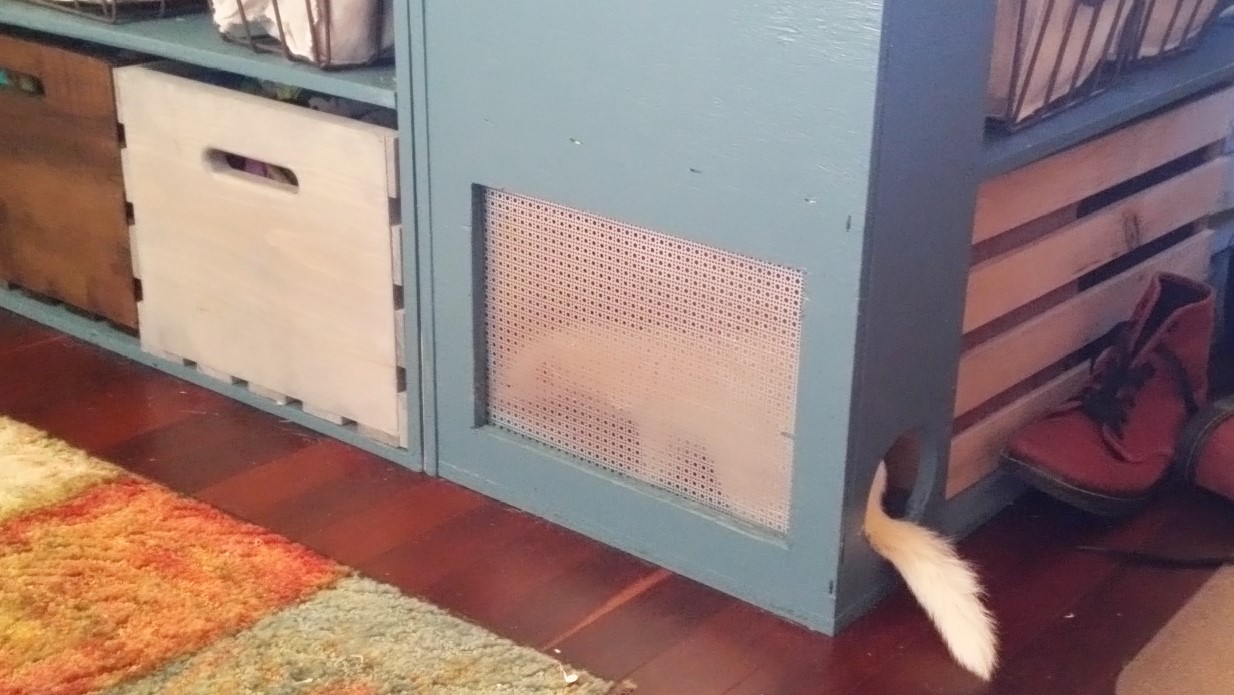
I made the two side support "cubes" a bit deeper than the depth of a crate. This allows for there to be more support towards the middle of the bed, as well as some additional storage behind the crates (it is also a fun play space for small pets). The end cube is significantly less deep, and I chose to store crates going in width wise. At the end of the foot cube, I cut out a window and inserted a piece of perforated metal leftover from a past project (any sort of wire mesh or material with openings smaller than a kitty paw would work for this) in order to prevent Xylophone from feeling like he was eating in an actual cave, and to give a little airflow to the area. On the open side of the end cube on that corner, I added a small covered corner with a ferret sized hole that allows me to hide a bowl of food in the back corner before sliding in the neighboring crate.
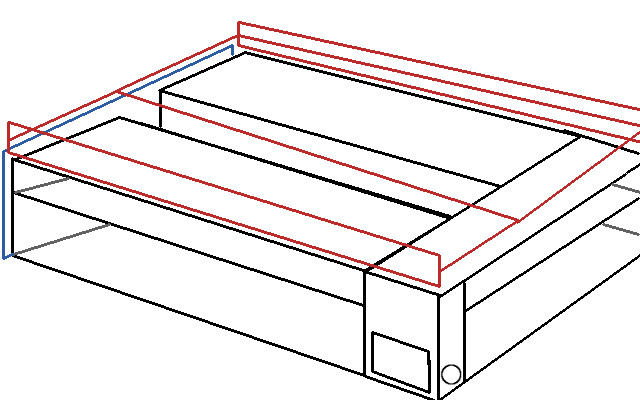
I added a back piece of plywood to add stability at the head end between the side cubes. In order to support the mattress on top of the cube frame, I added two pieces of 3/4" plywood attached to 1x4's to form an edge that slightly overhangs the cubes and hugs the mattress. The two pieces of plywood forming the bed platform are joined in the middle (underneath) for maximum stability. I finished off the frame by adding a final piece of 1x4 to edge the foot cube.

Before assembling, I painted all visible areas of the frame with a nice grey/teal color (I believe the formal name is "sophisticated teal") and I stained the crates with a variety of leftover stains, even making a teal stain by watering down the paint I used for the frame. I took a little time to find some storage containers that I liked for the top shelf, and I have plans to make a headboard in the future, but for now my DIY storage bed is working perfectly in my space!