A backyard was a must for me when most recently looking for a home. We lucked out in finding a place with a sizable yard, but unfortunately a few projects needed to get done to make it actually feel like home. While we have a fence between our yard and the adjoining yard of our shared duplex and decent coverage between the yards of our neighbors behind us, our next door neighbors and our yard have no barrier whatsoever, having a few yards run together. I really wanted to have at least some sort of visual barrier between the yards, but was also working with the challenge of being on a rental property, so there were limited options as far as fence installation goes. Luckily, I had a stack of 3 pallets just waiting to be converted into something awesome.

Because of the openness of the yards, I also wanted to be conscious of the fact that the barrier needed to be aesthetically pleasing from our neighbors side view as well. I took a trip to home depot and found a large sheet of plastic trellis. There are LOTS of trellis-type options that can be used for this project. I chose the trellis that I did primarily because of it's affordability, but it was also extremely easy to work with - easy to cut to size with my jigsaw and screw on to the pallet. Out of the one sheet of trellis, I was able to cover the entire back of two vertical pallets, and then decided to use the remainder decoratively with my third pallet.
After coming up with a game plan, I began dismantling the pallets. I was able to accomplish this with a crowbar and hammer, which didn't leave me too many intact pieces of pallet wood, but it was easy and fun. Some people may prefer using something like a jigsaw to dismantle pallets. I decided to make the planter portion of the pallet 3 slats high, leaving the more open side of the pallet towards our yard so we could see the decorative planter, but also provided a more finished side facing our neighbors. After pulling off any unnecessary pieces, I used my jigsaw to cut down the middle support to the height of the planter, leaving the two side pieces as supports for the trellis back.

The next step was by far the trickiest: the chicken wire. I got 1/2" wire to insert into the pallet and form the structure of the planter. You could use a different type of wire, but be conscious of what size stones you use then to fill in the bottom of the planter. Alternatively, if you cringe at the idea of having to wrestle sharp metal into a small space, you could skip this step completely and use garden cloth or burlap for the whole interior and forgo the aesthetic of seeing the rocks. If you choose to tackle the wire, I would suggest gloves for sure. I did not do this and still see evidence of that decision.... I used my staple gun to attach the wire, and it was far from graceful - the way my staple gun fit allowed me to primarily attach the wire to the inside of the side pieces and then to awkwardly hammer down misfired staples. I'm sure there are much better, safer, more effective ways to do this. But it worked out for me just fine.

For the third pallet, I decided to make it more decorative rather than a functional planter, so I cut it down horizontally to form a small fence barrier, leaving two longer side pieces on the back to attach the remaining trellis to as a decorative back (in the future I may add wire to the inside of this and fill with decorative rocks). Once all three pallets were modified, I lined them up close to the border of our yard and secured them in place with wooden stakes. For the vertical planters I simply drove stakes into the inside corners of the pallet so the entire thing sits on top of them, securely wedged in and upright. Once the planters are filled they are securely weighed down. I used longer stakes for the horizontal planter and secured the stakes to the back of the pallet with screws. Because we wanted to be able to enclose our yard for convenience with the pets, I spaced the pallets out at distances that allowed me to use panels of a small animal pen to attach between pallets.
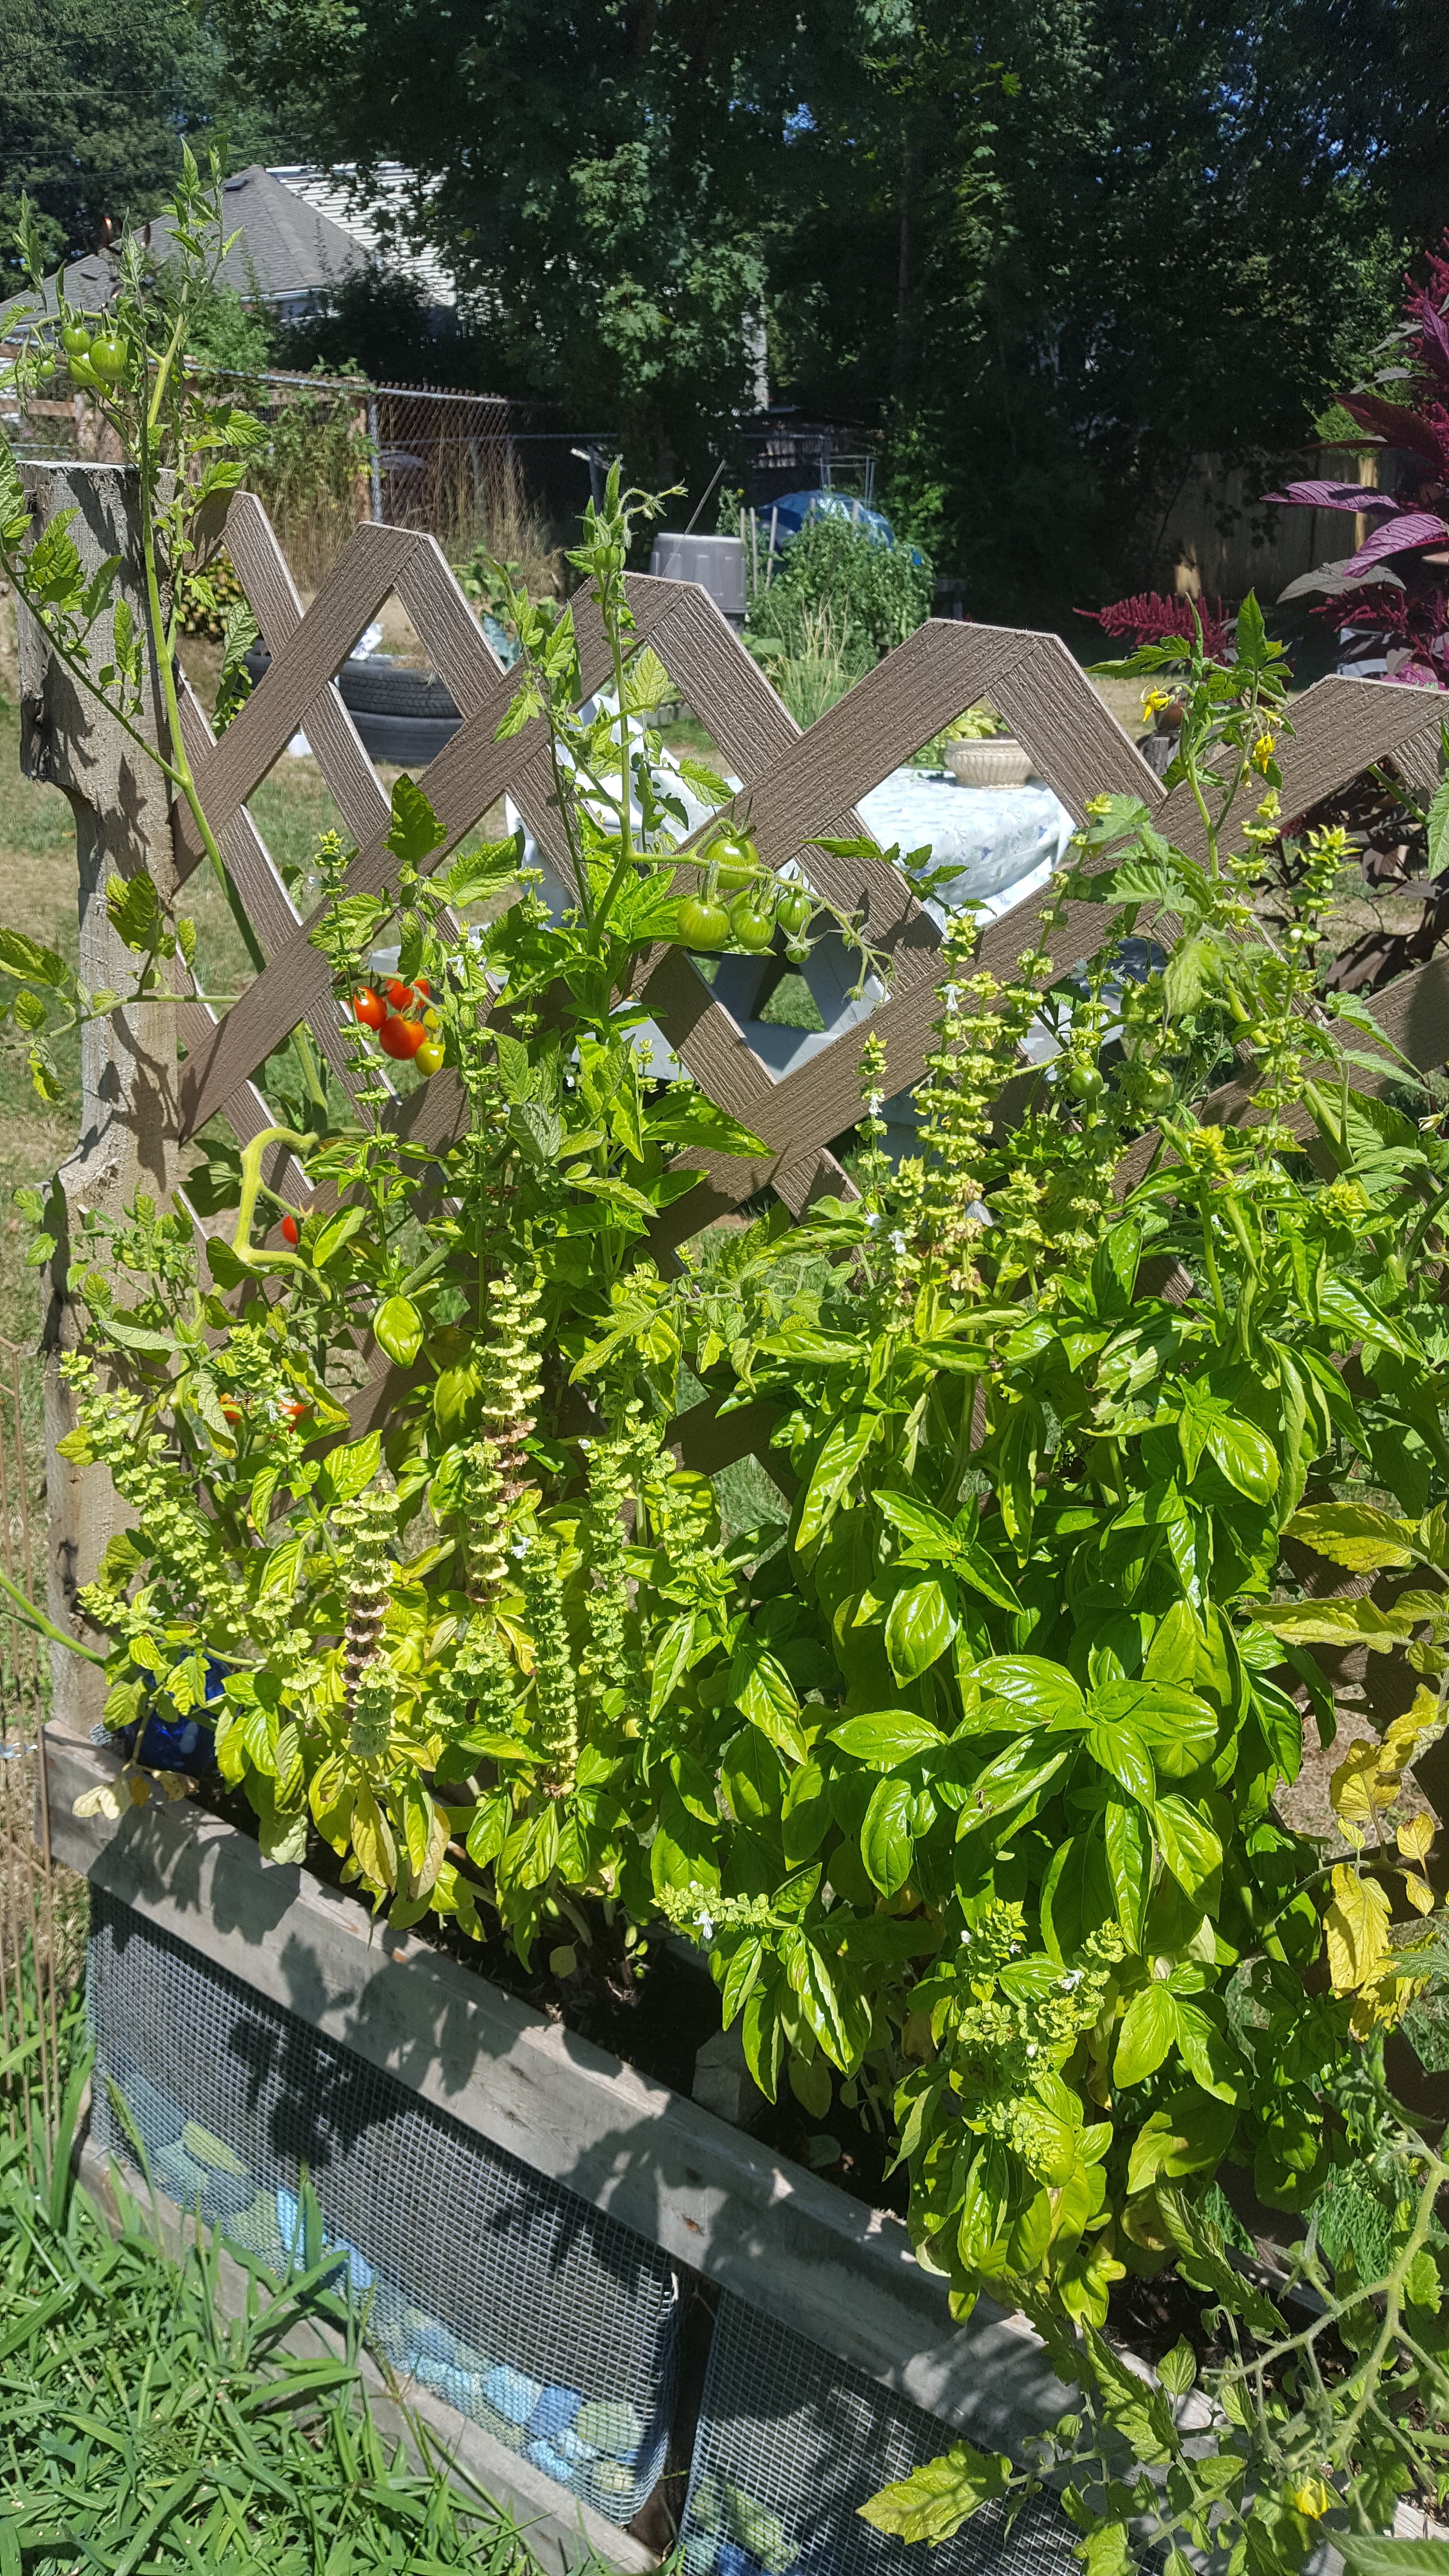
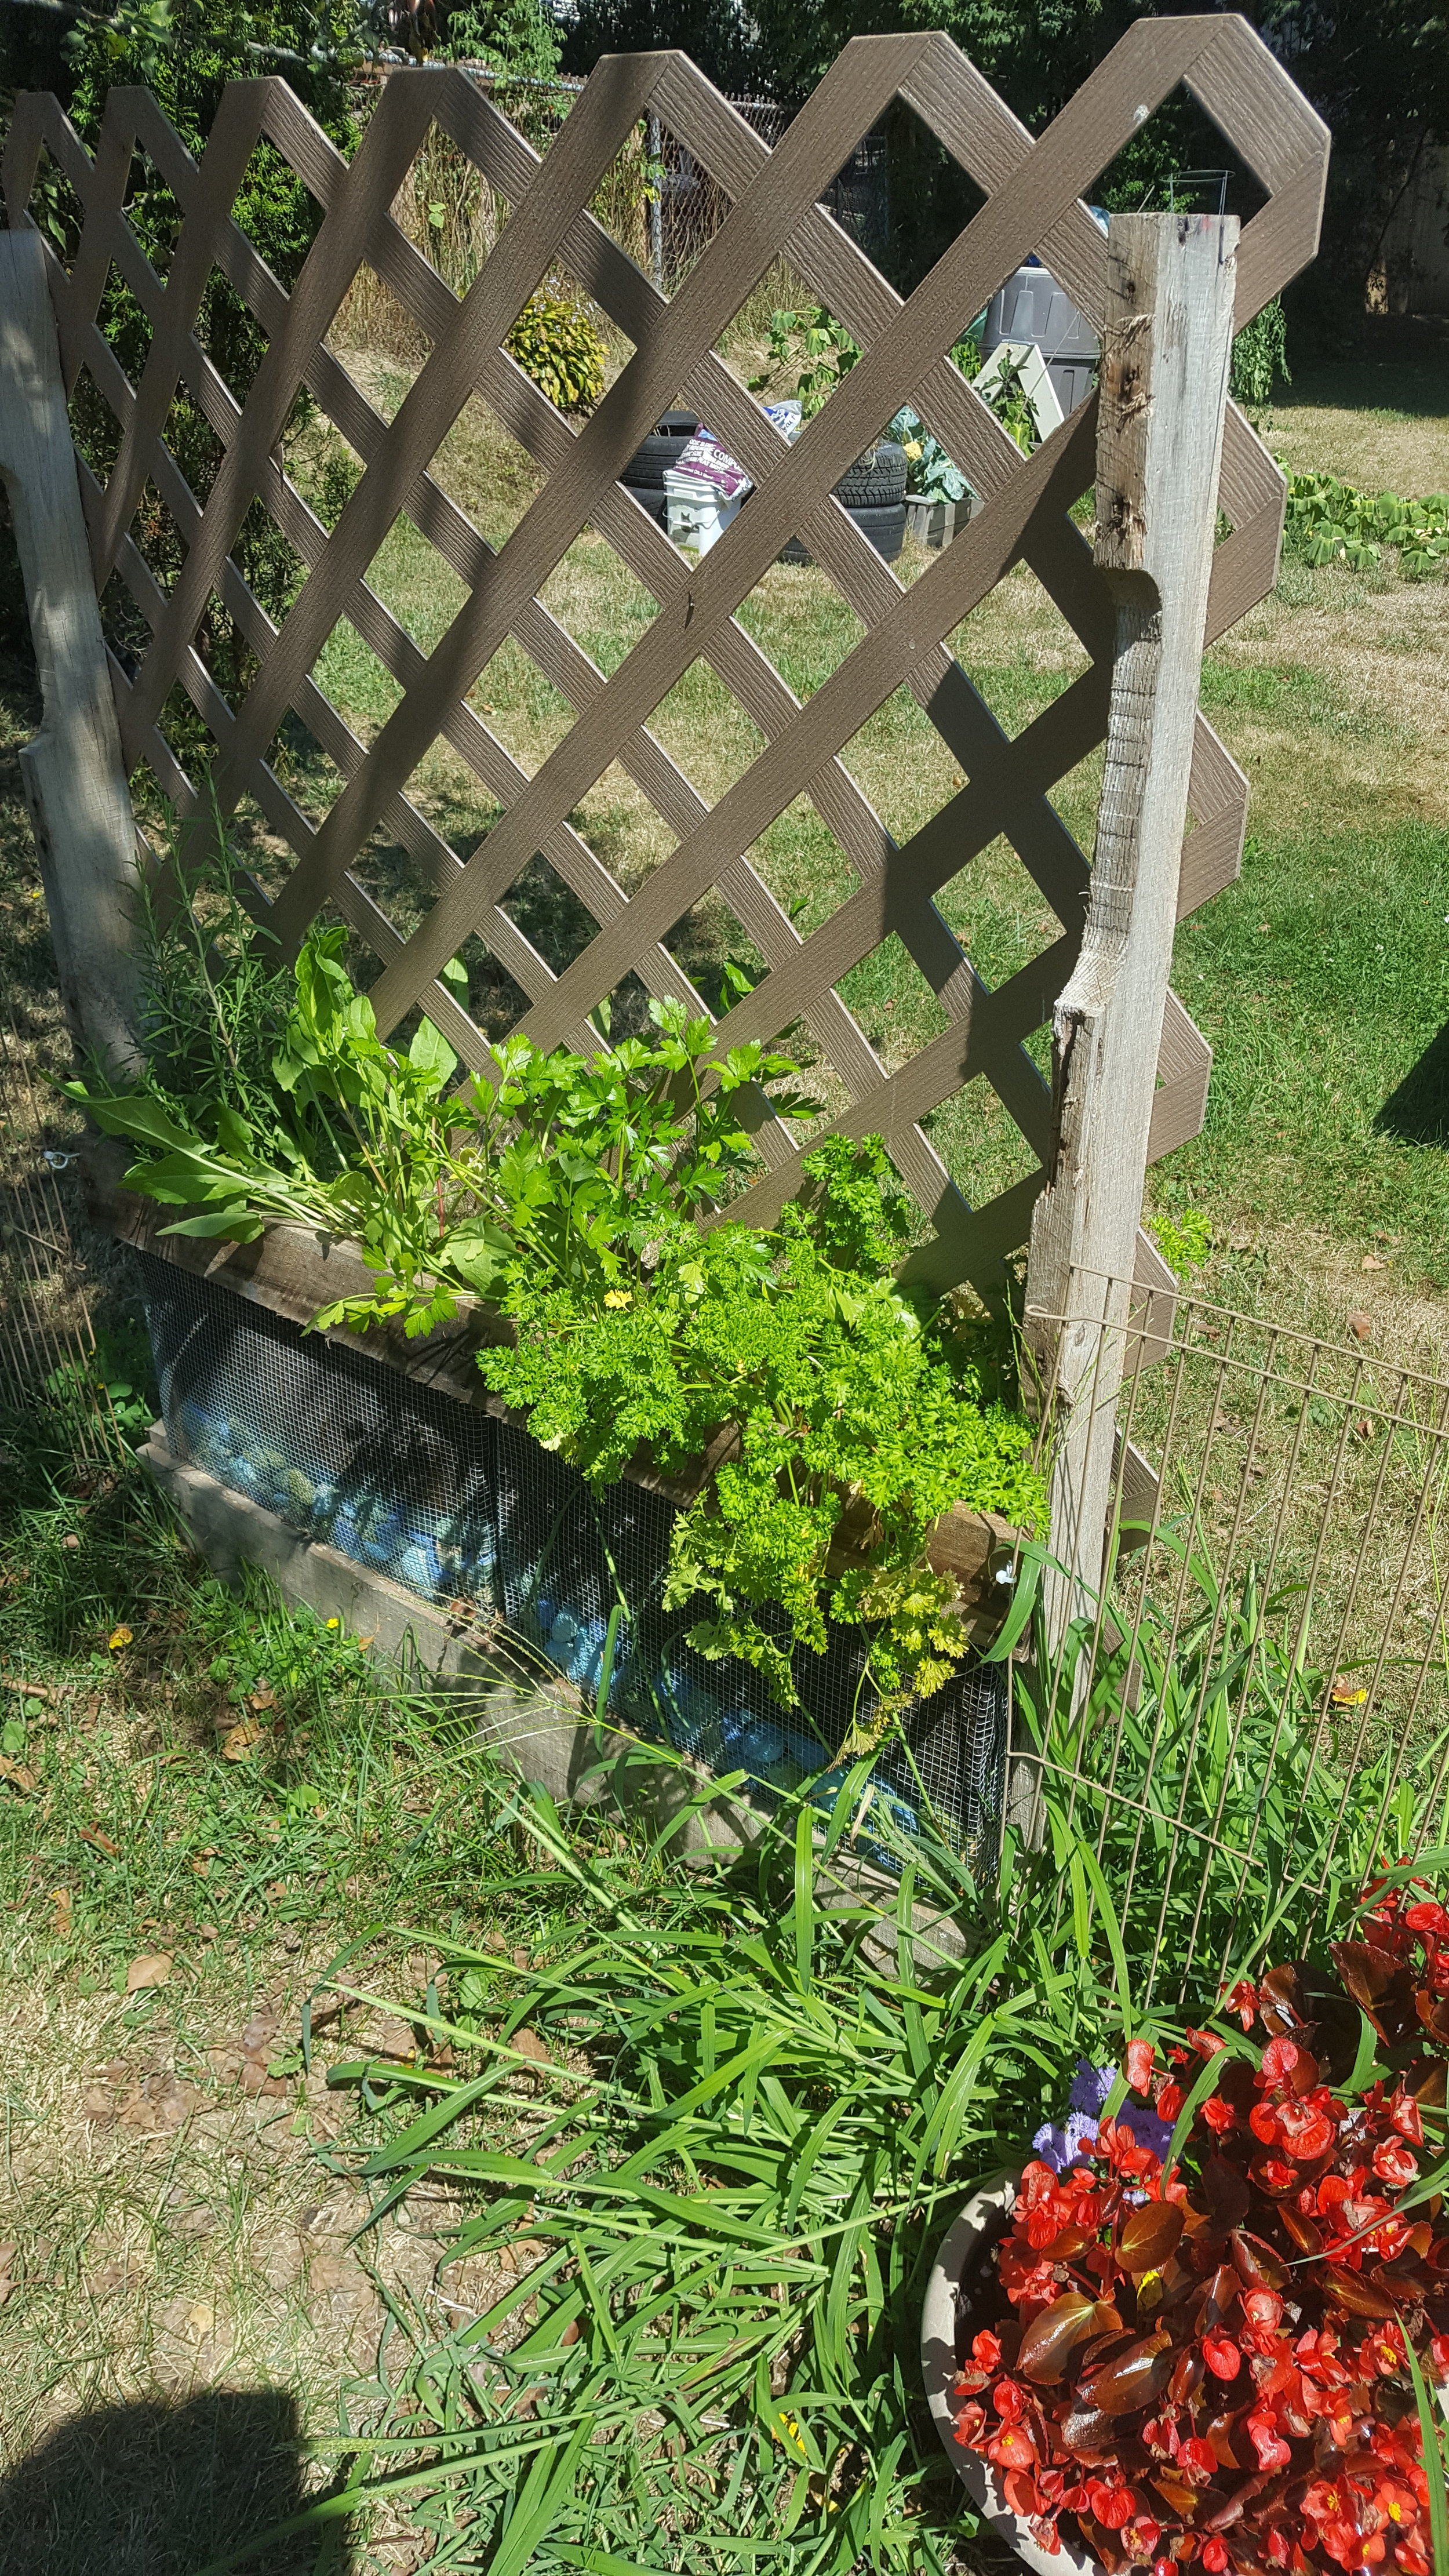
Now the fun part - filling the planter! I decided that rocks were the best option because they helped weigh down the planters and make them sturdy, but also acted as drainage for my plants. Rocks are great- you can buy them cheap in giant bags at home depot, or if you're lucky like me and live on the coast....take a couple trips down the street to the shore and pick your own! I used plain rocks to start filling in the planters, up until I reached the top of the first piece of wood, where you started to be able to see the rocks.

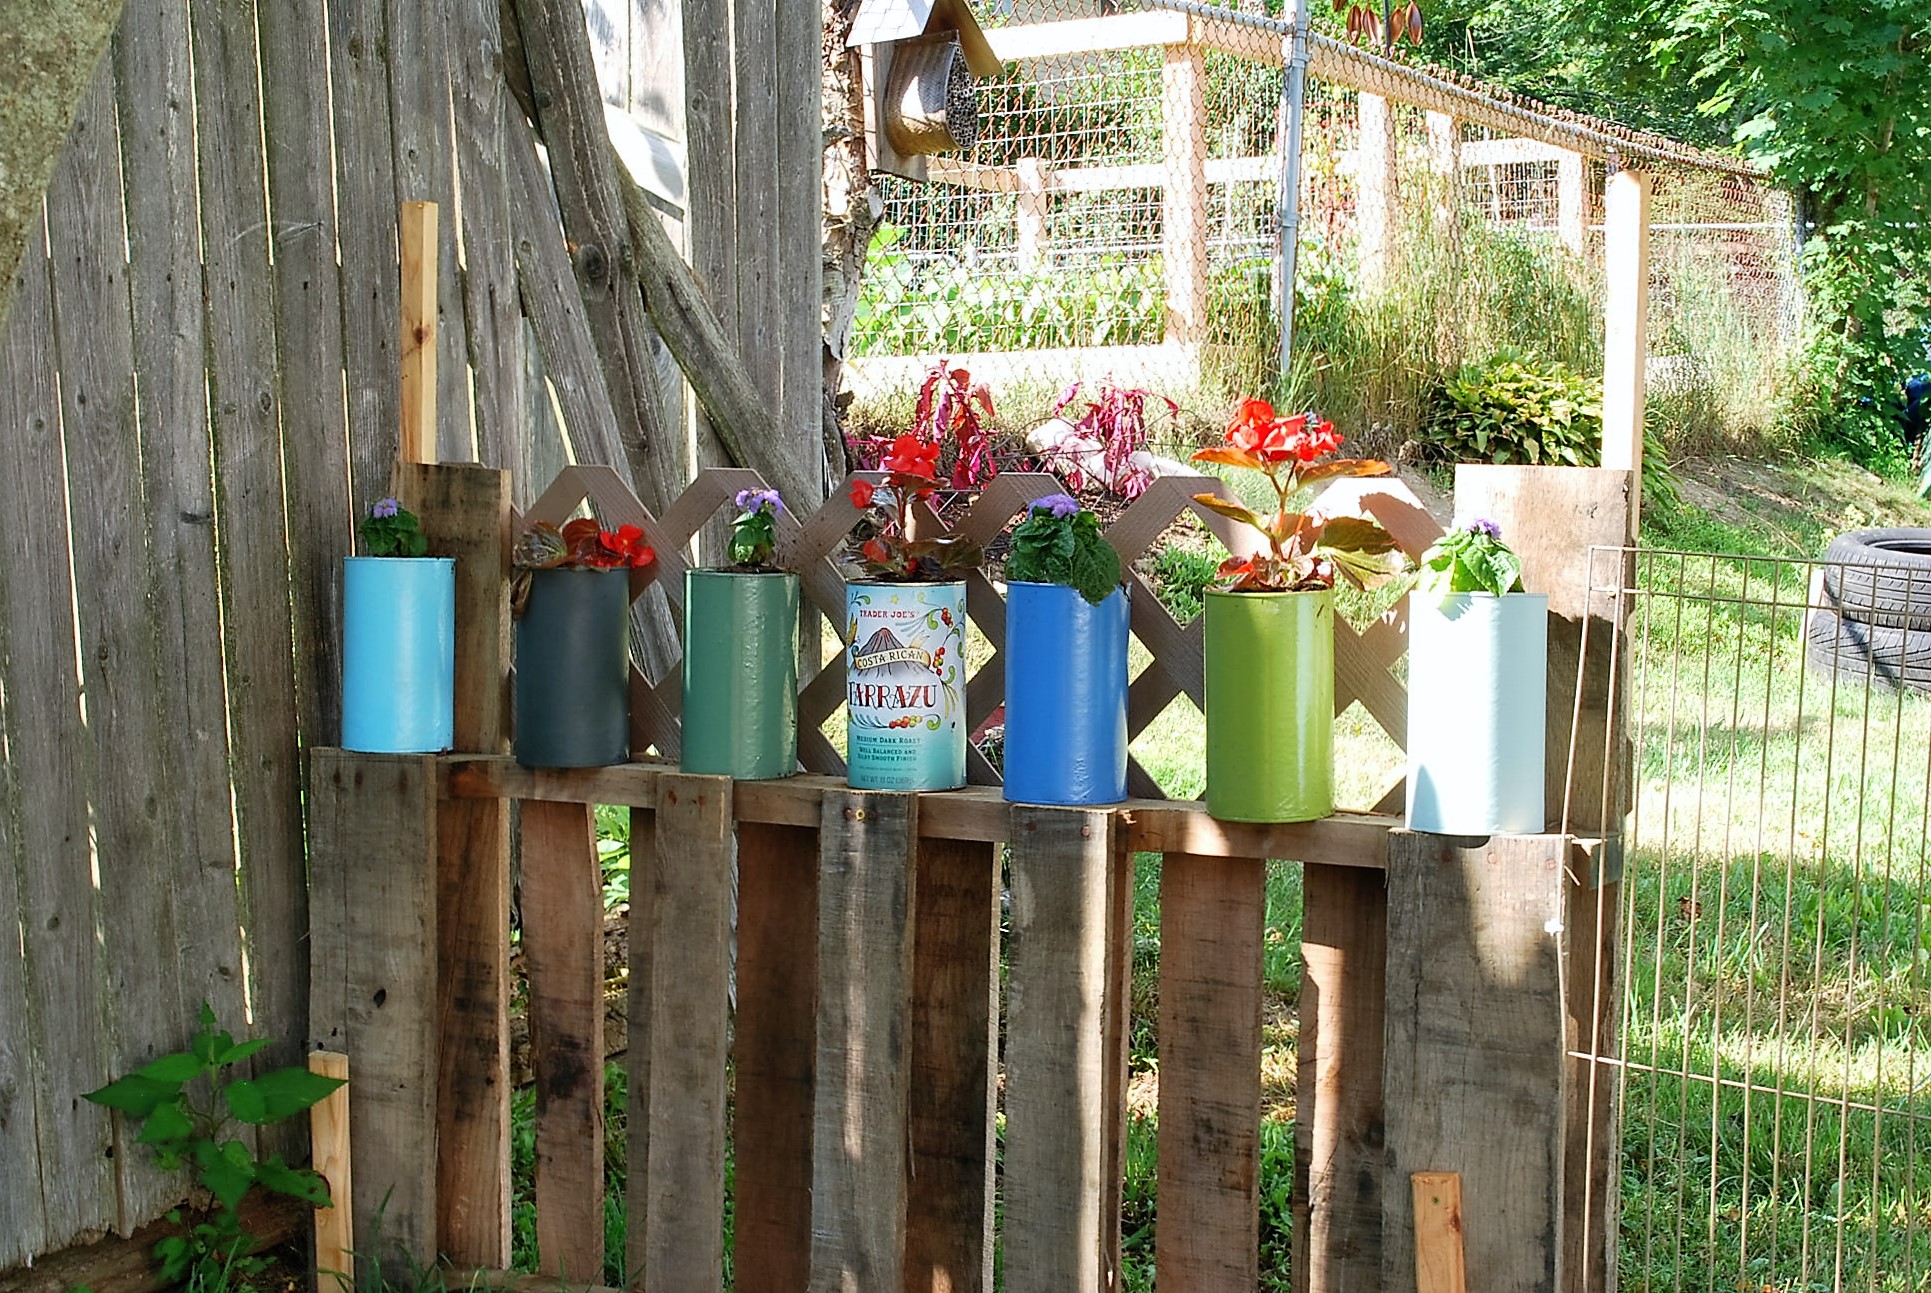
I decided I needed the rocks to be a little prettier, so I washed a bunch, spread them out on a tarp, and got out the spray paint. I added a layer of mixed colored rocks to the planter, up to where I felt left enough room to fill with dirt and plants. I draped burlap into the top half of the planters and filled with potting soil and planted myself a nice little garden including tomatos, basil, parsely, french sorrell, and rosemary! To add something a little visually nicer to my third, horizontal pallet, I used the same spray paint as the stones to make small flower planters out of coffee cans .


I re purposed part of a cat tree to place at another spot in the yard and act as an anchor for the pet fence. We are able to completely enclose the yard when we are outside, but then can easily fold up part of it. My plants are all growing really well, though in retrospect I would have made the planters double wide to give them a little extra growing room. So that's on my project for next year!

As the summer has gone on, my plants have thrived. We've been able to enjoy handfuls of delicious cherry tomatoes and I'm constantly grazing on the herbs. I've already started brainstorming ideas for moving my herb garden indoors in the fall!